
We’re thrilled to announce another February Guest Designer, Lisa Golzbein!
Hello Crafty Coffee Loving Fans!
My name is Lisa and I am so excited and honored that Amy asked
me to be a guest designer for the Coffee Loving Cardmakers Blog!
I live in South Florida with my 3 children and 3 fur babies and I work
as a full time NICU nurse……(that is until I can get a full time gig making cards)……
But seriously I am totally addicted to card making and I have been paper crafting
as long as I can remember! I started blogging back in 2010 and I have been enjoying
sharing my cards online ever since!

Go ahead and grab your cup of coffee or warm beverage of choice,
I’d love to share my card with you today!

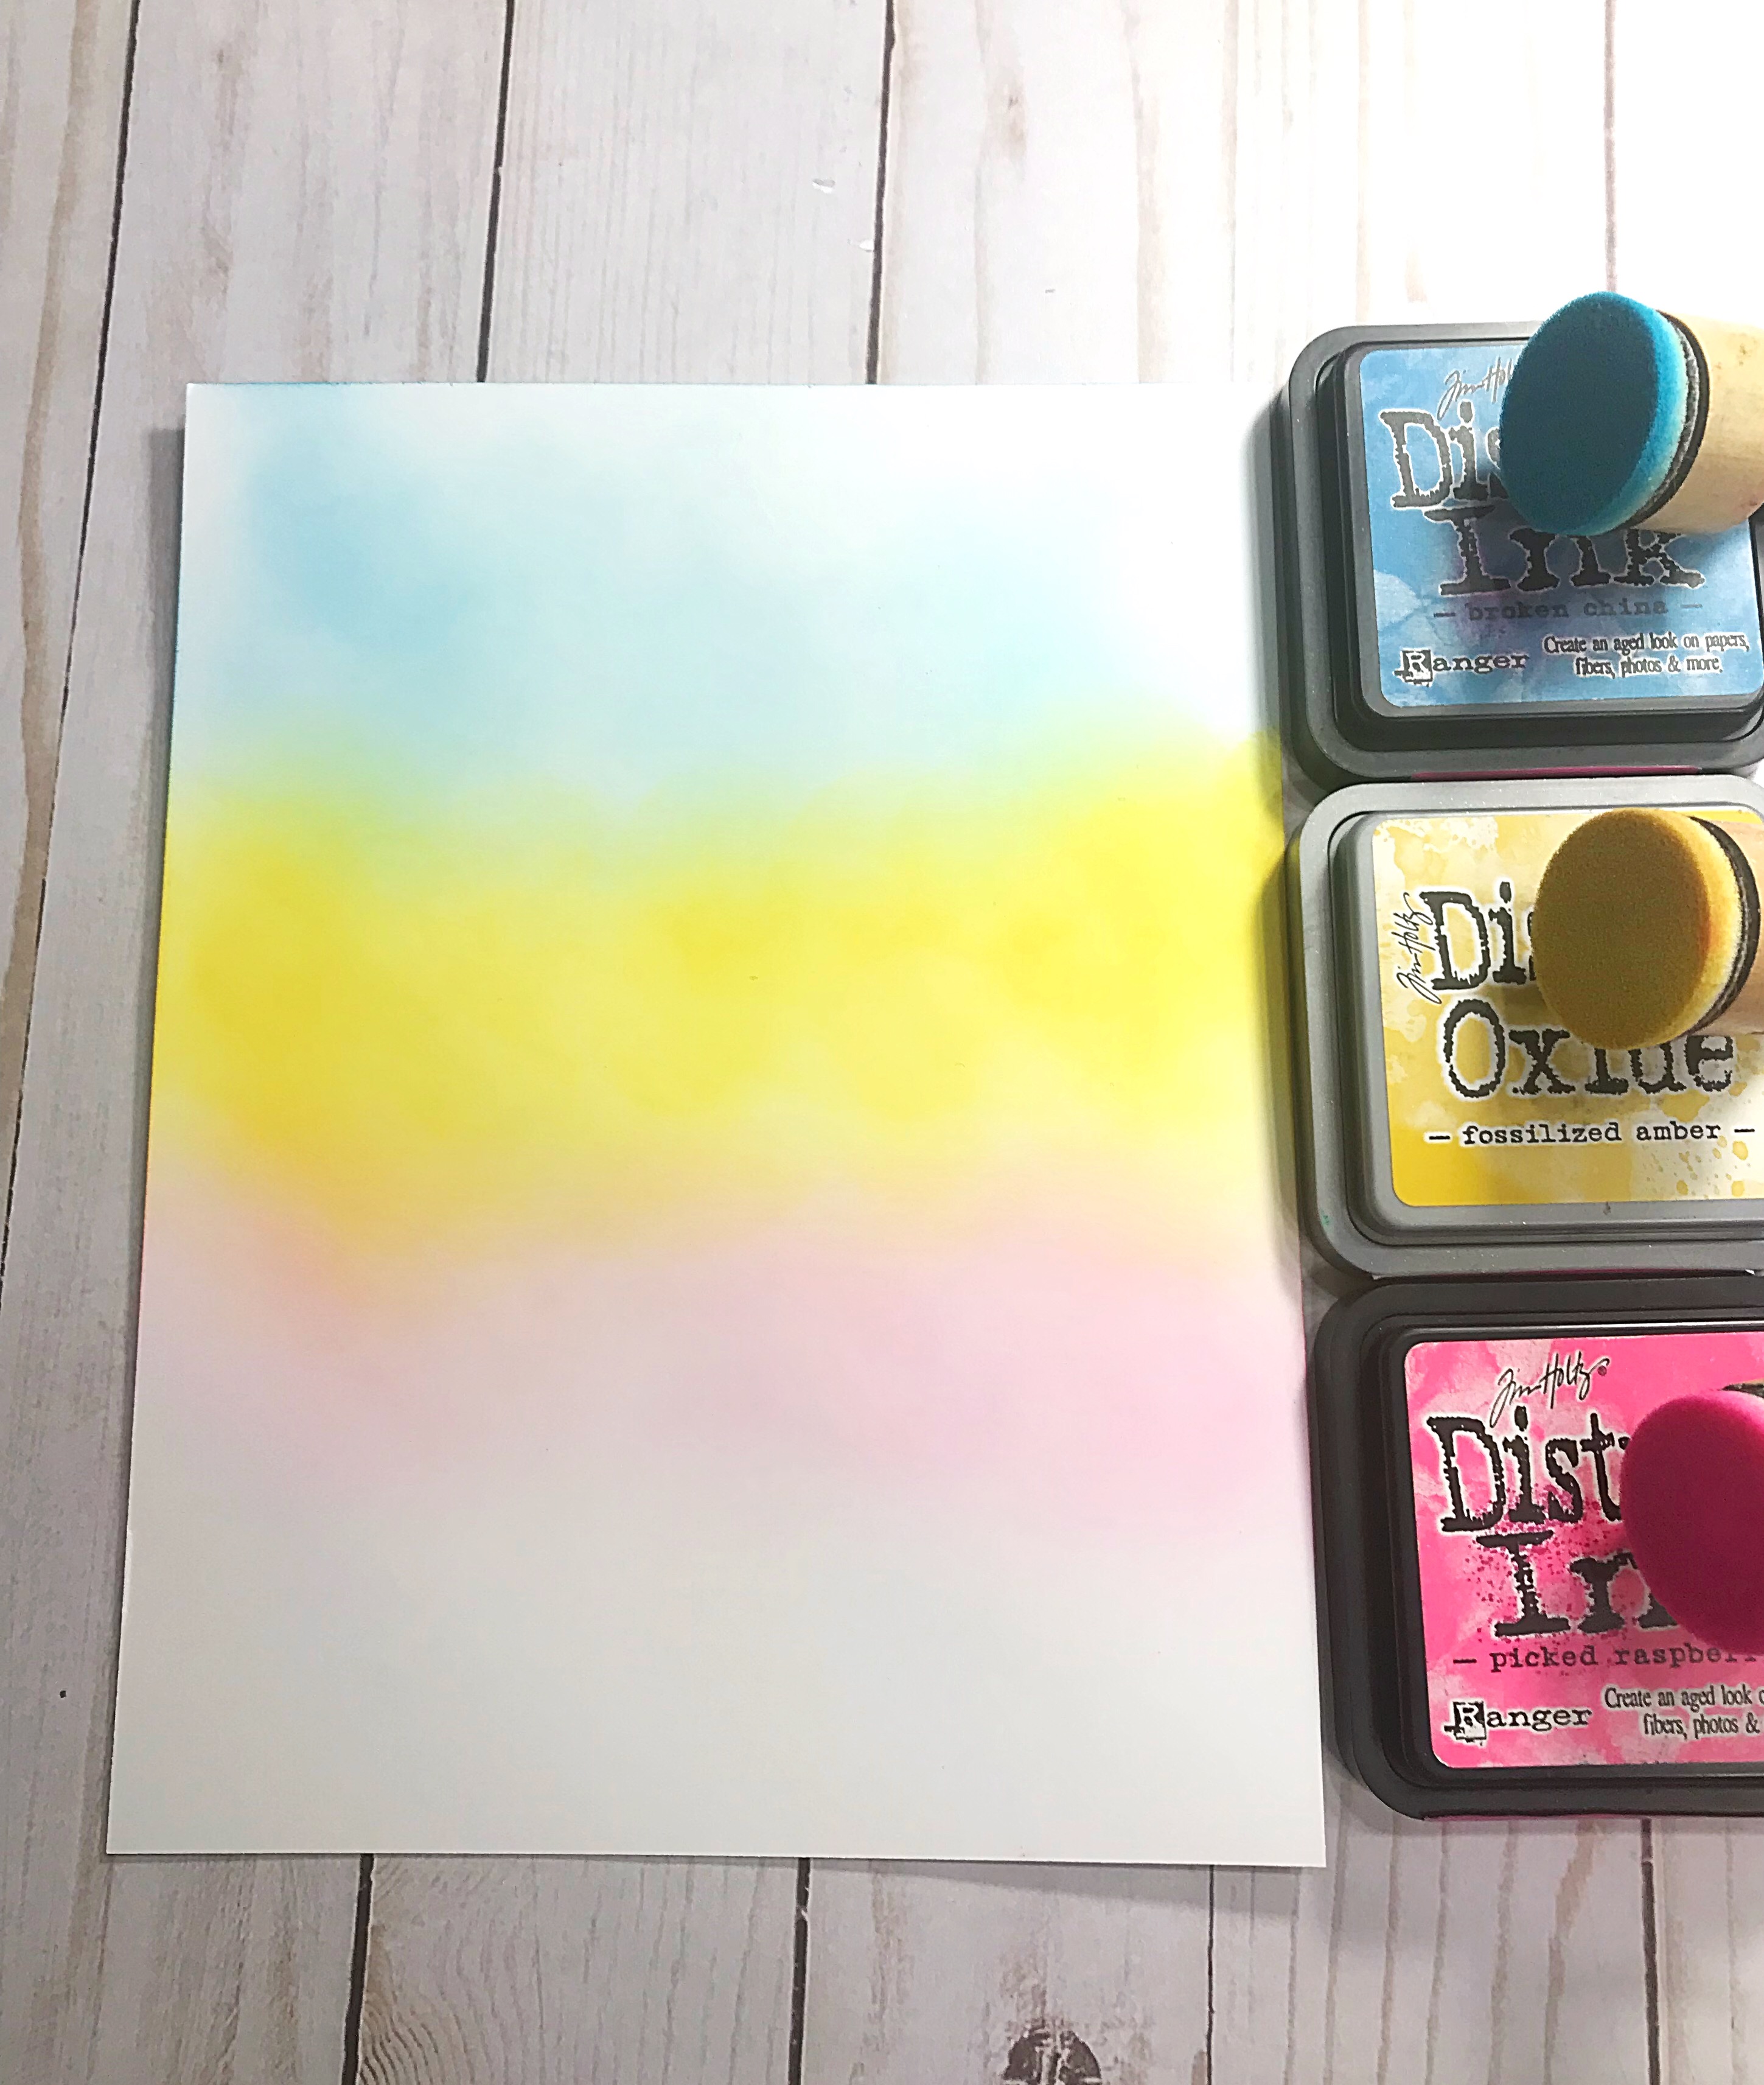
This card involves a technique that I am addicted to lately. It’s not a new technique by any means but I have been experimenting with it lately using different color combinations. I have been using distress inks to do ink blending on my backgrounds.The 3 colors I used on this card are:
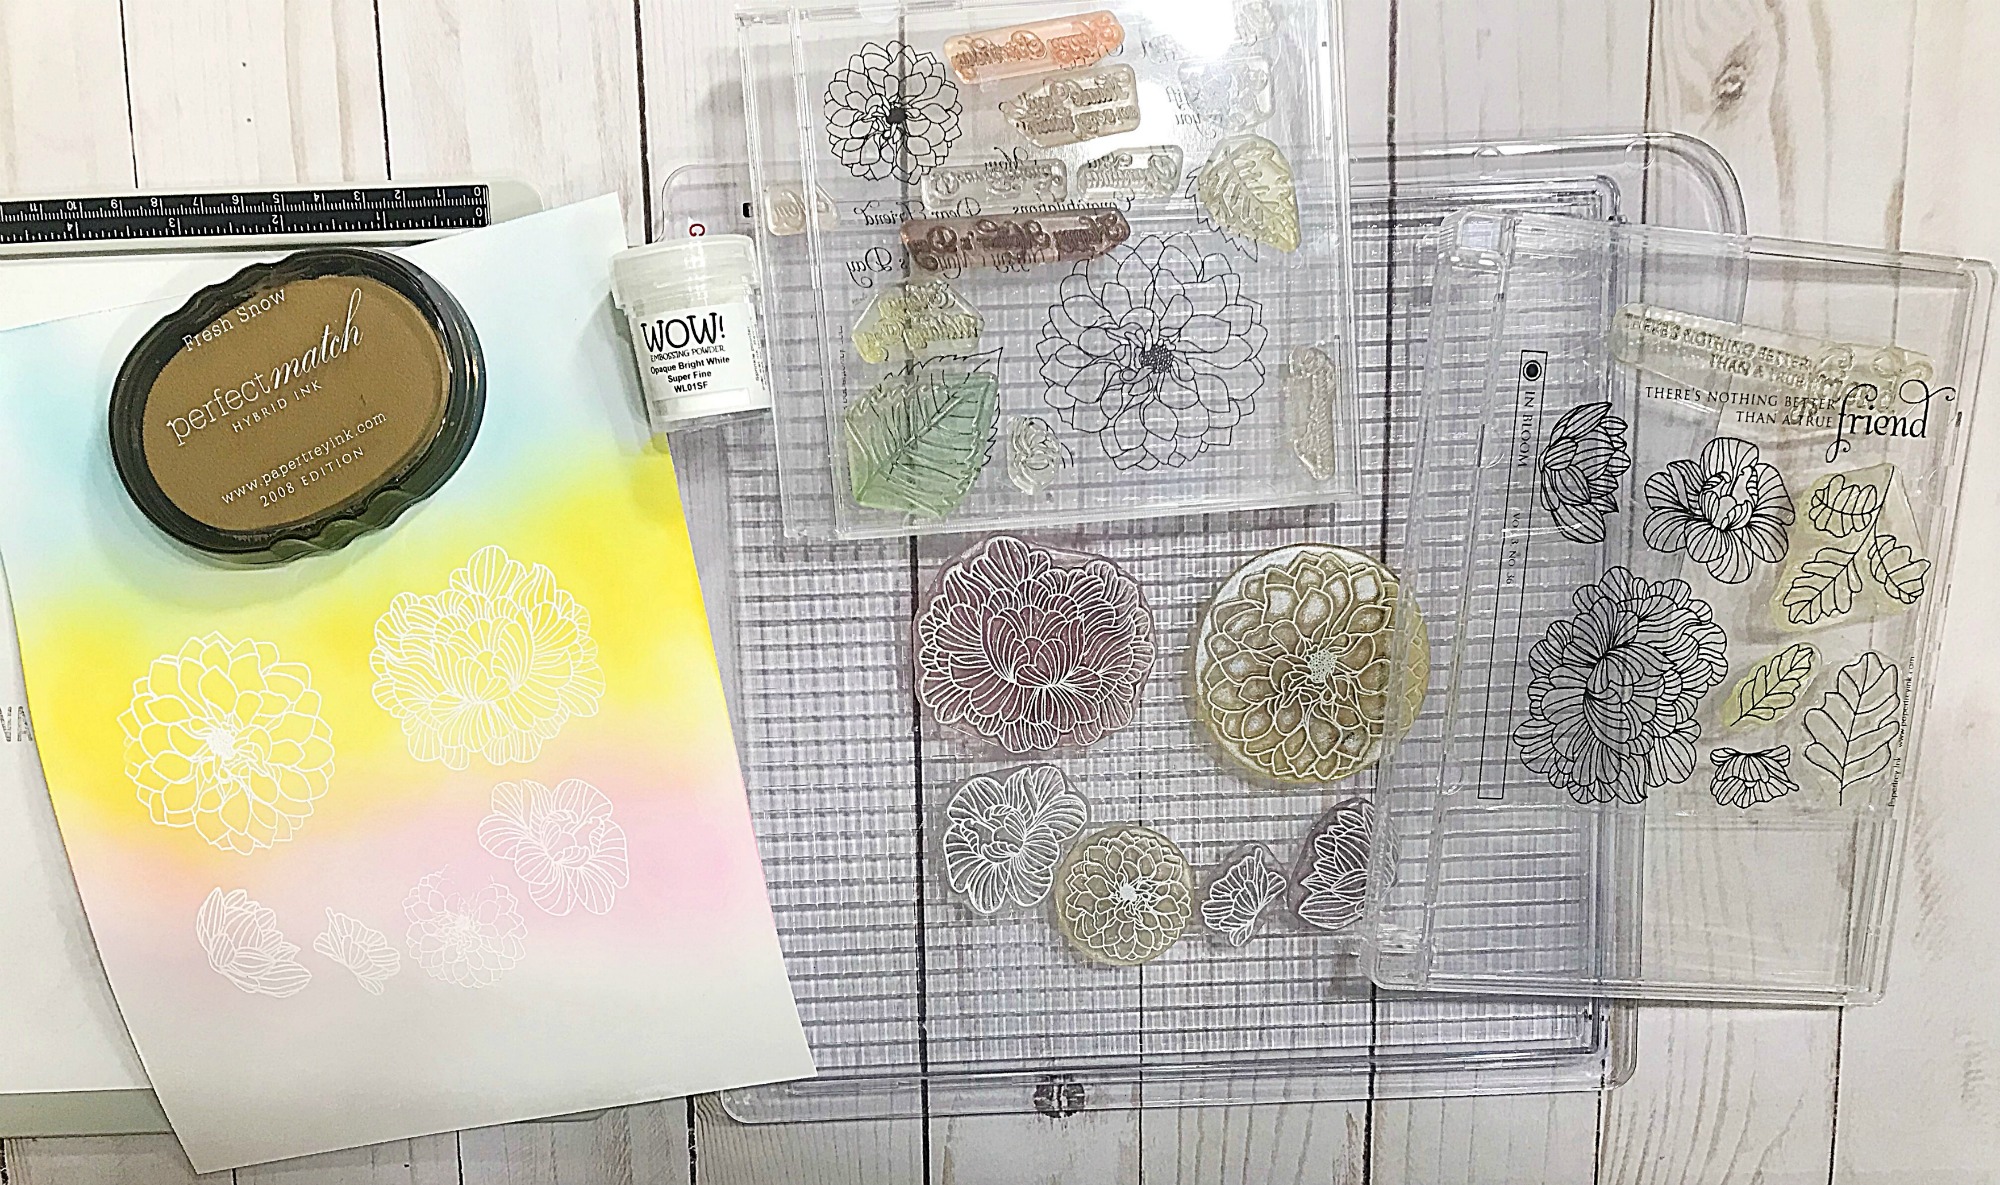
I just love how only 3 colors look like so many more when they blend together!I recently saw a card that had some floral stamps that were heat embossed with white powder over the ink blended background. I fell in love with that look and re-created it on this card. Here are the steps I took to make this card:
Step 1: To begin with I took some Bristol smooth card stock and I blended Broken China,Fossilized Amber and Picked Raspberry with a Ranger Mini Blending Tool. Once I liked the look of the blended colors I dried my background with my heat tool so that I could do some embossing on top of it.
Step 2: Next I took some floral stamps from two older Papertrey Ink stamp sets (Delightful Dahlia and In Bloom) and I placed them all over the lower half of my background. To prep the surface I used my anti-static tool and I used my Tim Holtz stamping platform to position the stamps where I wanted them. I stamped them with Fresh Snow ink from Papertrey Ink and sprinkled WOW Opaque Bright White powder all over them. I hit the powder with my heat gun and let the magic take place!
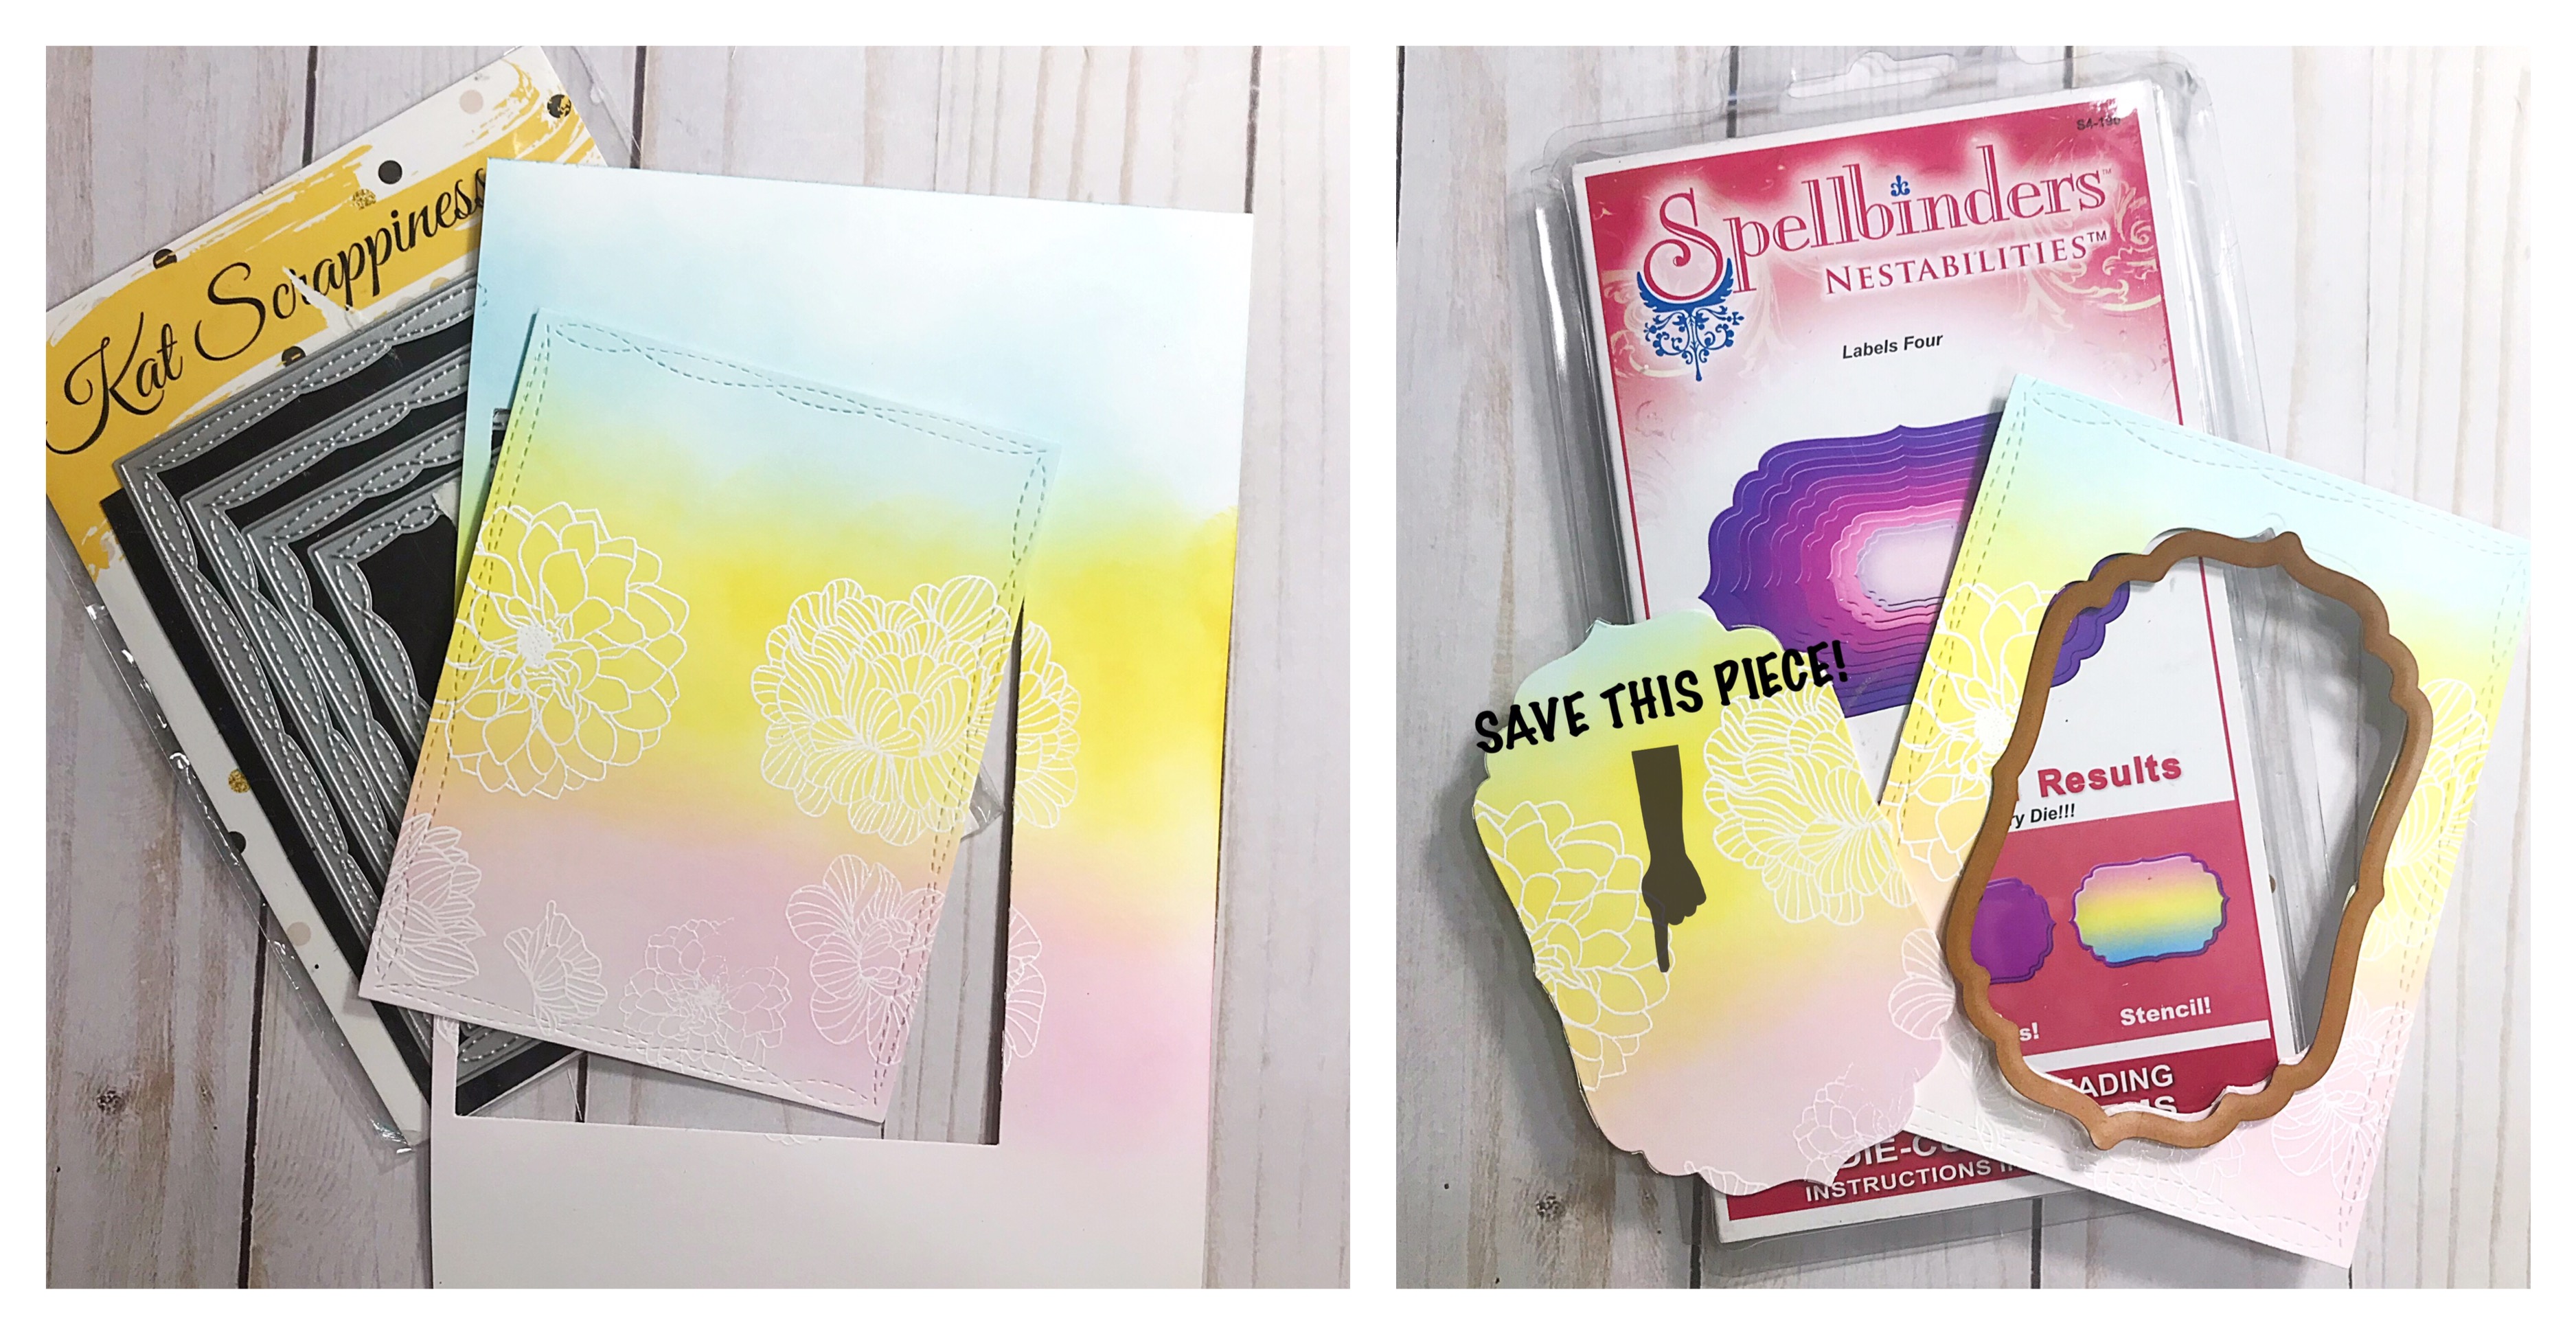
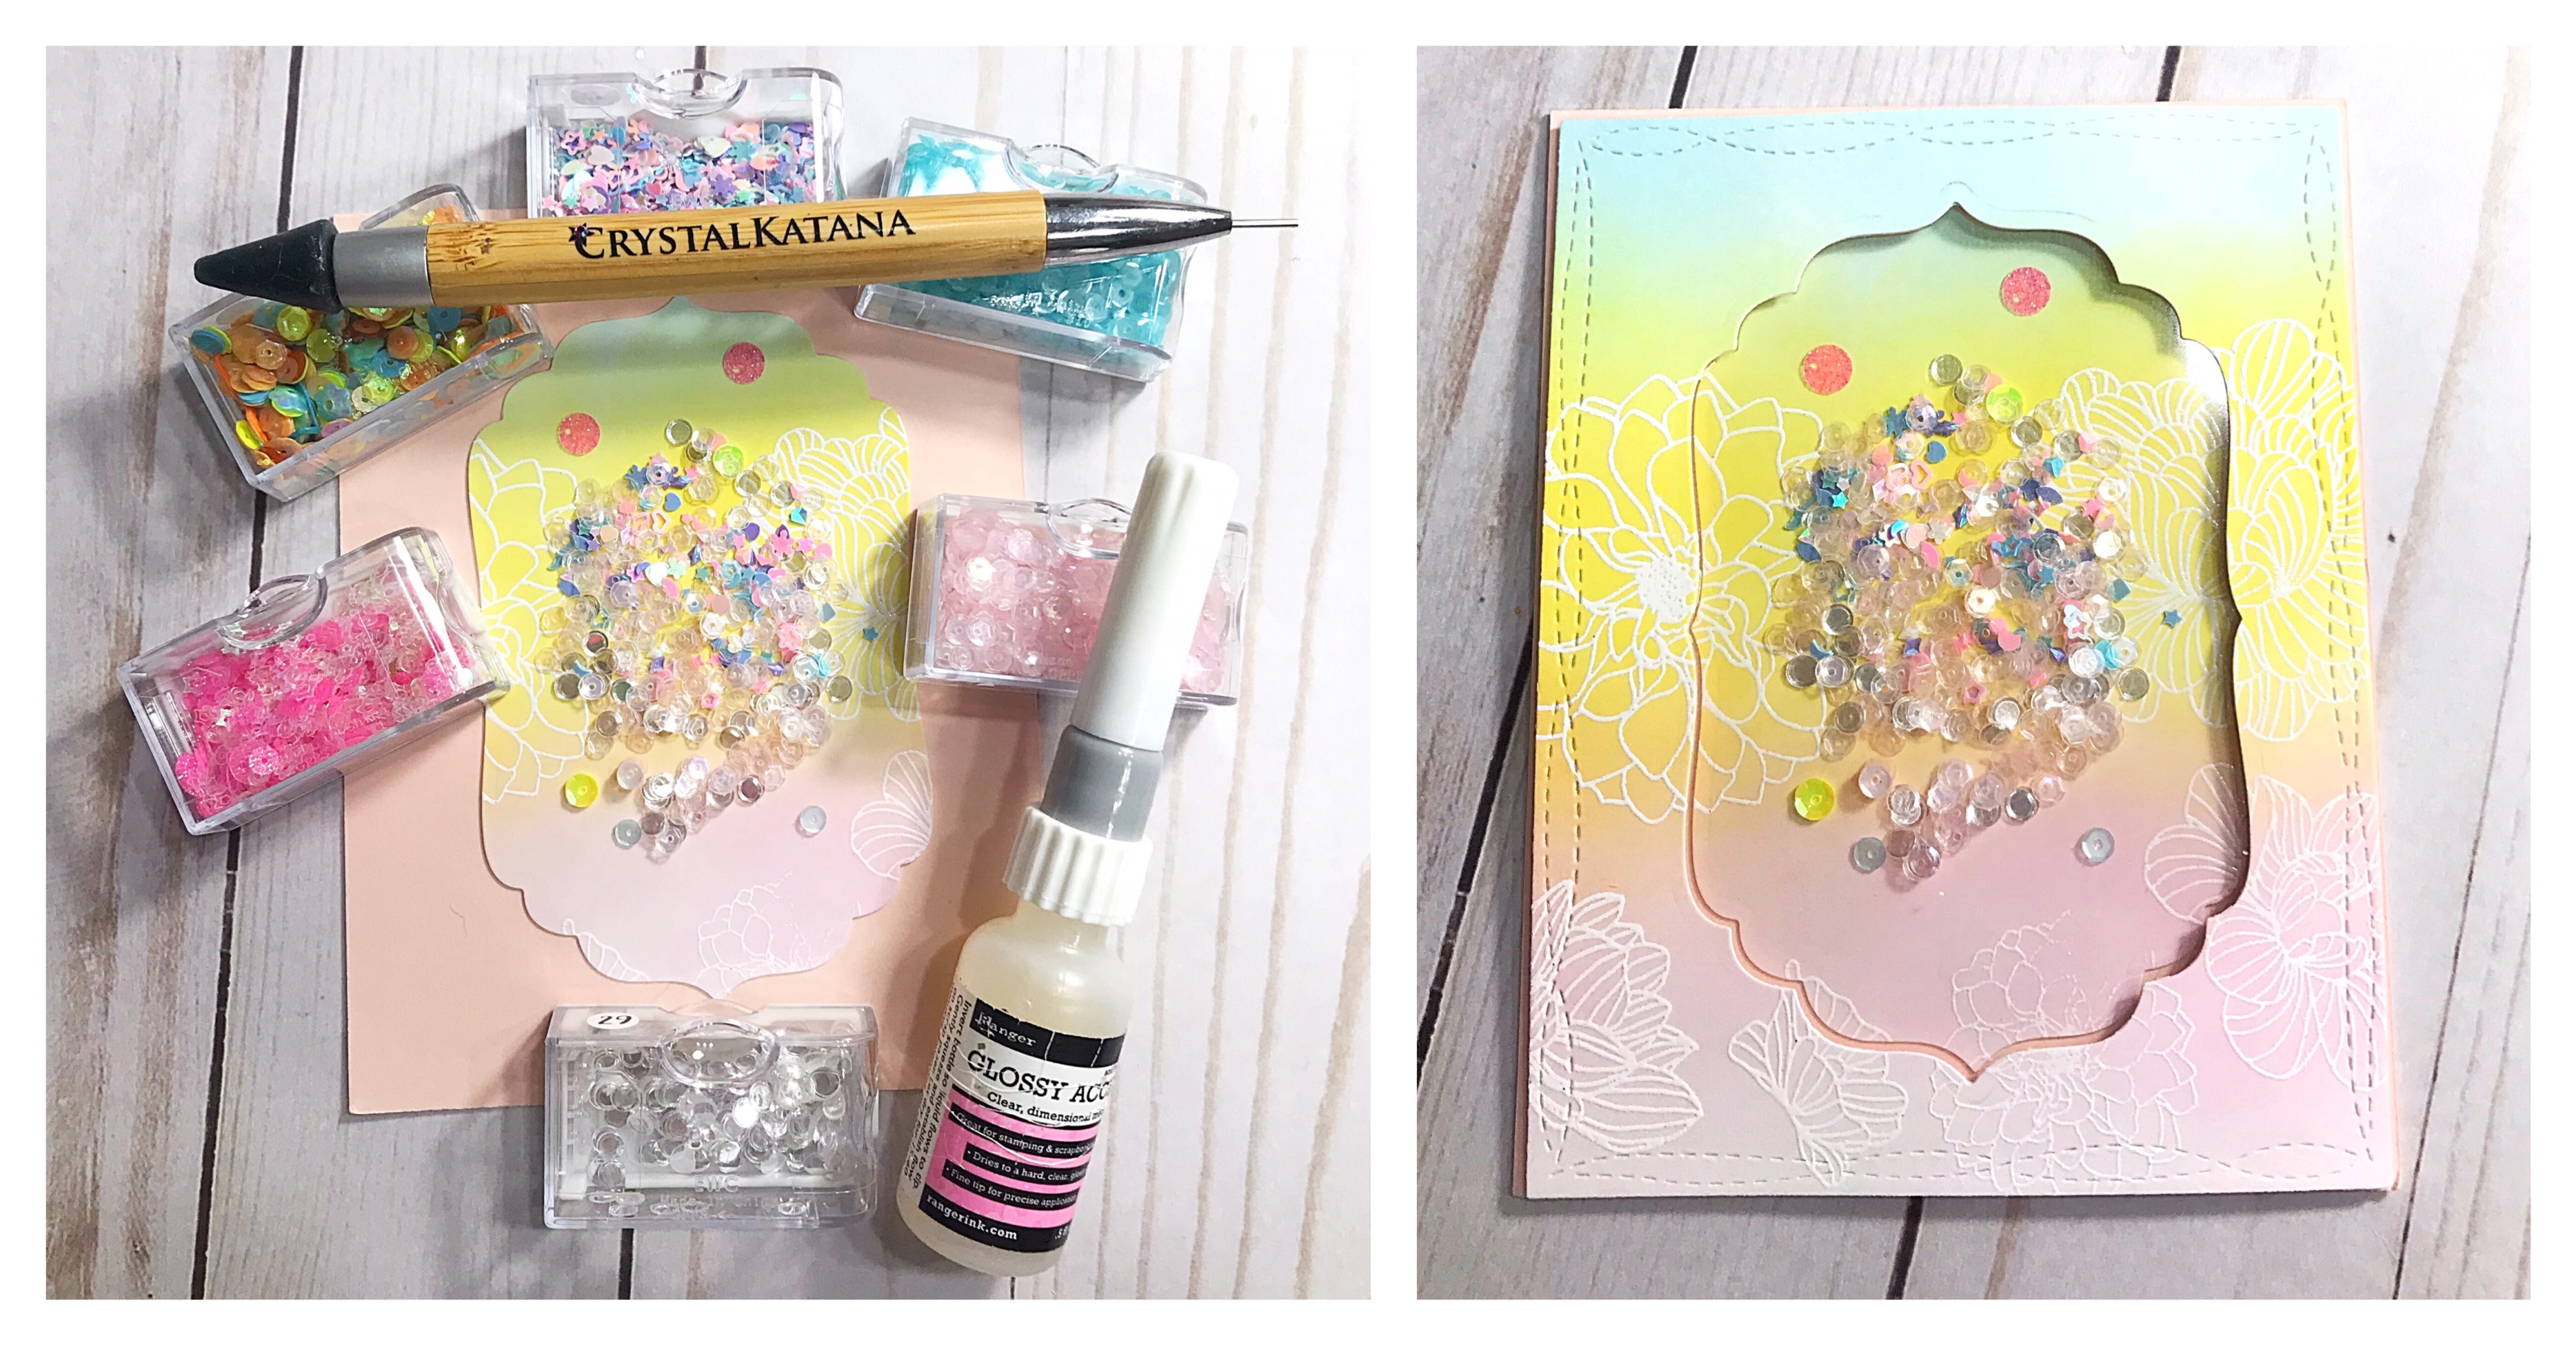
Step 3: Once the background was inked, stamped and embossed I took the largest die from the Kat Scrappiness Wonky Wavy Stitched Rectangle Dies and cut out a panel. From that panel I cut out yet another panel from the center using the largest die from the Spellbinders Labels Four dies. (Save the piece that you die cut!)
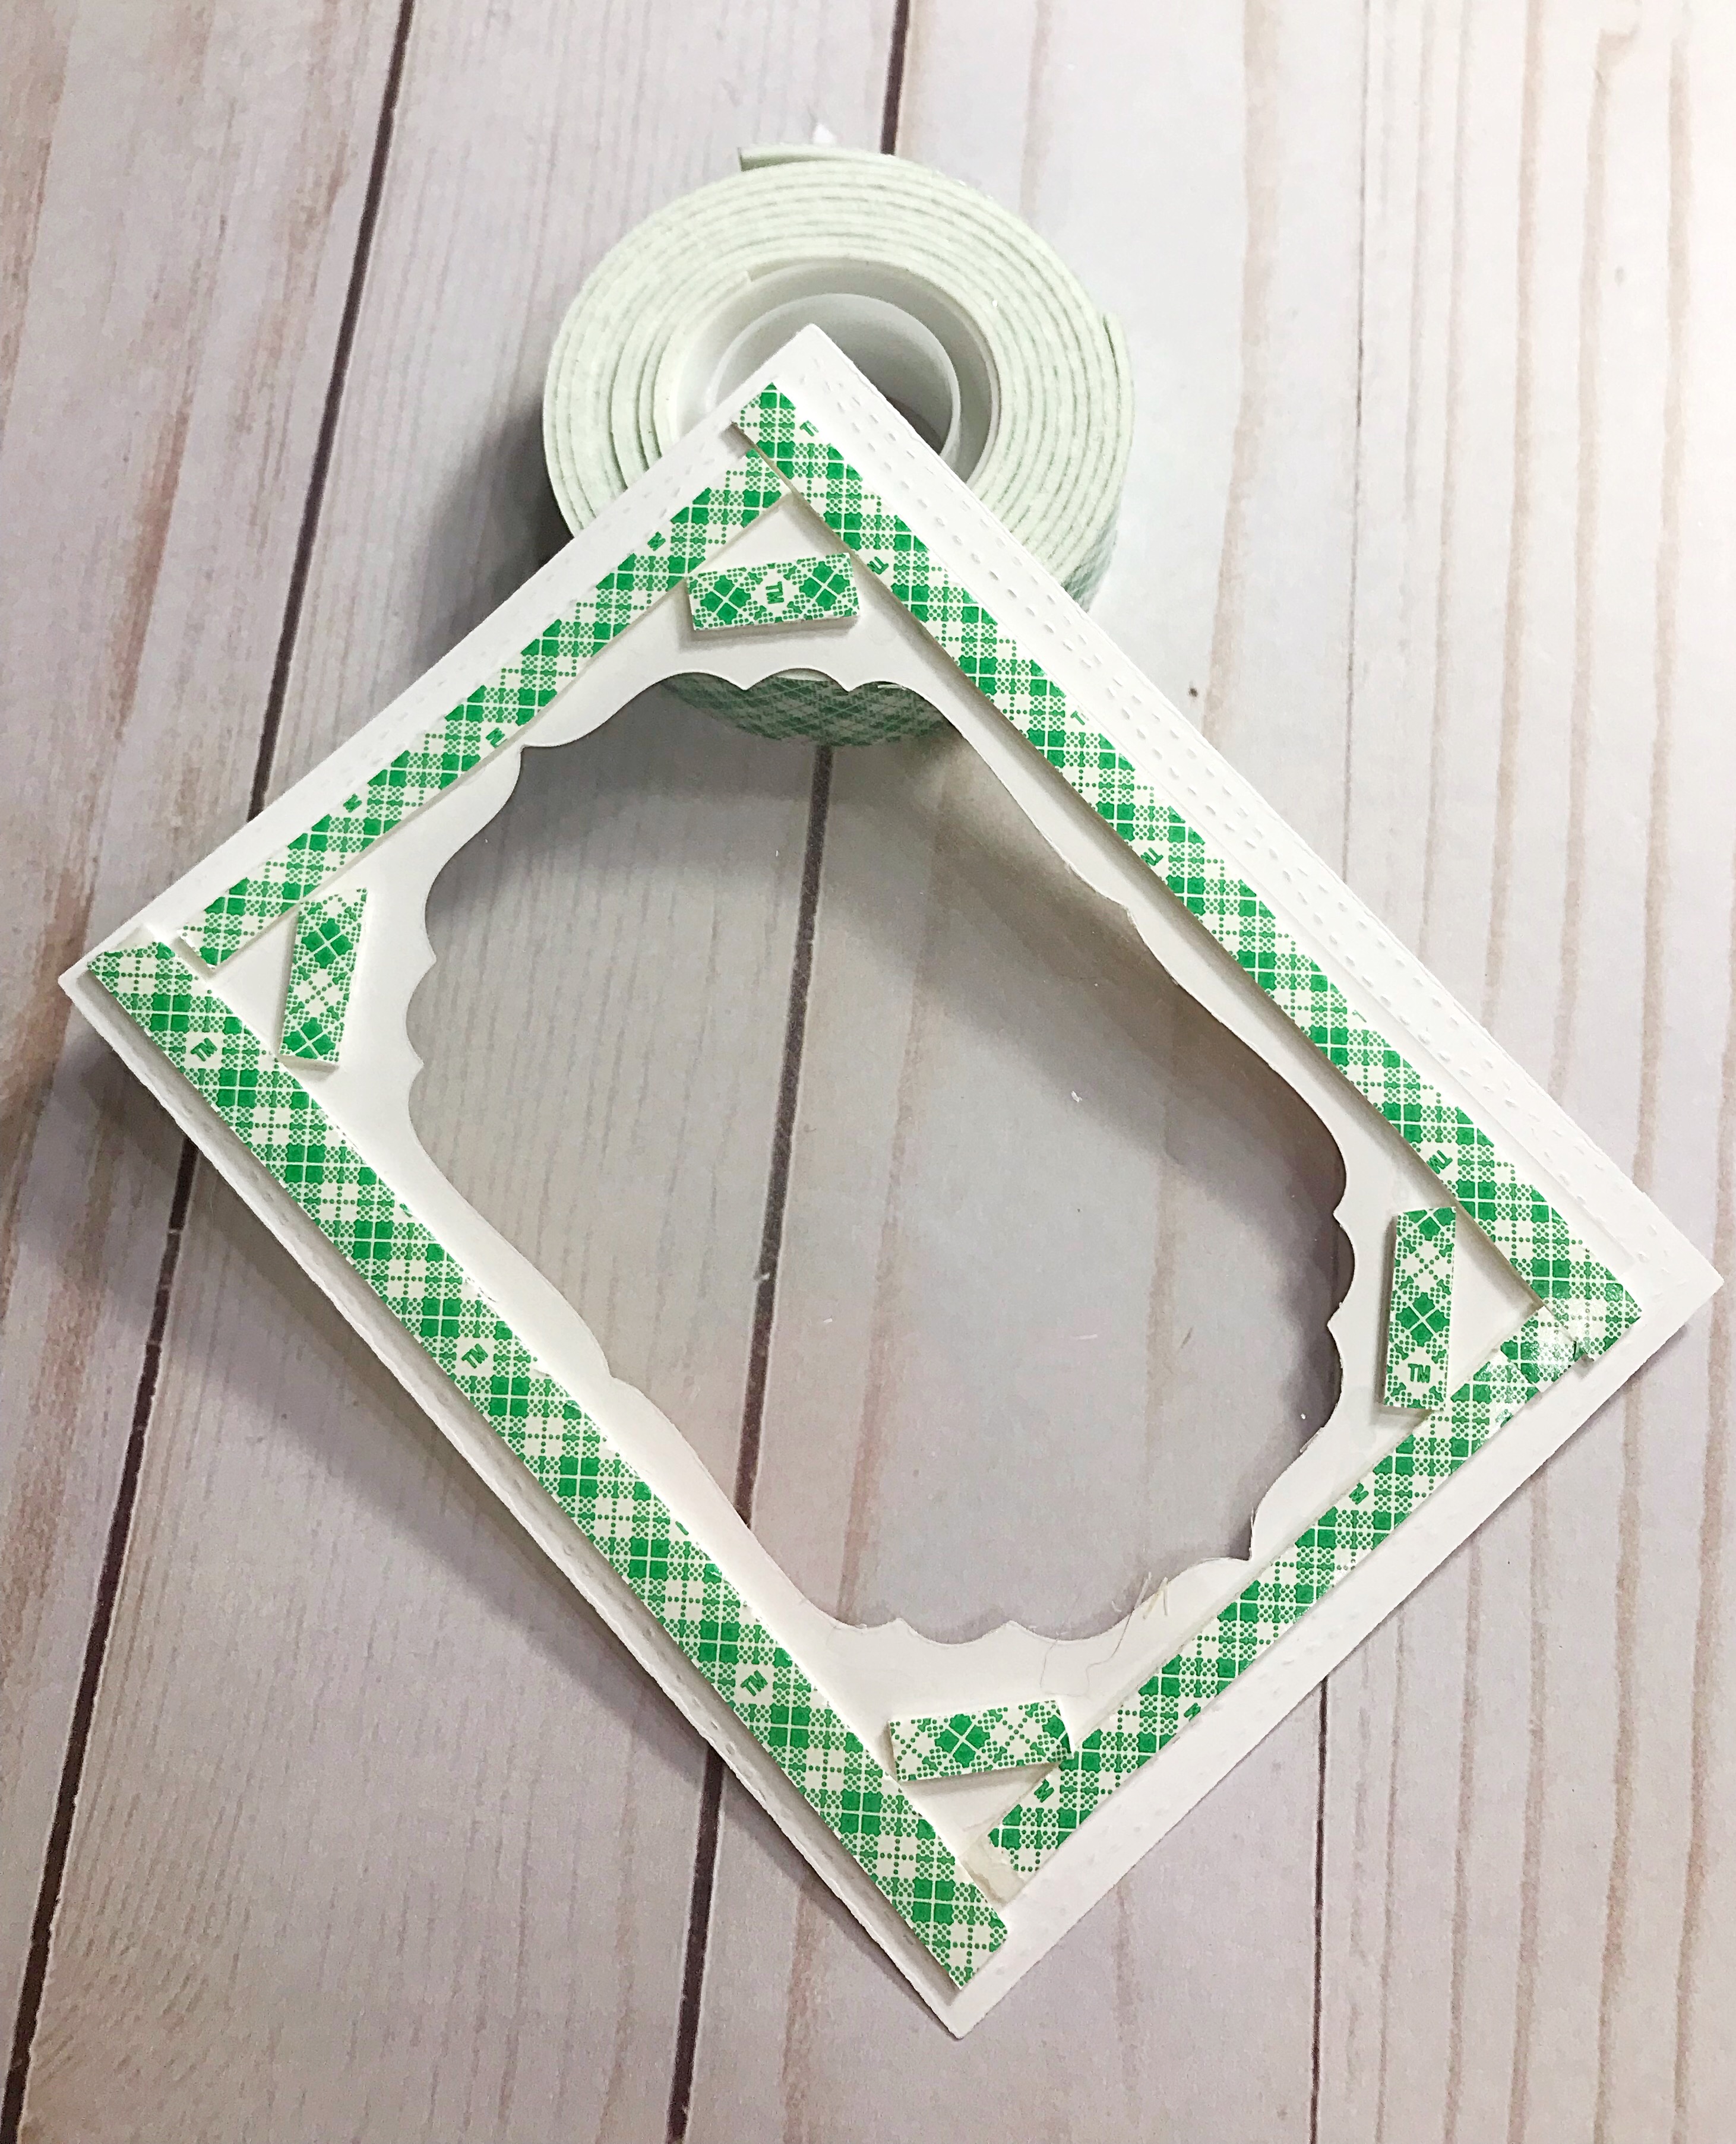
Step 4: The next step was to make the shaker portion of the card. I adhered a piece of acetate to the back side of the panel with the missing die cut shape and then I placed foam tape all over the border of that panel to enclose my shaker bits.
Step 5: Now it’s time to use the negative shape we die cut using the Spellbinders die. We’ll adhere that shape to front panel of the base of an A2 sized card. I used a pink card base.

Step 6: This step is optional but I love the extra special touch it gives to a shaker card. (I took a few colorful sequins and glued them to the background with the Crystal Katana tool so they would remain visible even when the card was “shaking”.) After I glued them down I sprinkled the rest of my mix all over the die cut panel. You could use whatever mix you want, but here is the sequin mix I made:
Sequins by Kat Scrappiness – Neon Barbie
4 mm Sparkling Clear Confetti, Sun Kissed
Sequins by Cartwright – Pale Pink, Light Ocean Blue Green
(Yes I went overboard but what can I say…….. I LOVE shaker cards!) You can now adhere the top panel over your lovely shaker extravaganzapalooza!……is that even a word??🤷🏼♀️
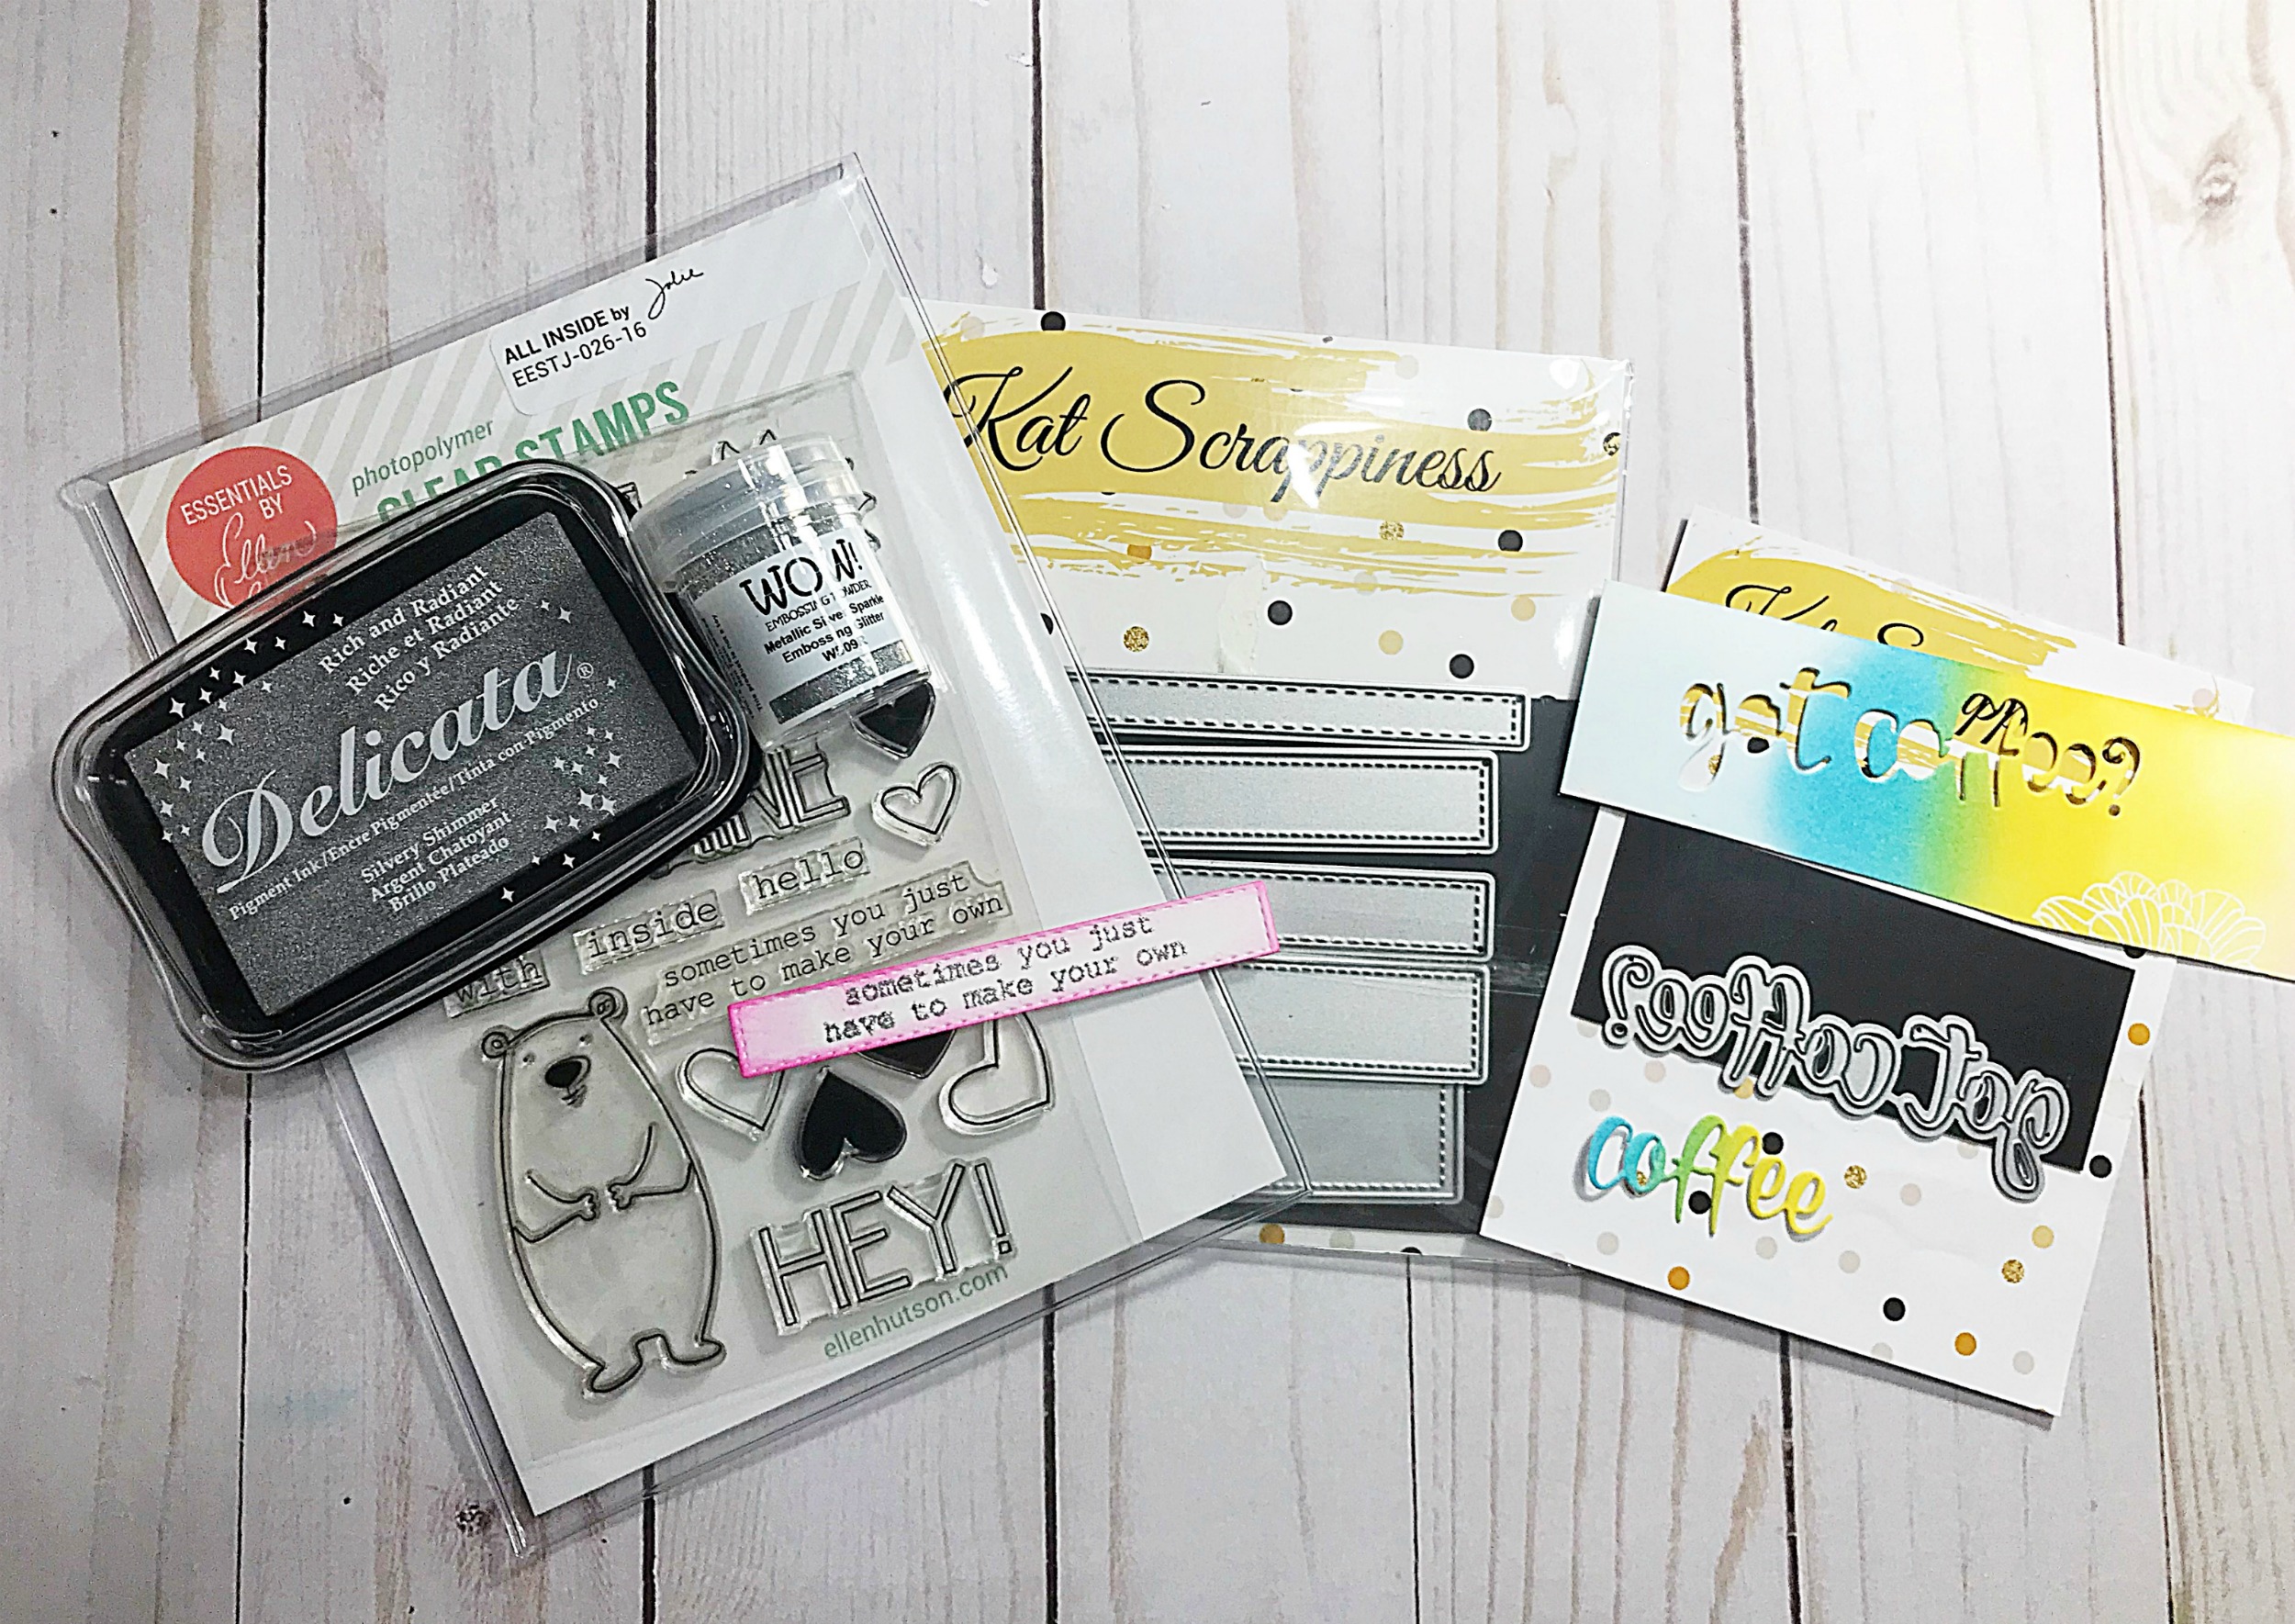
Step 7: Ok now that the background and shaker are complete we can work on decorating the front of the card. I chose that darling bear from the Ellen Hutson – All Inside stamp set and I watercolored him with my Zig markers. I also took the coffee cup from the Paper Sweeties – Coffee Planner Stamps and Copic colored it to put in his furry little hands. I popped him upon foam tape and boy did he look cute!

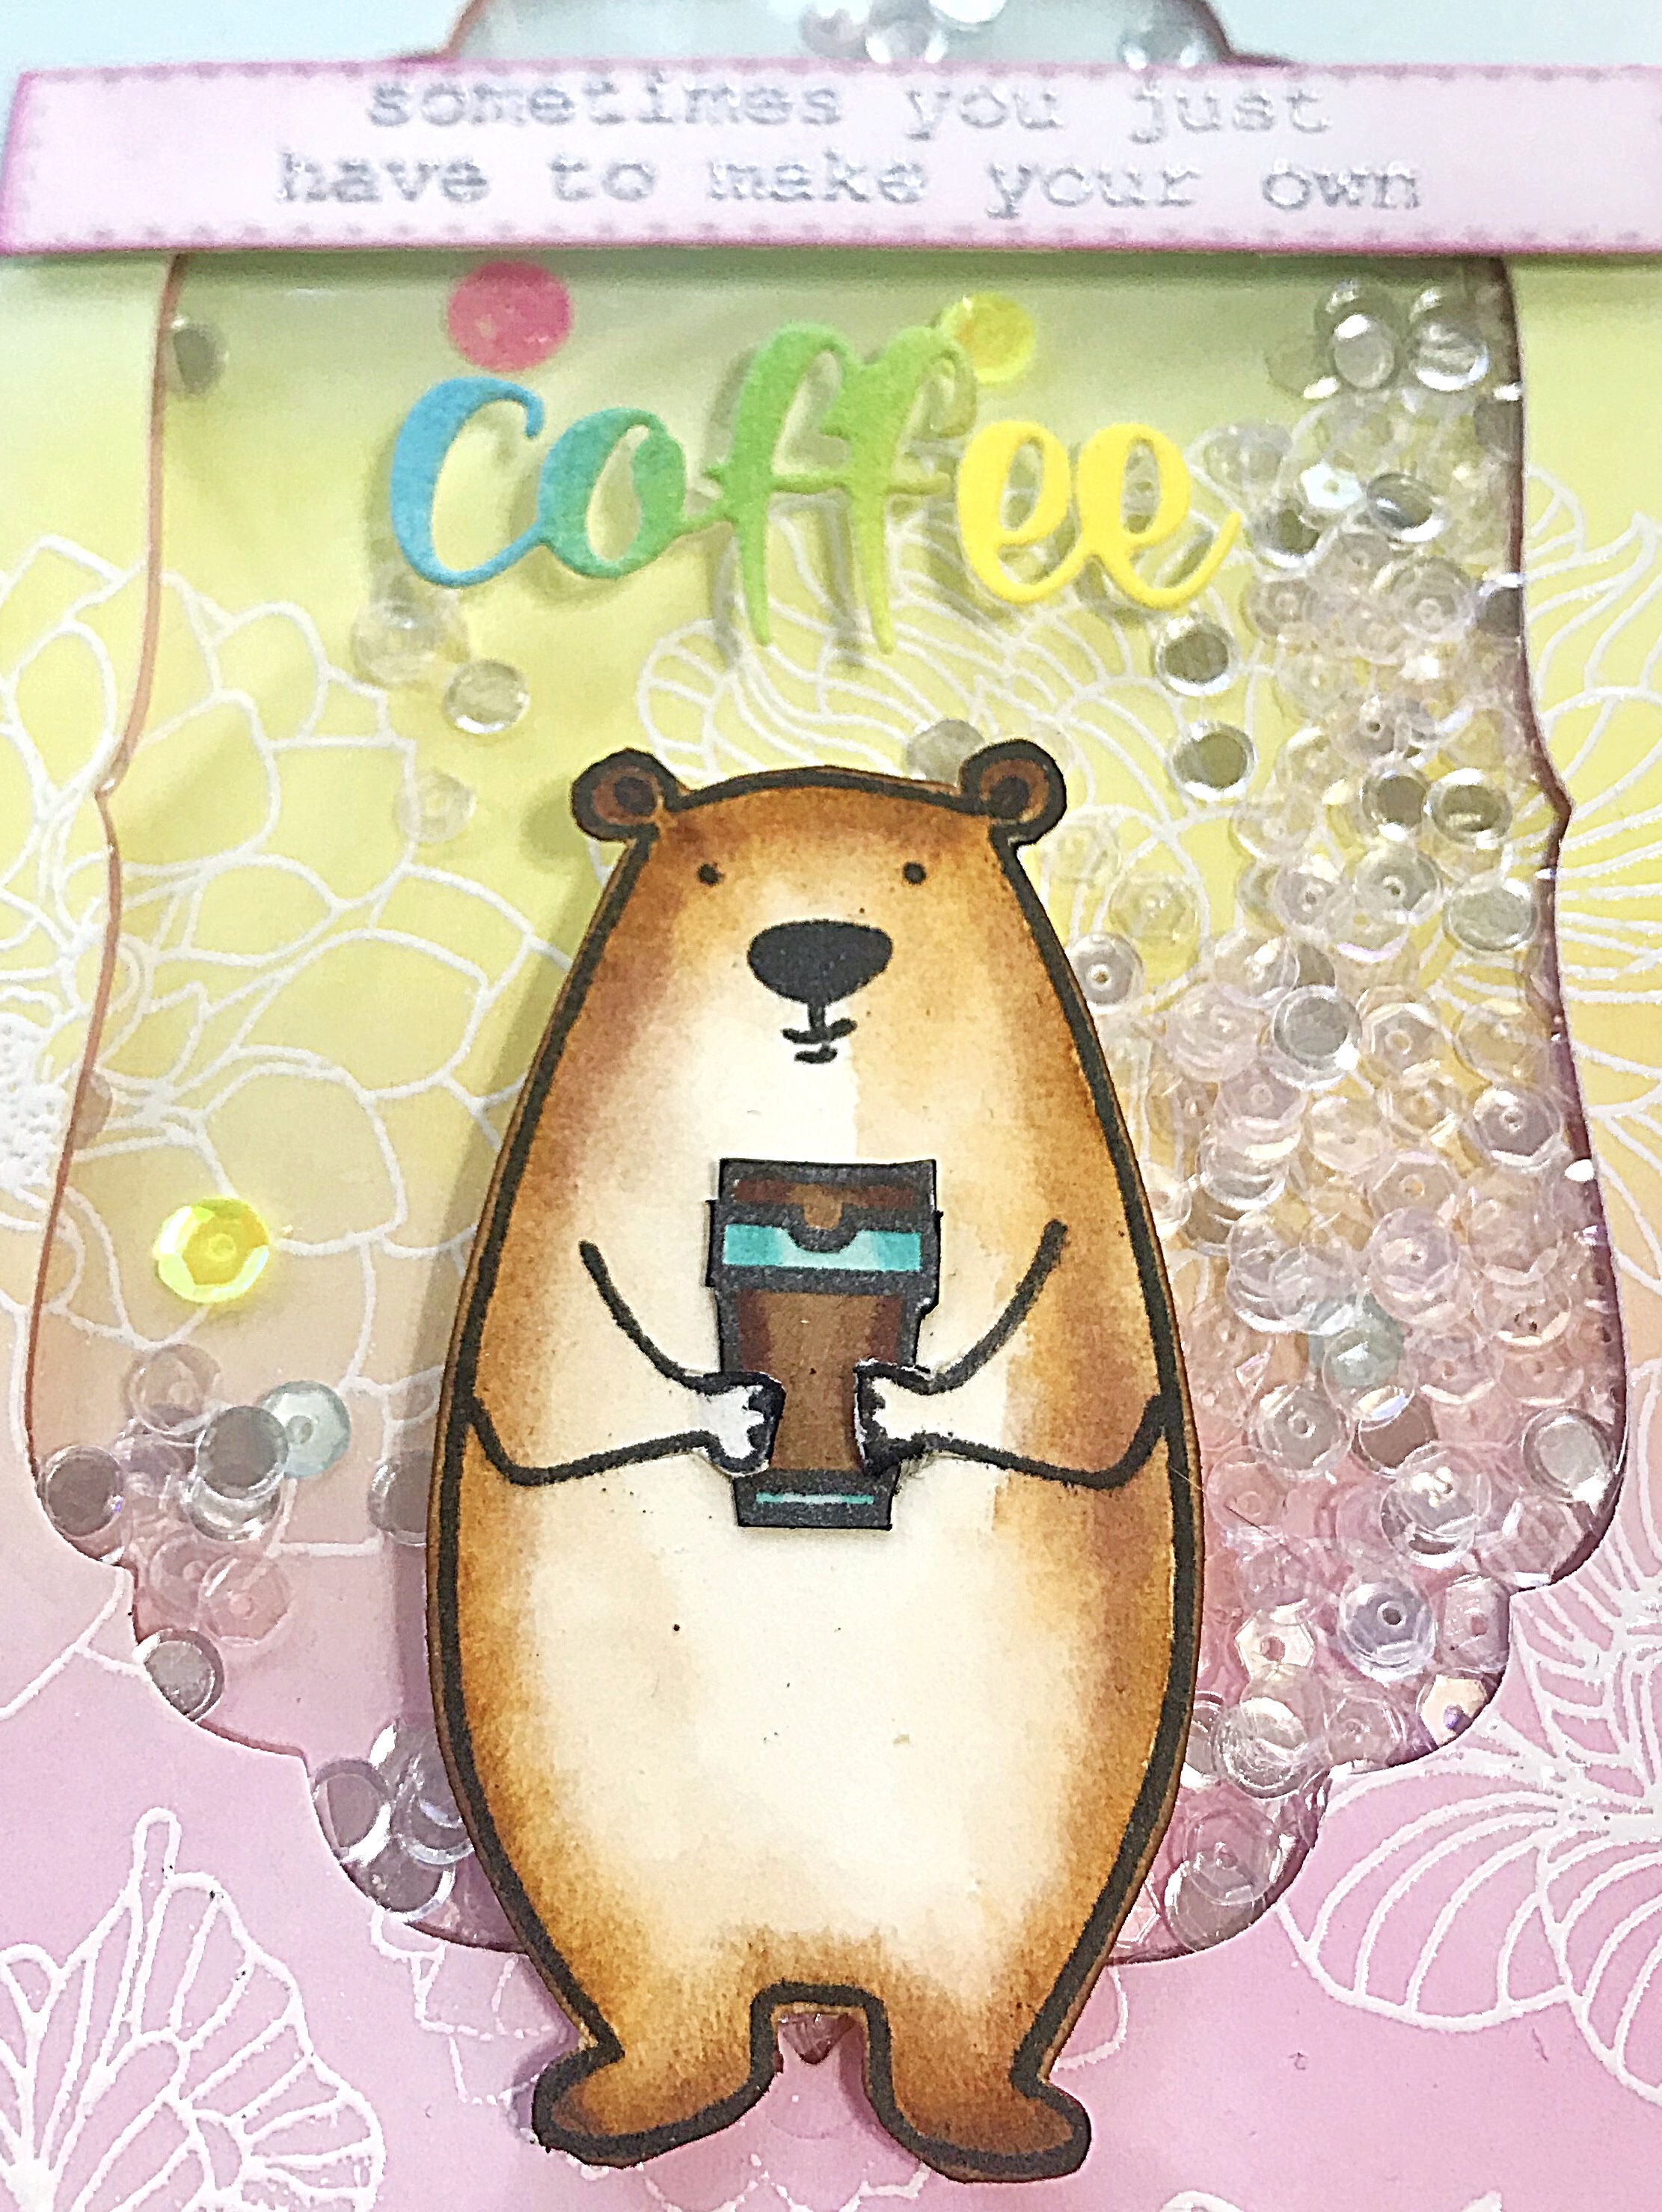
Step 8: YOU MADE IT TO THE LAST STEP 😂
It’s sentiment time! In the All Inside stamp set there was a sentiment that read “sometimes you just have to make your own” and I thought why not finish that sentiment off with…….. you guessed it COFFEE!
I heat embossed the sentiment with WOW Metallic Silver Sparkle embossing powder on to a Stitched Sentiment Strip Die from Kat Scrappiness and inked the edges with Picked Raspberry distress ink. For the COFFEE word I used the Got Coffee Sentiment Die from Kat Scrappiness. I took a leftover piece from the ink blended background from step 1 and diecut the word coffee from it to give it a colorful twist!
PHEW!
This card was a labor of love and I certainly loved making it! I hope I made the directions easy to follow! I really love how the card came out and I hope you’ll give it a try. So many fun techniques on one card!
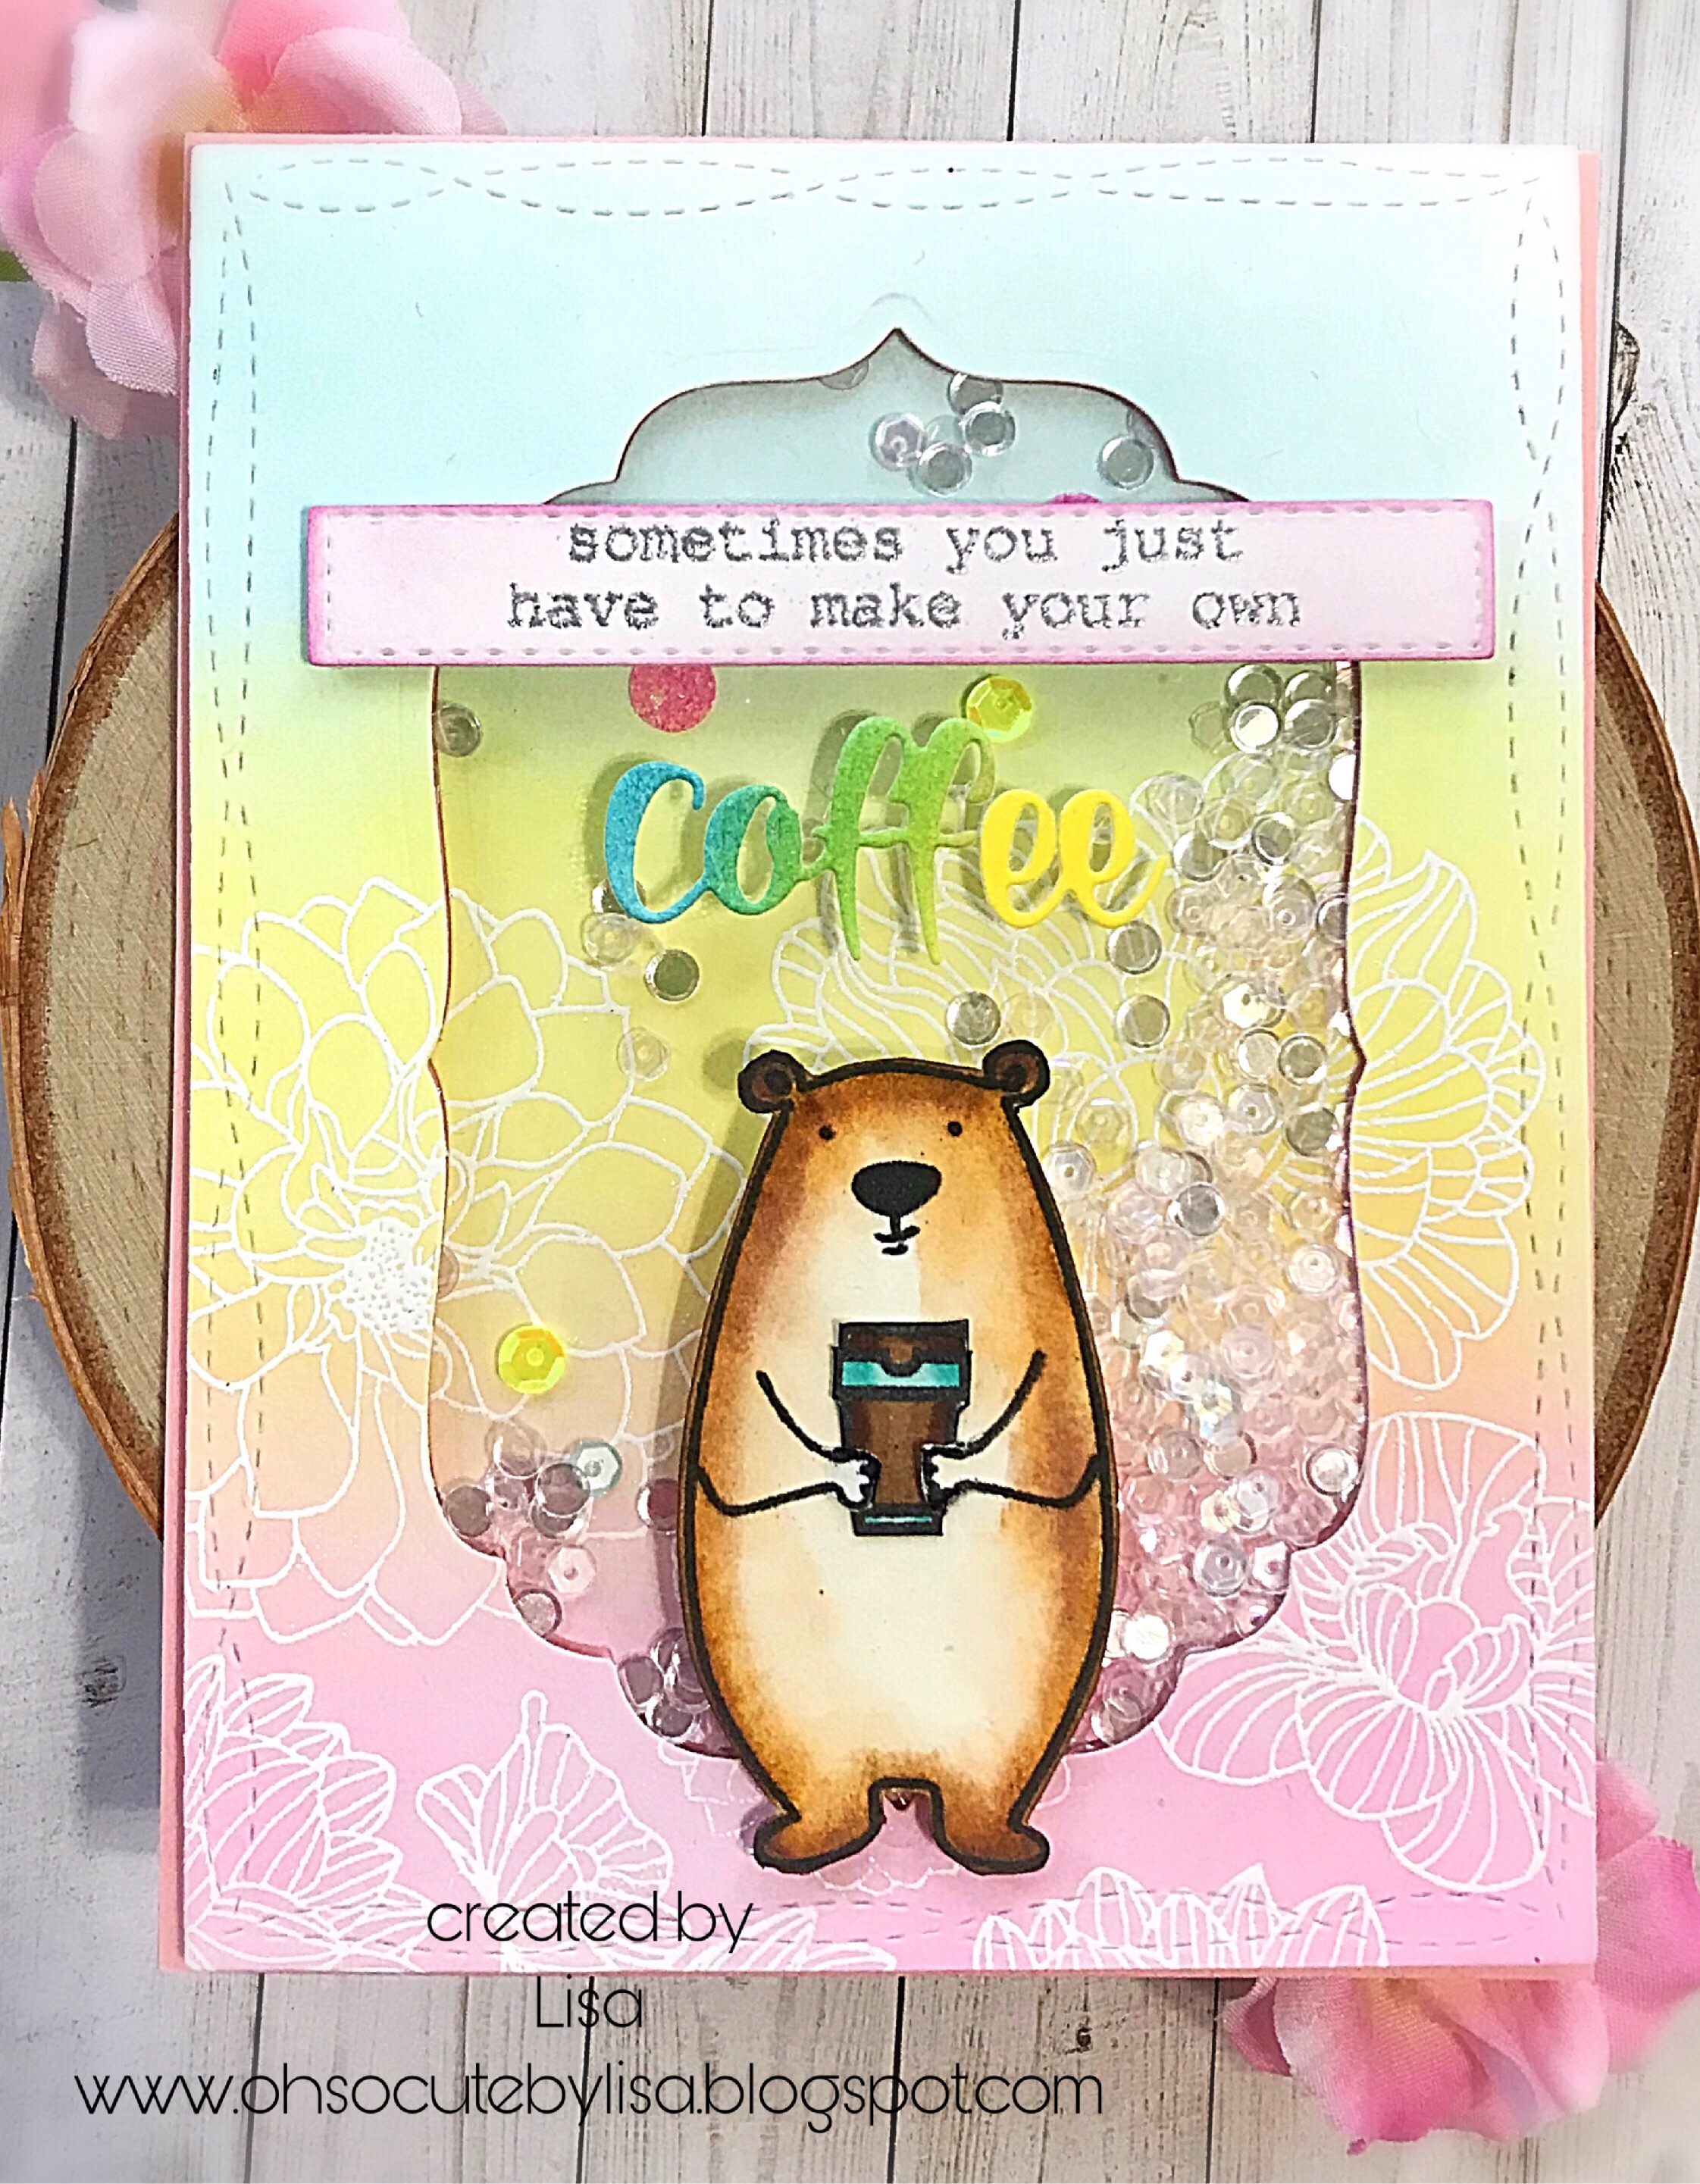
Thanks so much for joining me on the Coffee Lovers blog today!
Have a great day, I already am!
☕️Lisa ☕️
For more inspiration, please visit Lisa’s Blog | Instagram | YouTube | Facebook


Leave a Reply – please note that comments are moderated