Hello!! Have you submitted your project to the Winter Hop? Better get to it, only have until tomorrow!! But in the meantime, I have a new installment of Brew & Craft Your Stash! Today I have some great ideas for Paper Folding! If this is the first time you are seeing my feature or need a refresher, click here for my very first post, it gives a little background explanation of my feature!!
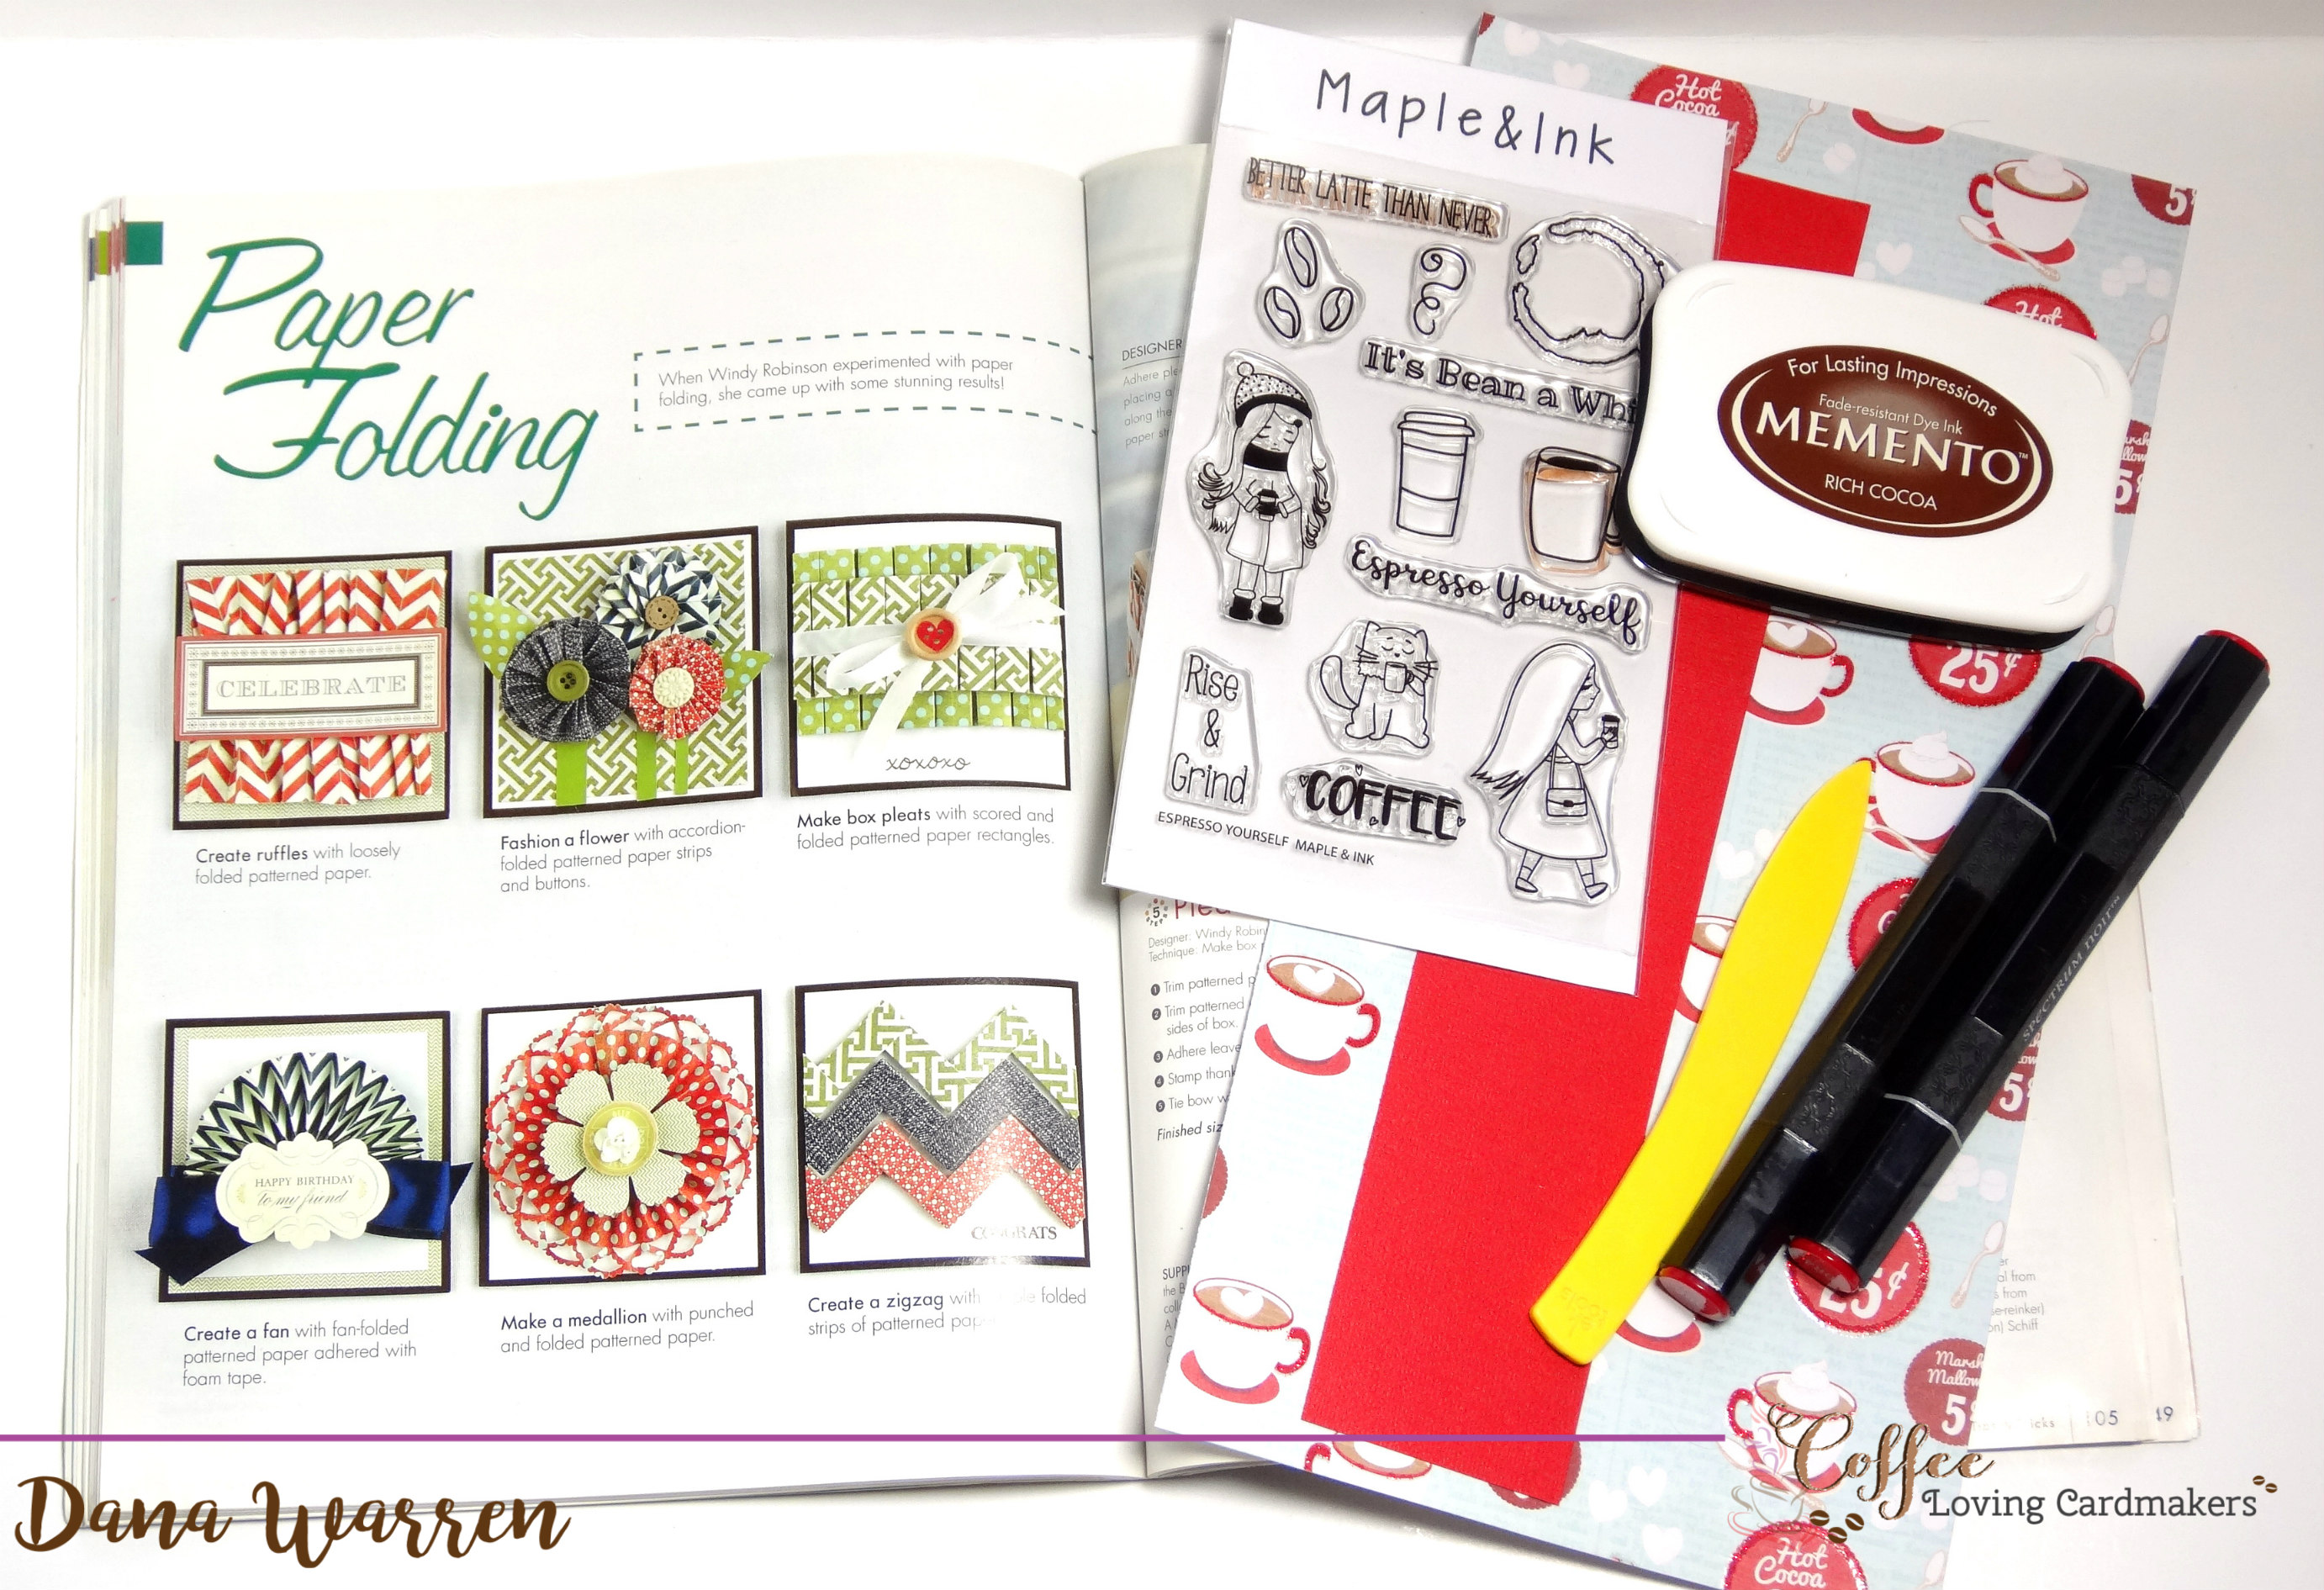
We are stopping in the Appling Techniques section of Paper Crafting Tips & Tricks a 2012 magazine by PaperCrafts. Today we are looking at Paper Folding, Windy Robinson has some great Paper Folding ideas for your cards!!
- Fold pattern paper to make ruffles
- Make a flower from accordion folded paper
- Make box pleats (fold rectangles)
- Fold some paper to create a fan embellishment
- Use a punch and folded paper to make a medallion
- Fold strips of paper to make zigzags
It took me a little while to come up with today’s project. I originally wanted to do some kind of folded origami coffee cup but couldn’t find one. But I found a really cool folded heart and then found a video for a really cute candy wrapper. So I thought I’d put the heart in the treat holder with a card, candy, and a gift card!
First, the treat holder. I got the idea from this video, which makes these little mini folders for chocolates! So cute! But I wanted something bigger, so after many, many tries I finally figured something out based on what I saw in the video. As I was making the actual project I actually remembered to grab my camera and did a little tutorial!
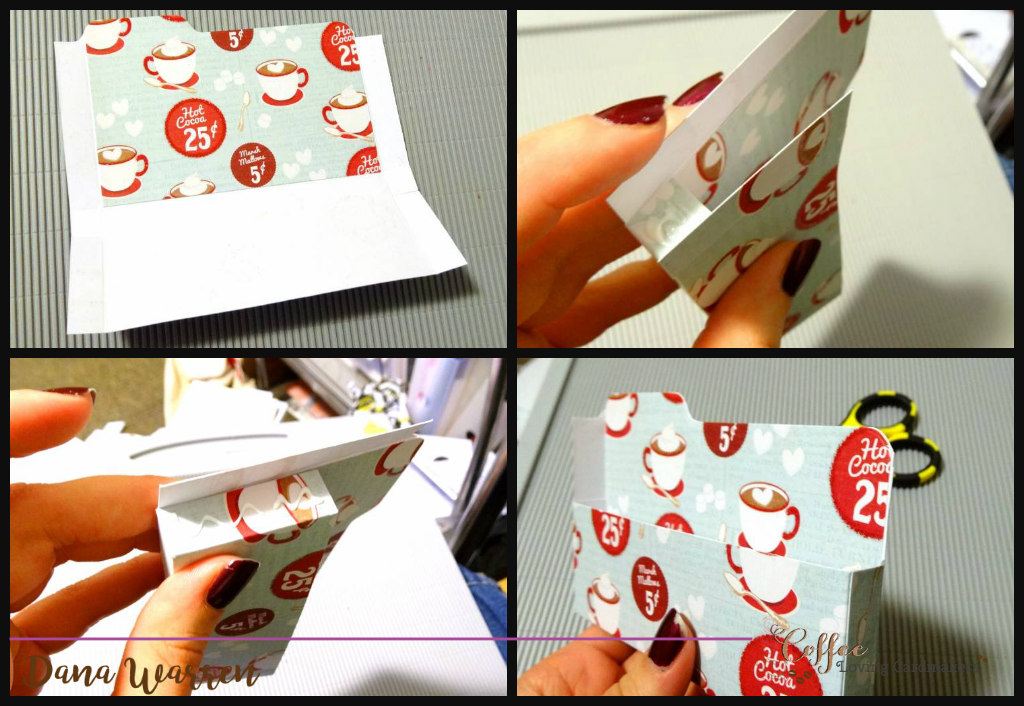
First, cut cardstock 6 x 6.50 inches (all measurements are in inches). I should have used double sided paper, it would have made life so much easier!! I didn’t so just be mindful of the pattern, in the first photo, this shows what will be the front of the pocket, so you want to start off right if one-sided paper is used!
From the shorter side score at 0.5 inch and 5.5 inches. Turn and then score at 1.75 and 2.25. This scoreline gives you the bottom of your pocket. Cut the little tab on each side.
The shortest side is the front, and the longest side from the bottom is the back. Here I used a file tab die to add the tab, you can use any edge die you might have. You can adjust the height as you need to, making the back longer or shorter.
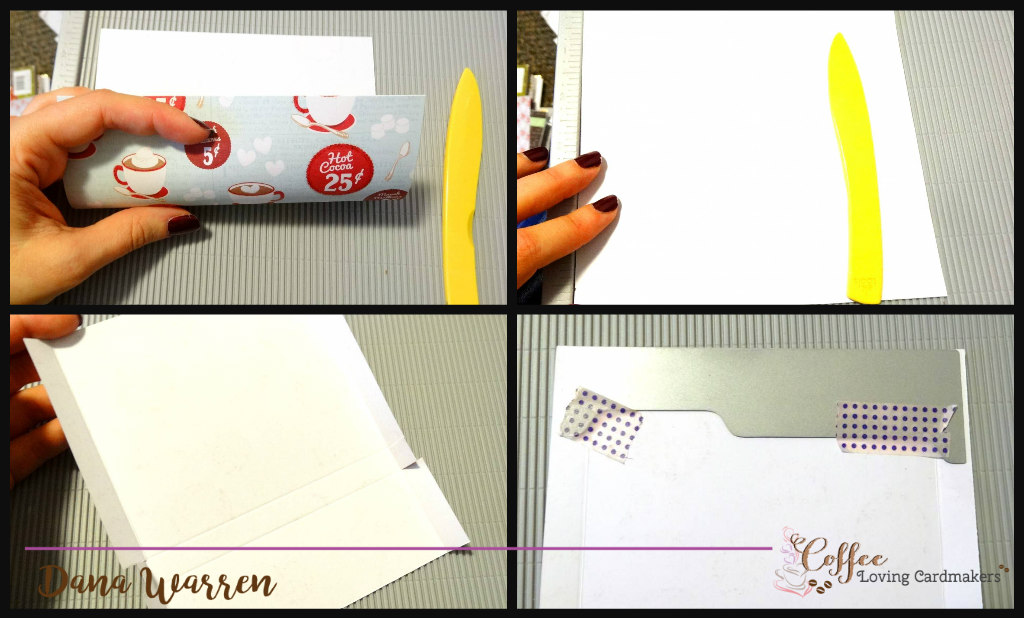
Since I didn’t use double sided paper and didn’t want to see white for the back of the pocket I added an insert, measuring between the score lines and trimming off the extra around my tab.
Then it was a matter of gluing the side tab, first the smallest one to the front pocket side tab. Then the longer backside tab, repeat for the other side. Once dry trim off that longer tab so the front pocket is the same height at the sides. The 4th photo shows the right side trimmed, but the left not trimmed yet.
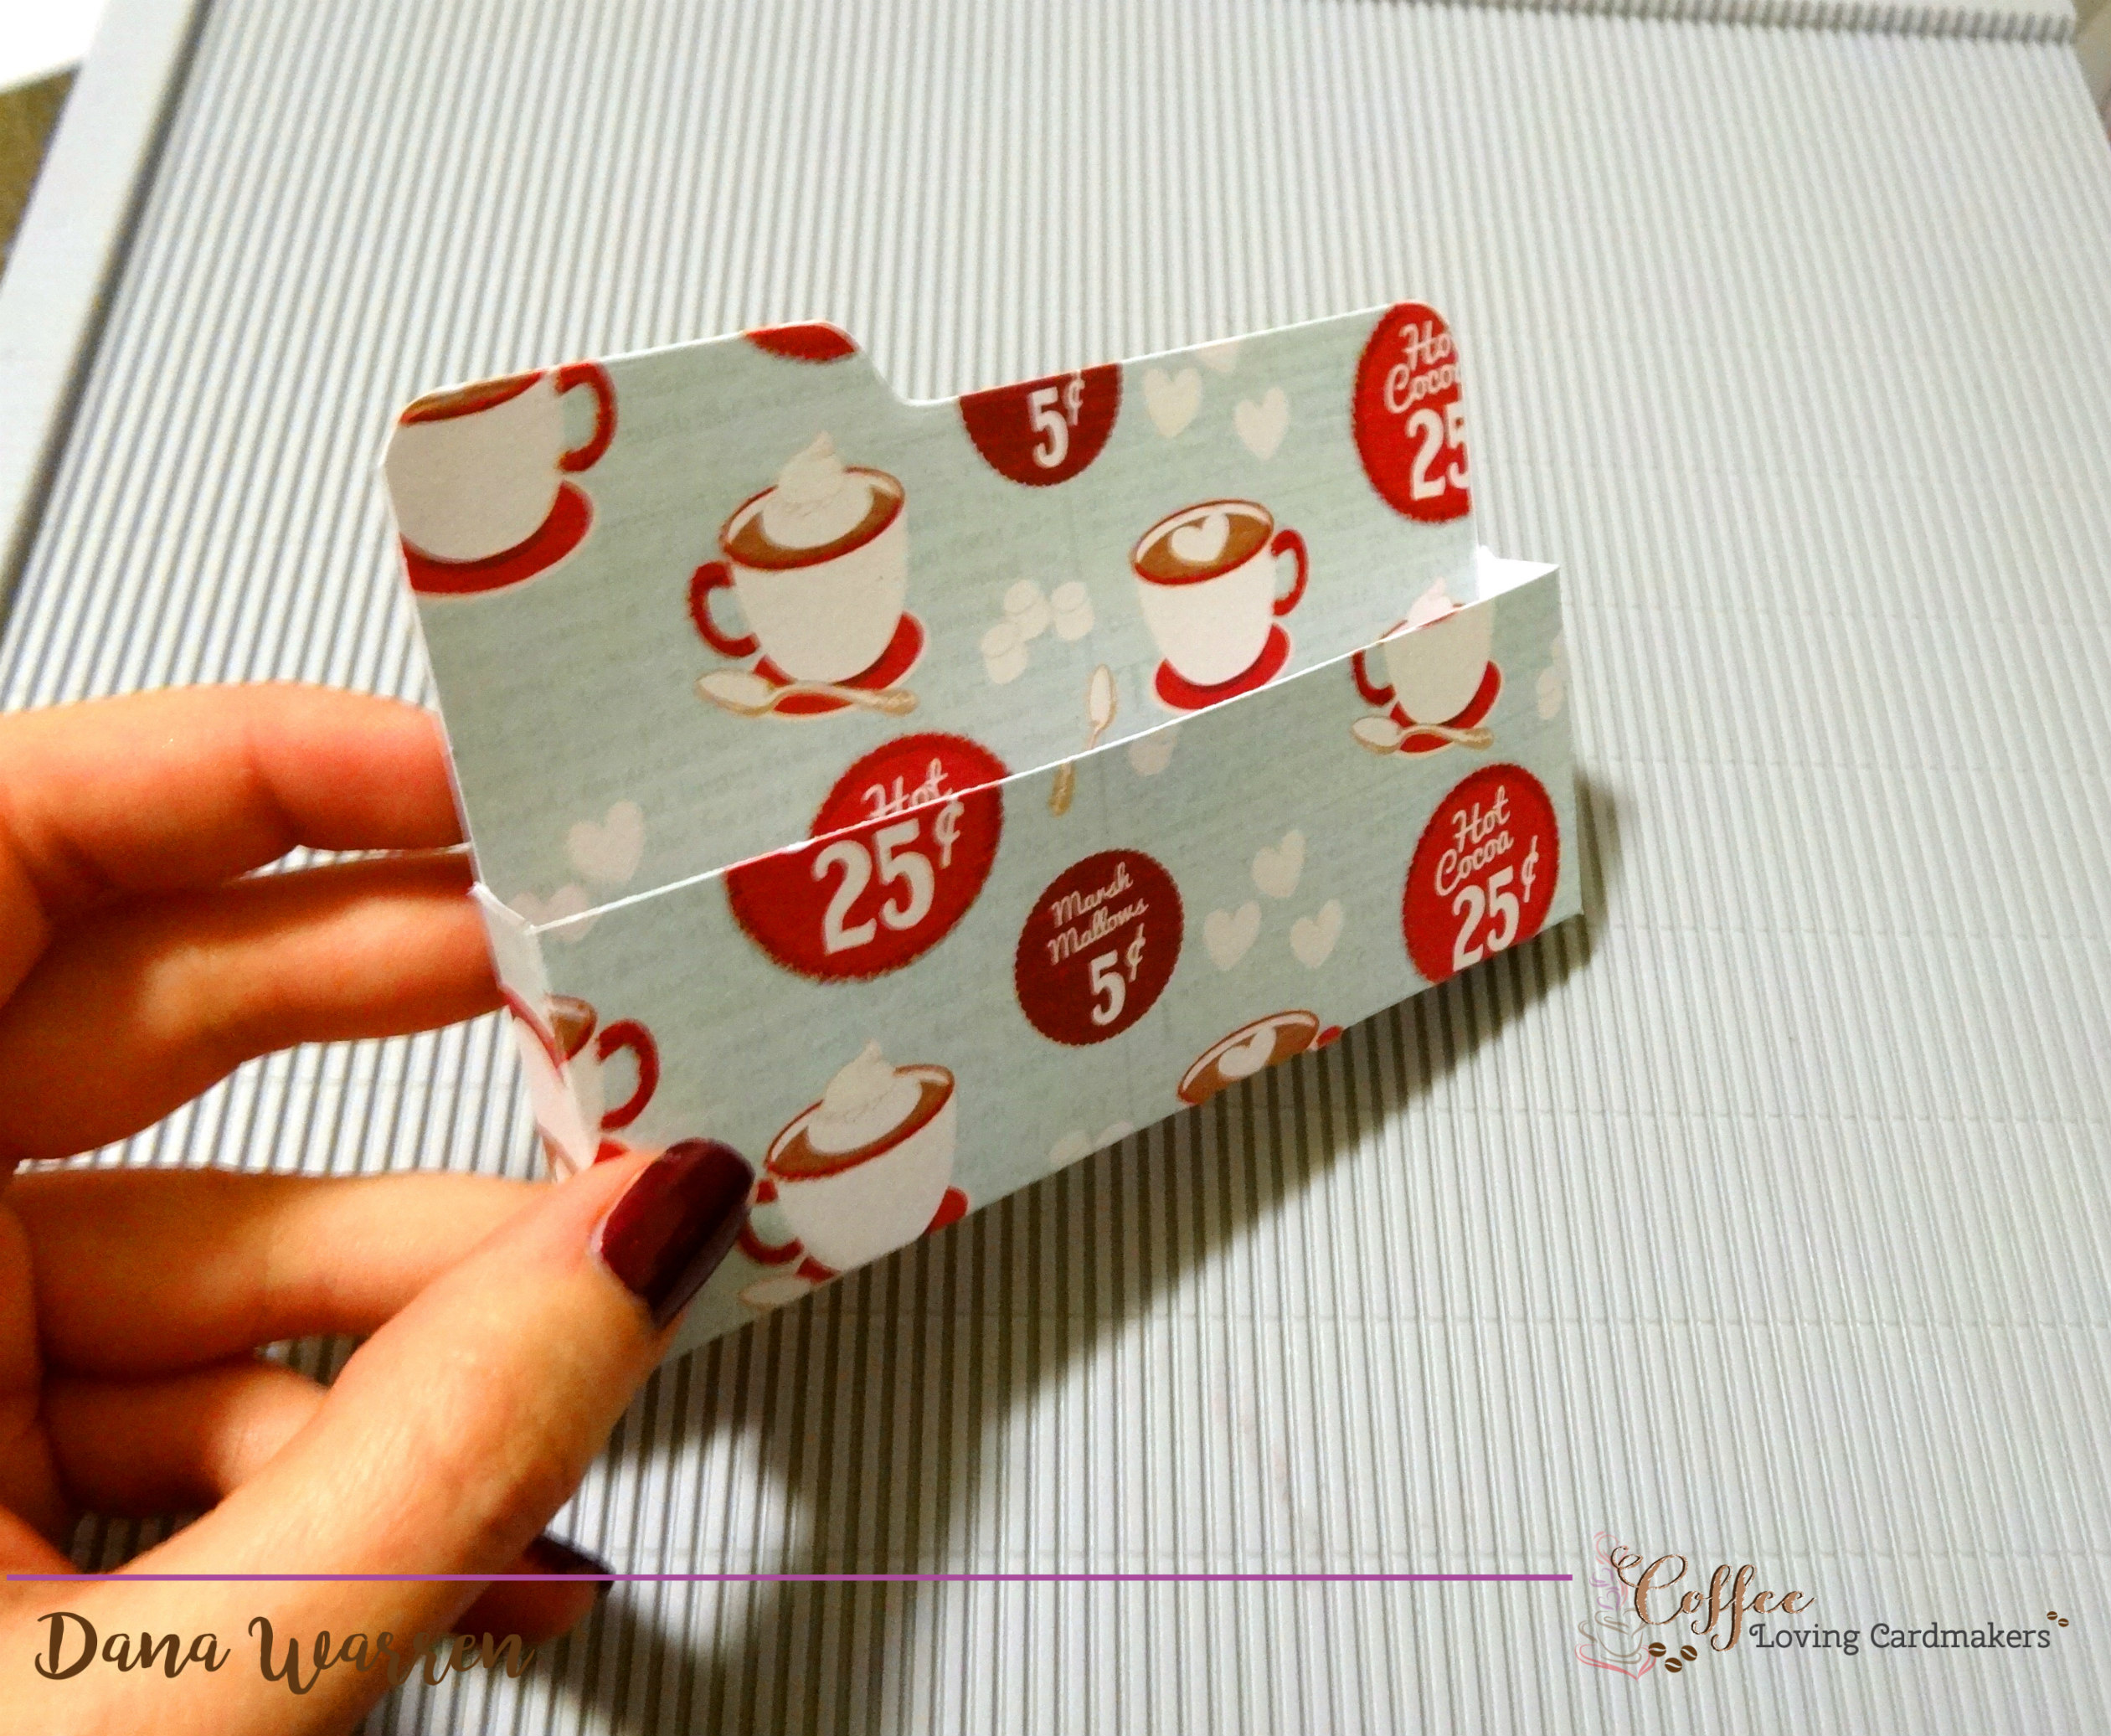
And wa-la here is your little file pocket/treat/gift card holder!! For the heart, I used this tutorial, but again I tried it out first with plain copy paper, too big. Cut it in half, too small. Sized it down about 1/4, just perfect! I started with 6 3/8 x 8 1/4 red cardstock. And I now see why origami paper is so thin!! I even tucked in under a huge pile of textbooks and it’s still a bit thick, but the size is right! You could add a message and your recipient could open to read it, but I had to glue a few things to make the fold stay, so no message for mine!! (just use origami paper!!)

Anywho! I kept the rest pretty simple! I got lucky and won some fabulous stamps from Maple & Ink (they are one of the many sponsors of the Winter hop, too!!!), like last week! I got it fast and I was able to use them this past weekend with my project.
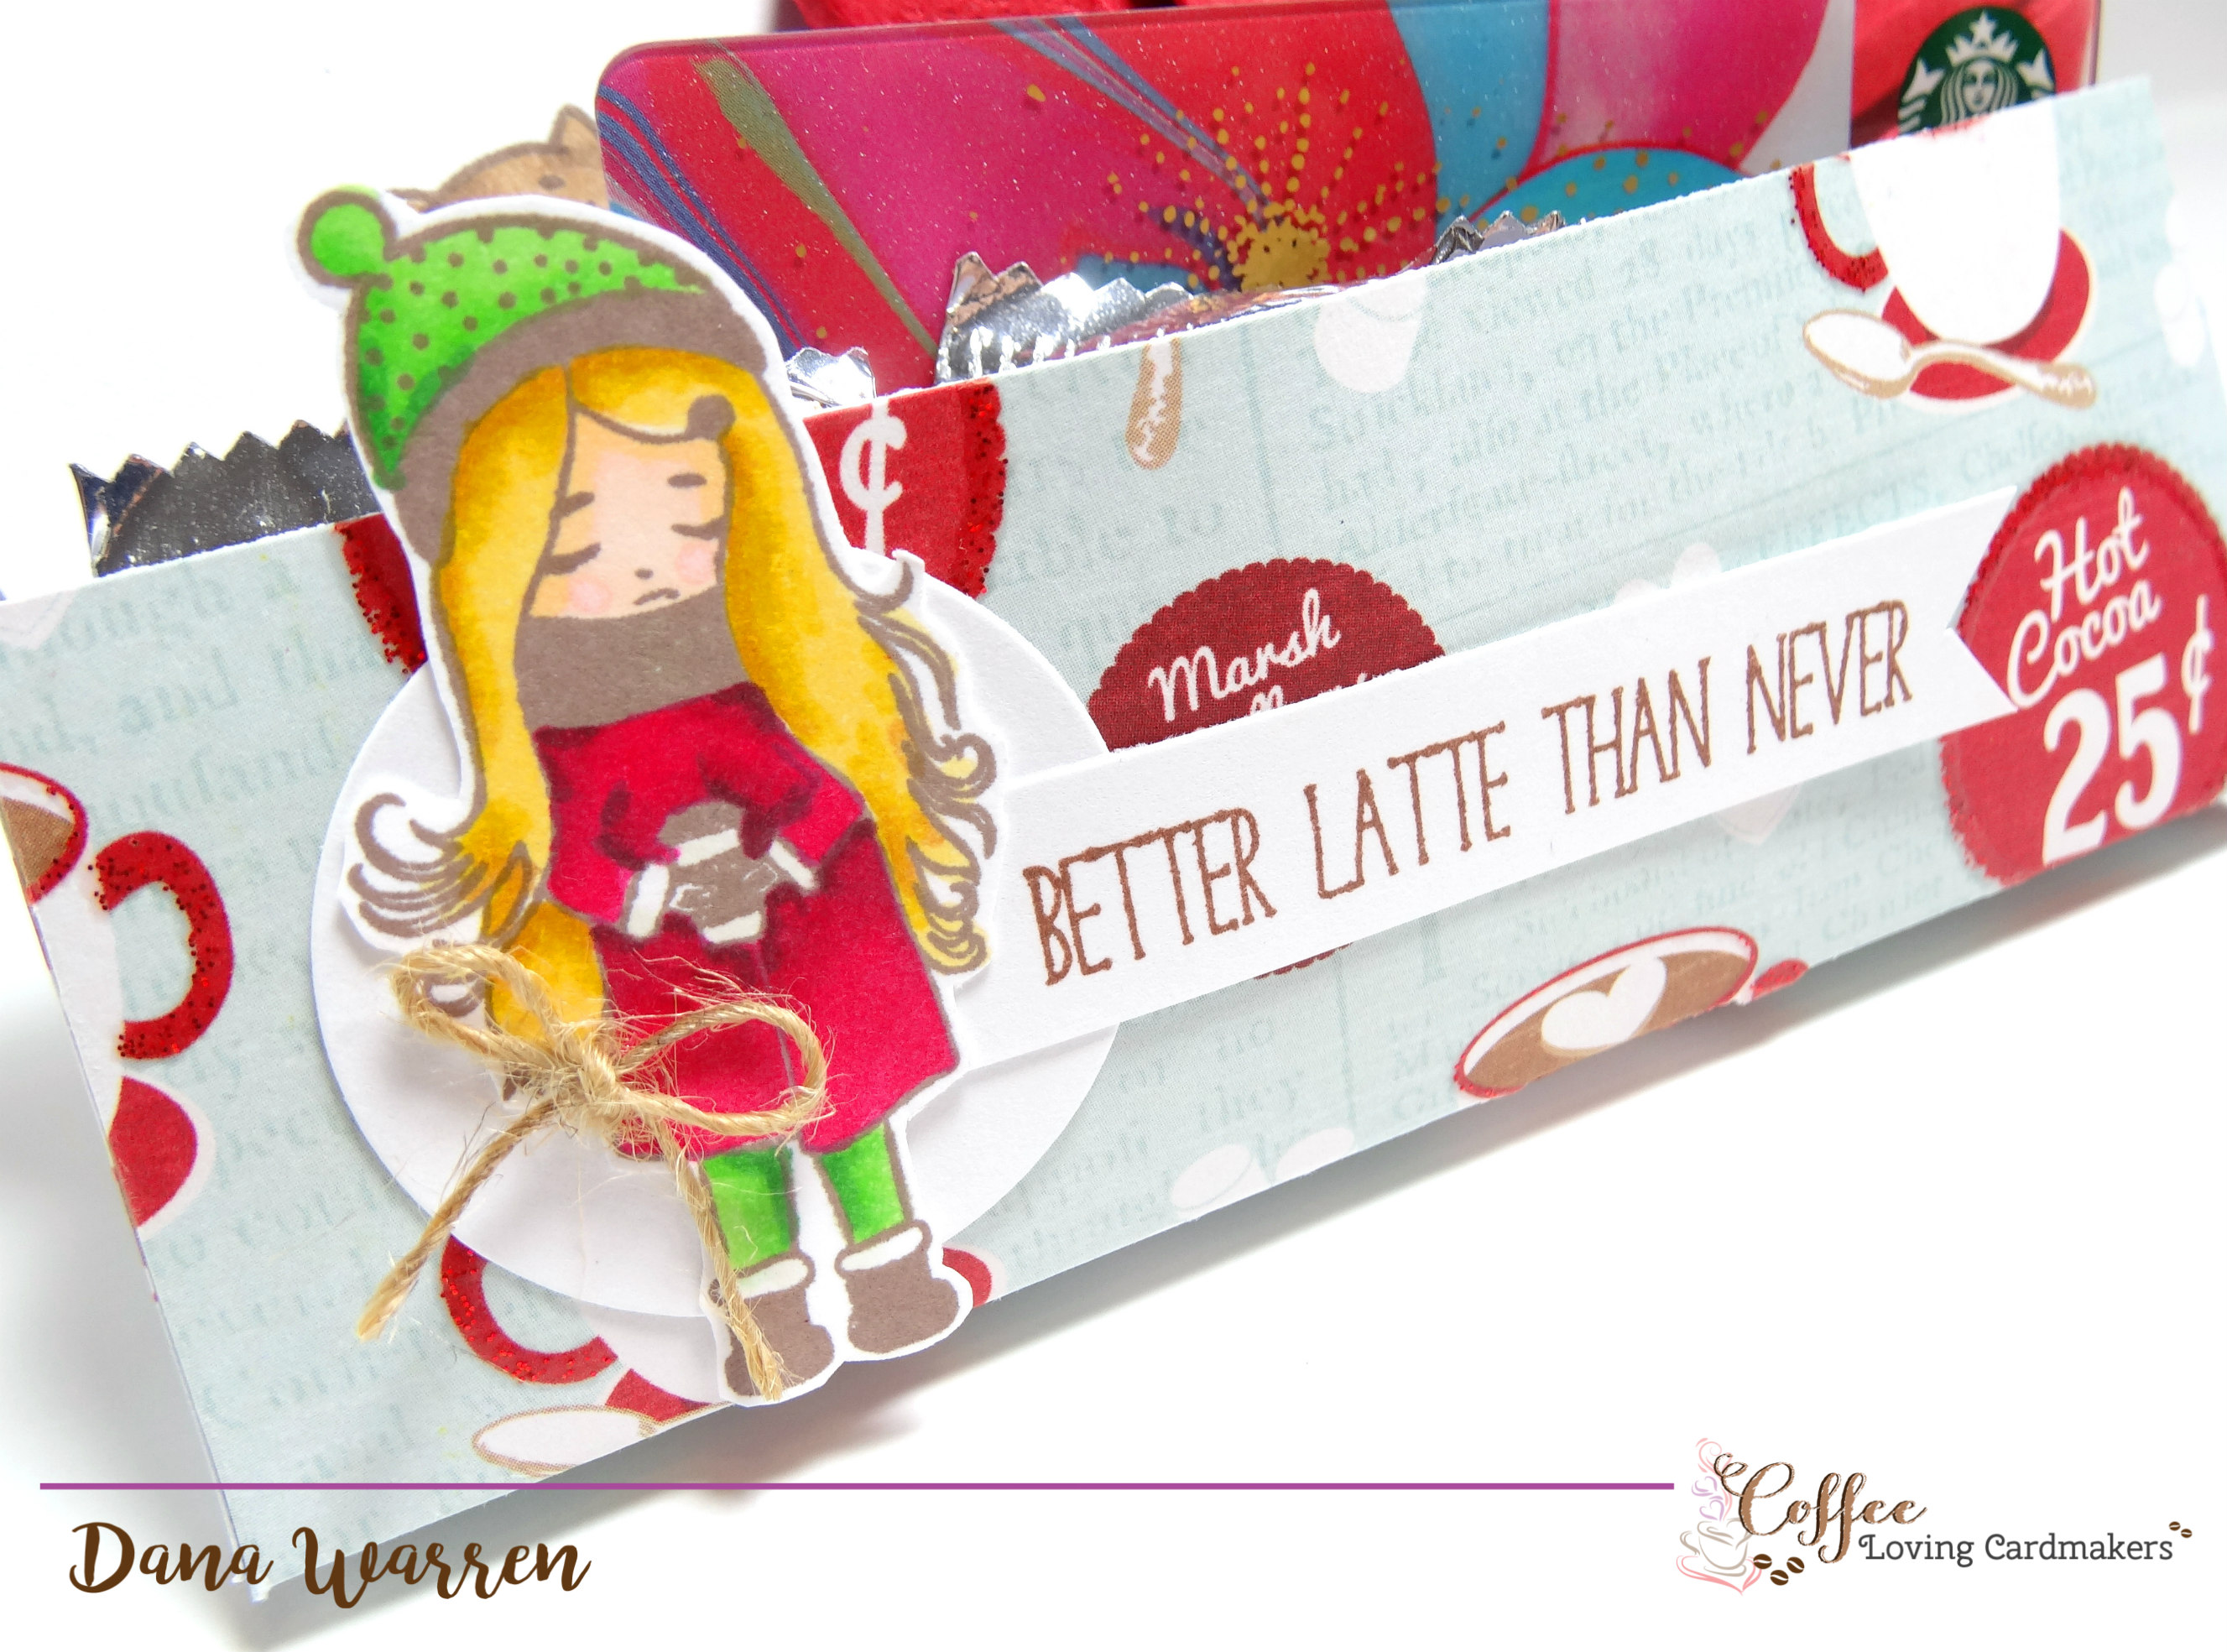
I used Espresso Yourself and stamped the girl and used my Spectrum Noir Markers to color her up. Then I stamped the Latte sentiment and added that too to the front of the pocket.
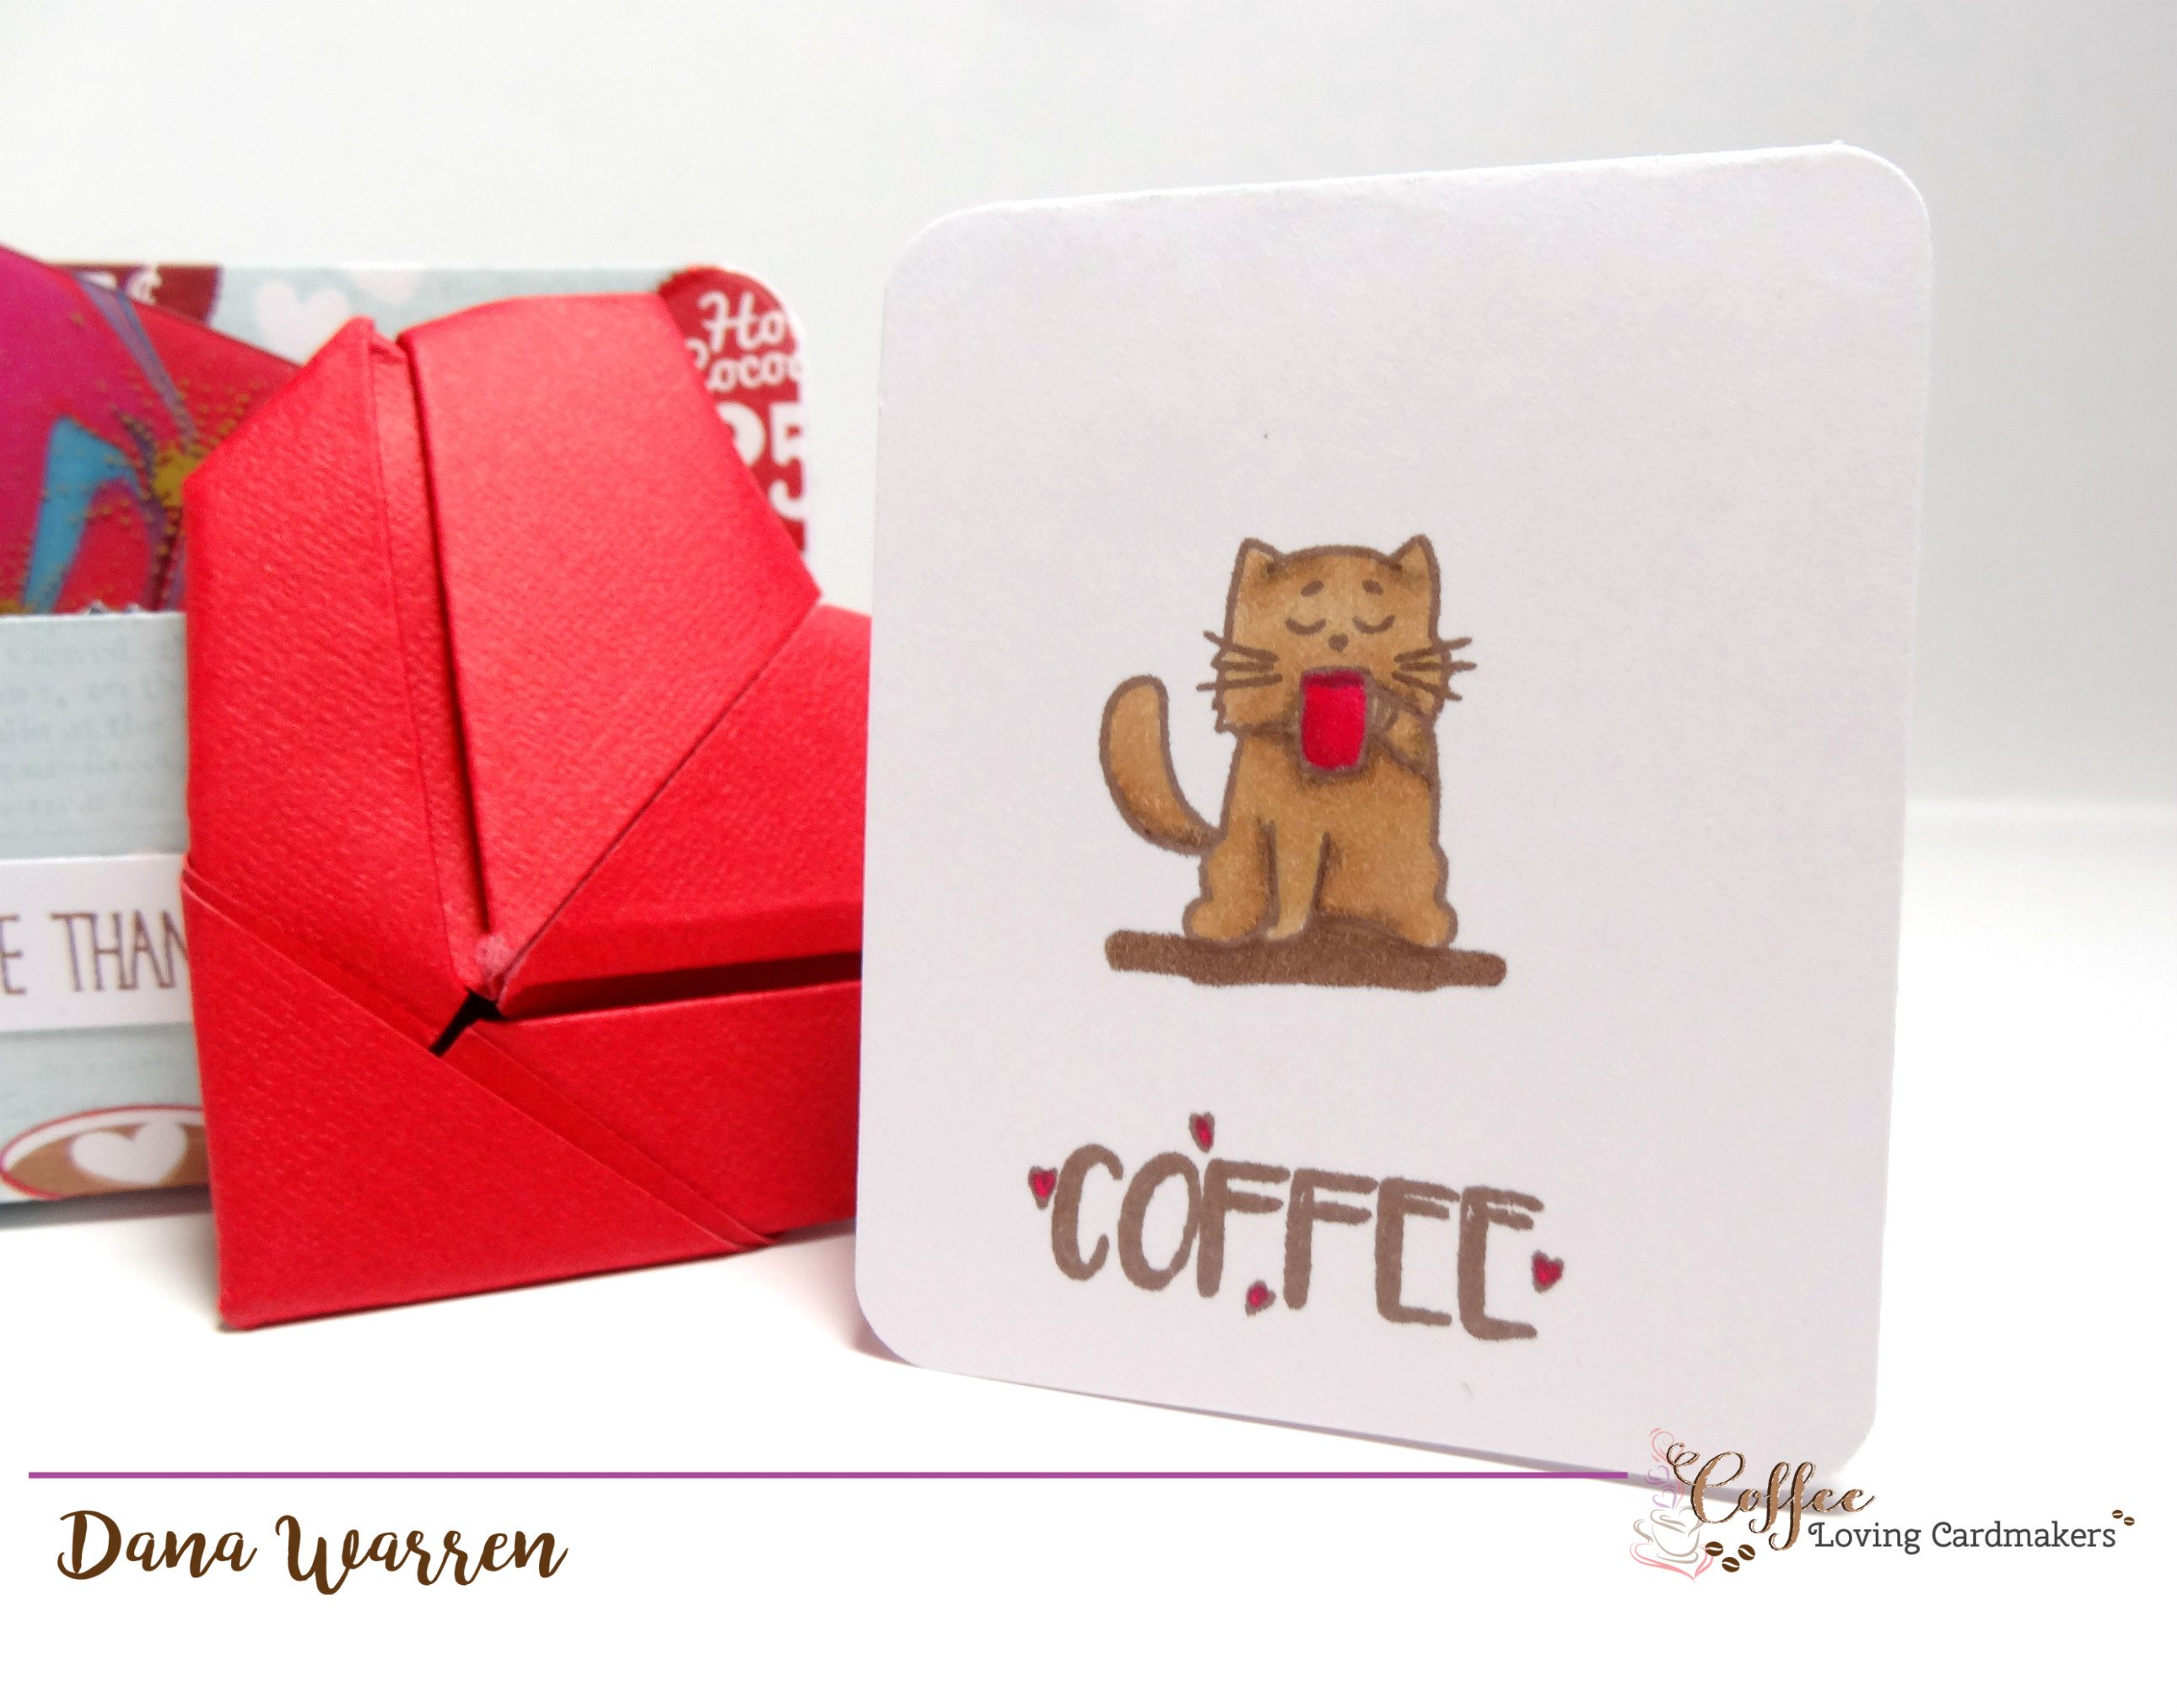
I felt my little pocket need a card so I made a little mini one with the coffee drinking cat!! A little bit of coloring and it’s ready for a quick message!! All my pocket needed was a couple little treats, the gift card and it’s already!!

Thanks so much for stopping by! I hope this inspires you to take another look at paper folding! Make a gift card pock and send someone a heart!! 🙂
Dana
Supplies
Stamps: Maple & Ink – Espresso Yourself
Spectrum Noir Markers: AG1, AG2, AG5, DR4, DR6, DR7, FS4, FS6, FS9, GY1, GY4, GY5, MB1, MB3, MB4, RB3, TN2
Pattern paper: DCWV – Home For Christmas


Leave a reply to Fikreta Cancel reply