Hello!
Dana here with a new installment of Brew & Craft Your Stash!! Grab your coffee or tea and read on for some great ideas for some Textured Perfection! If this is the first time you are seeing my feature or need a refresher, click here for my first post, it gives a little background explanation on my feature!!!

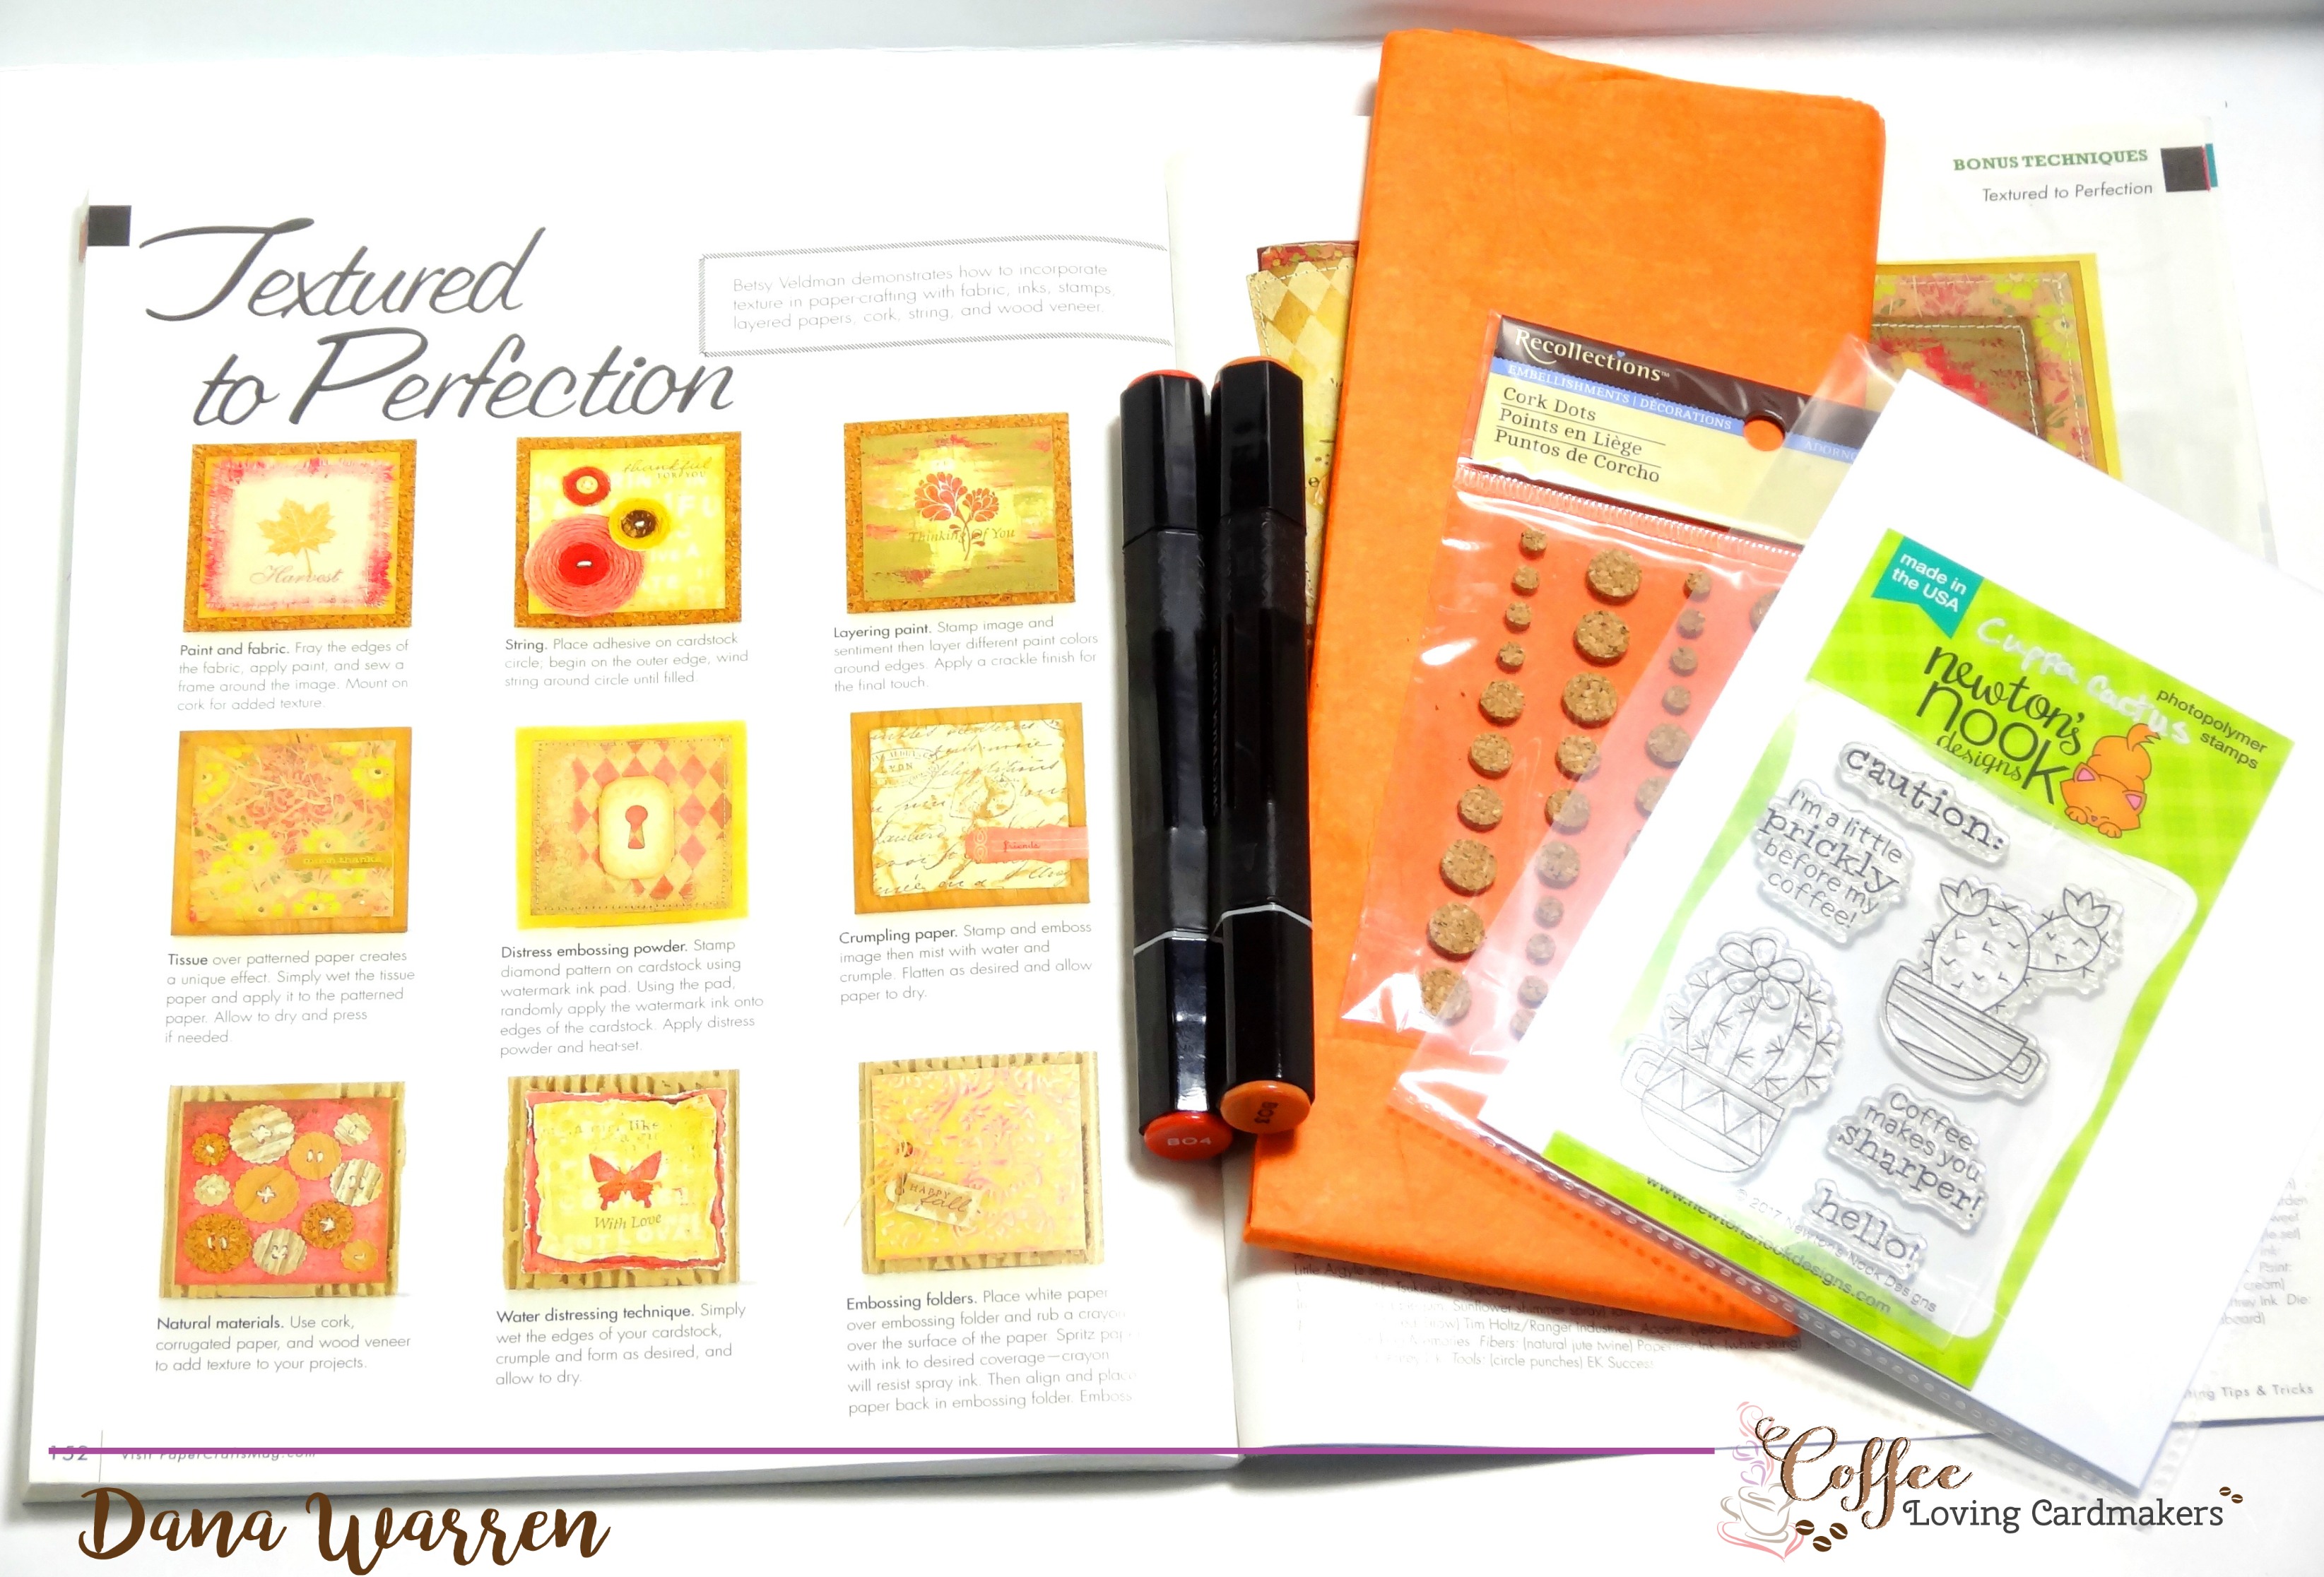
We are moving to the Bonus Techniques section and to the Textured to Perfection feature. Texture can add some great interest to your card, flat or 3D it can only enhance your card!! The amazing Betsy Veldman has many ideas for adding texture to your card!
- Paint or ink some frayed fabric
- Create flowers or circles by adhering twine around and around on a circle piece
- Layer paint on pattern paper or stamped image, add a crackle finish for even more texture
- Apply wet tissue to pattern paper and let dry
- Get a distress texture look with embossing powder by stamping with watermark ink, then randomly applying ink directly with ink pad, heat emboss
- Crumple stamped or pattern paper, add some ink, flatten and adhere to card
- Use natural materials like corrugated paper, cork, wood etc.
- Distress paper edges, crumple, and bend before adding to card
- Use an embossing folder to ink and then use sand paper and more ink to distress
So after thinking about what kind of texture I wanted to do for my card, it finally came to me….. in the shower!! That’s where all the great ideas happen, right?!?!! LOL!! Anyway, the Lifetime tv channel has most past seasons of Project Runway, it starts in season 6 I think. I’ve been working my way toward the most recent season and so far I’m on season 10. There is a particular designer that does this really cool shredding technique that I tried to copy with paper instead of fabric!
Of course, I tried it out on a little piece of scrap paper before giving it a go, I got to make sure that it would work and look ok too!! 🙂
So with fabric, the designer cuts two pattern pieces from thin chiffon fabric, layered them on top of each other and then stitches many lines across the stacked piece. Kind of like quilting but straight lines instead of a scrolling and curling. Next, the designer cuts the top fabric in between the stitched lines, then he frays the fabric a little.
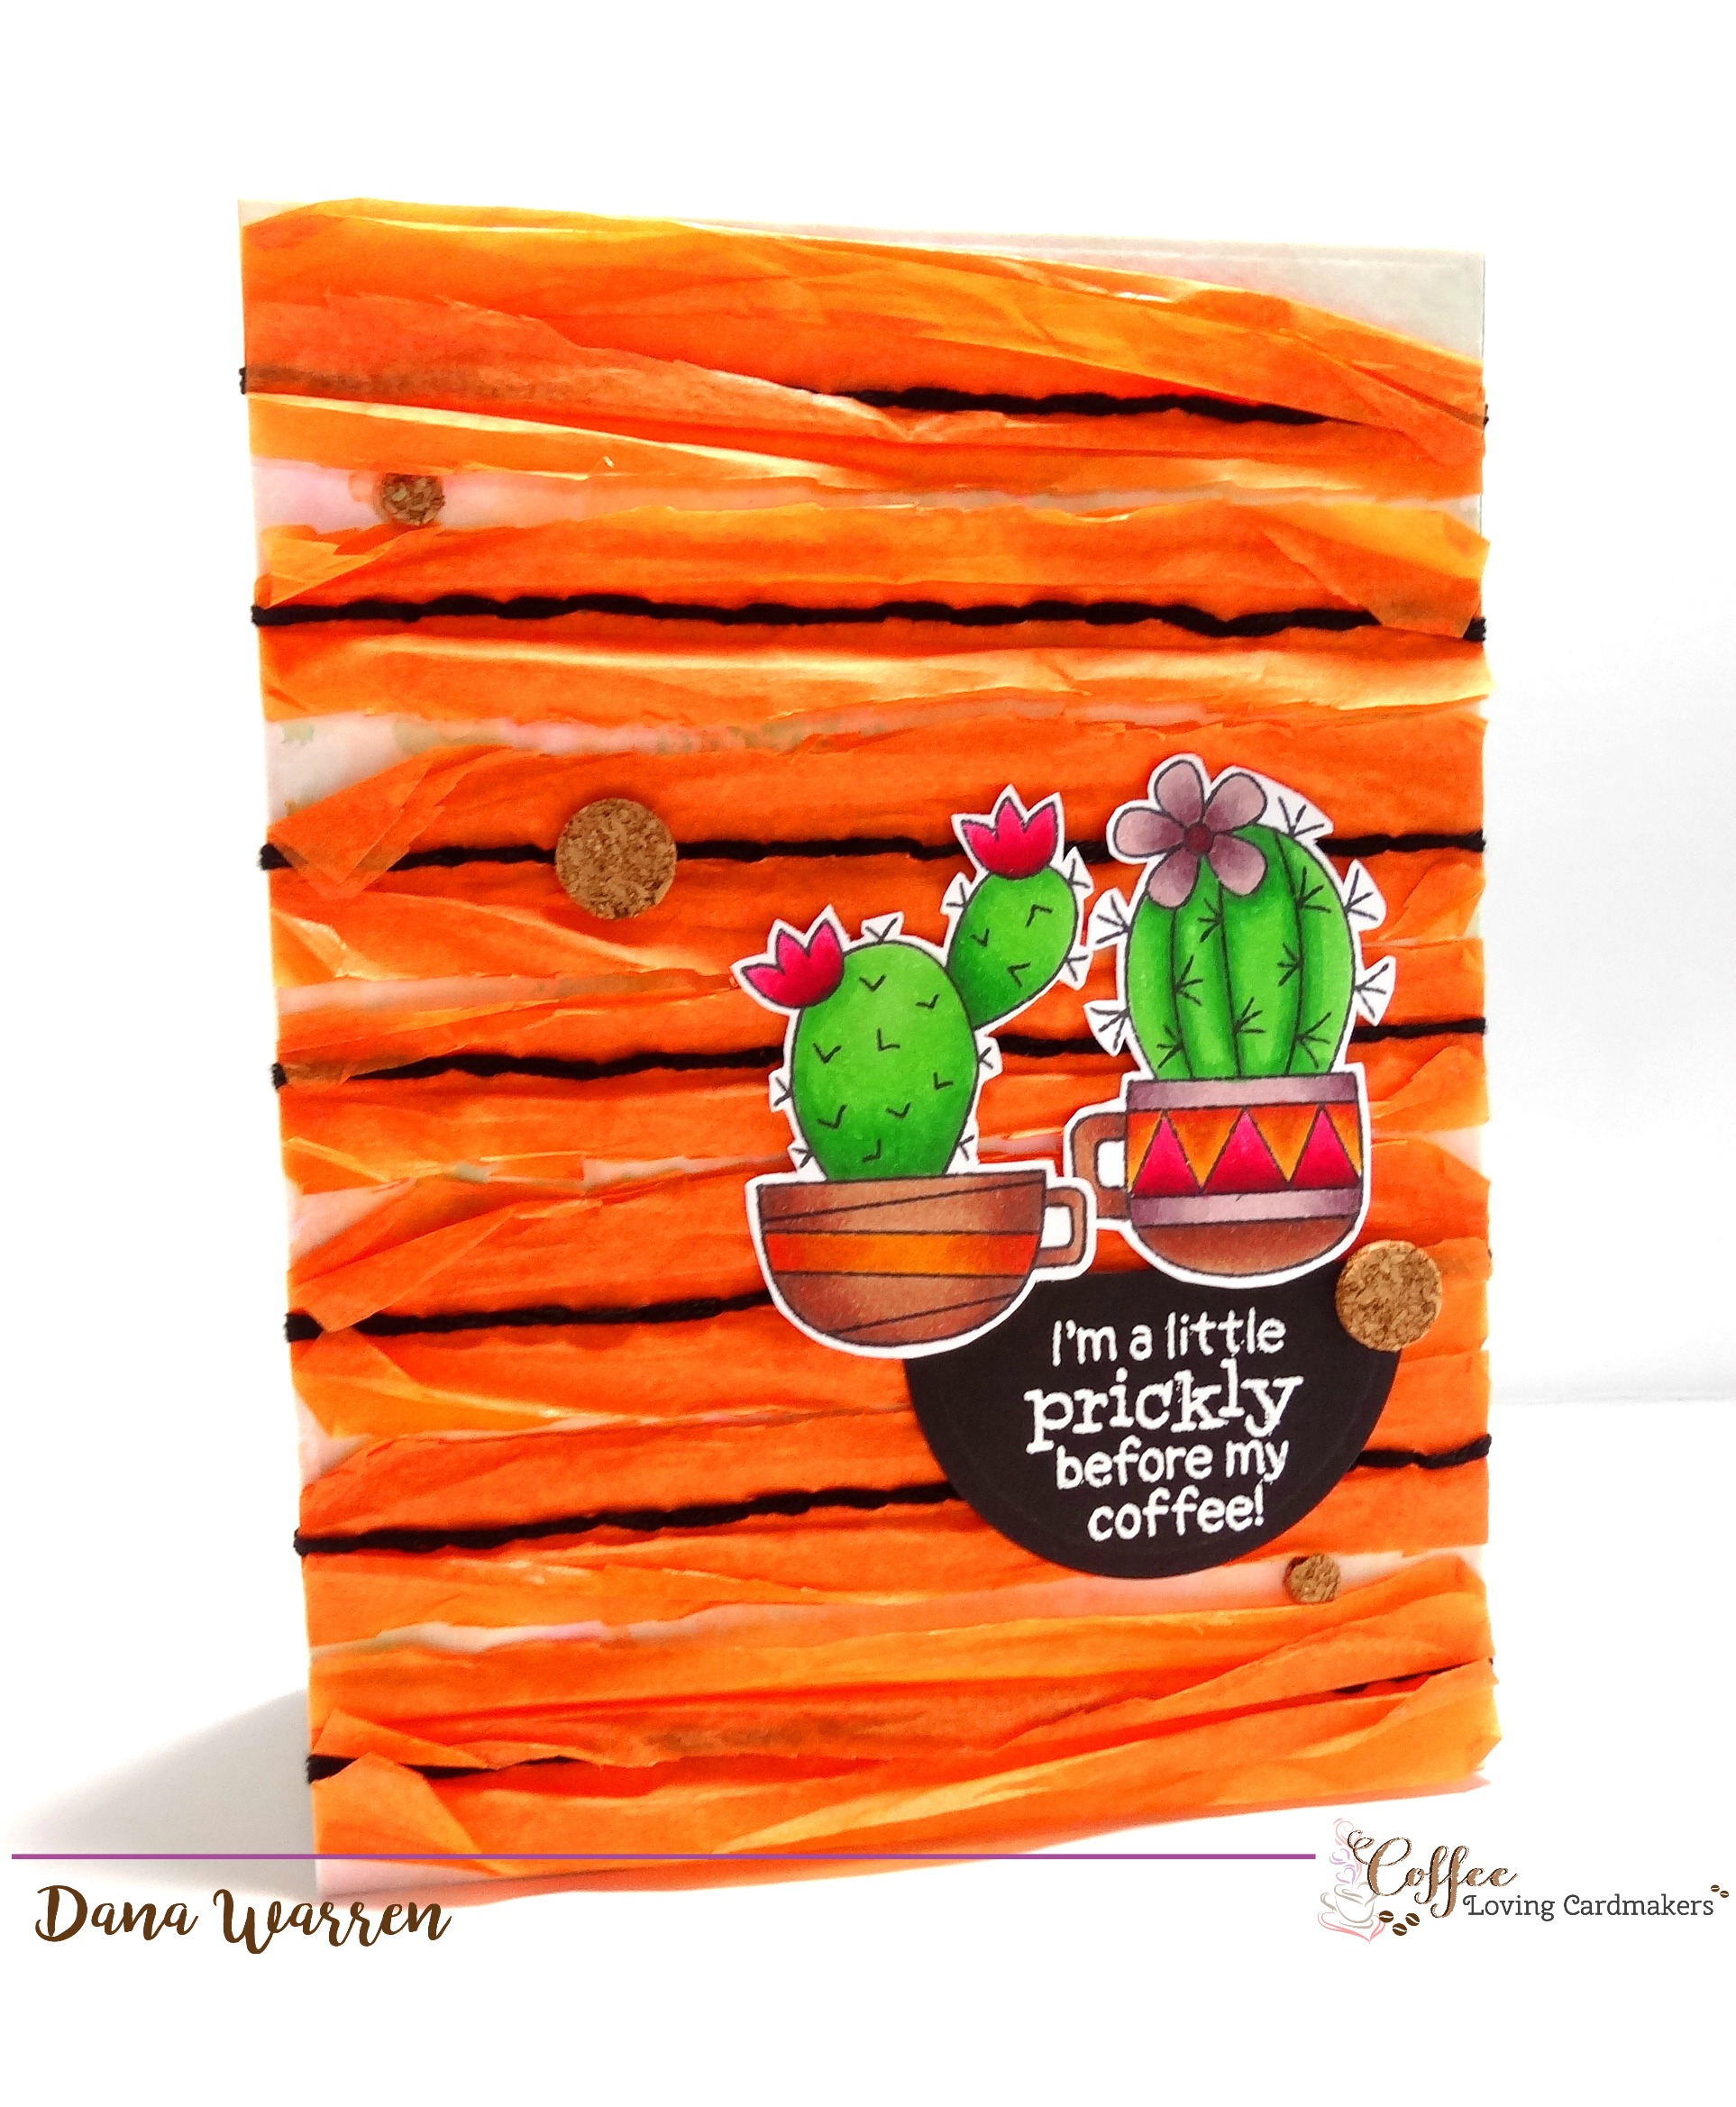
This technique looks really pretty in fabric and I thought if it worked it would add some great texture to a card!! To start I did some water coloring smooshing with a panel of watercolor card stock. In the end, I should have used brighter darker distress markers (or more ink and less water) so you could see the peek of color, but … next time!!!
When my panel was dry I cut two orange tissue rectangles slightly bigger than my panel. If I had a sewing machine I would just stitch many horizontal lines, but I don’t so instead I used just a tiny bit of liquid glue as my lines. I placed a big clear stamping block on top to keep the two layers of tissue paper in place as the glue dried.
Later after the glue was dry I used a Tim Holtz ruler that has holes along the ruler and marked the tissue paper along my glue lines. I used a paper piercer to punch holes at each mark. Then I used black stitching floss to stitch my lines. When that was done, I cut both tissue paper layers in between the stitched lines. Then I roughed up the tissue paper by curling, crunching and bending the tissue paper to get that nice texture!! And wa-la my take on the fabric shredding technique!!
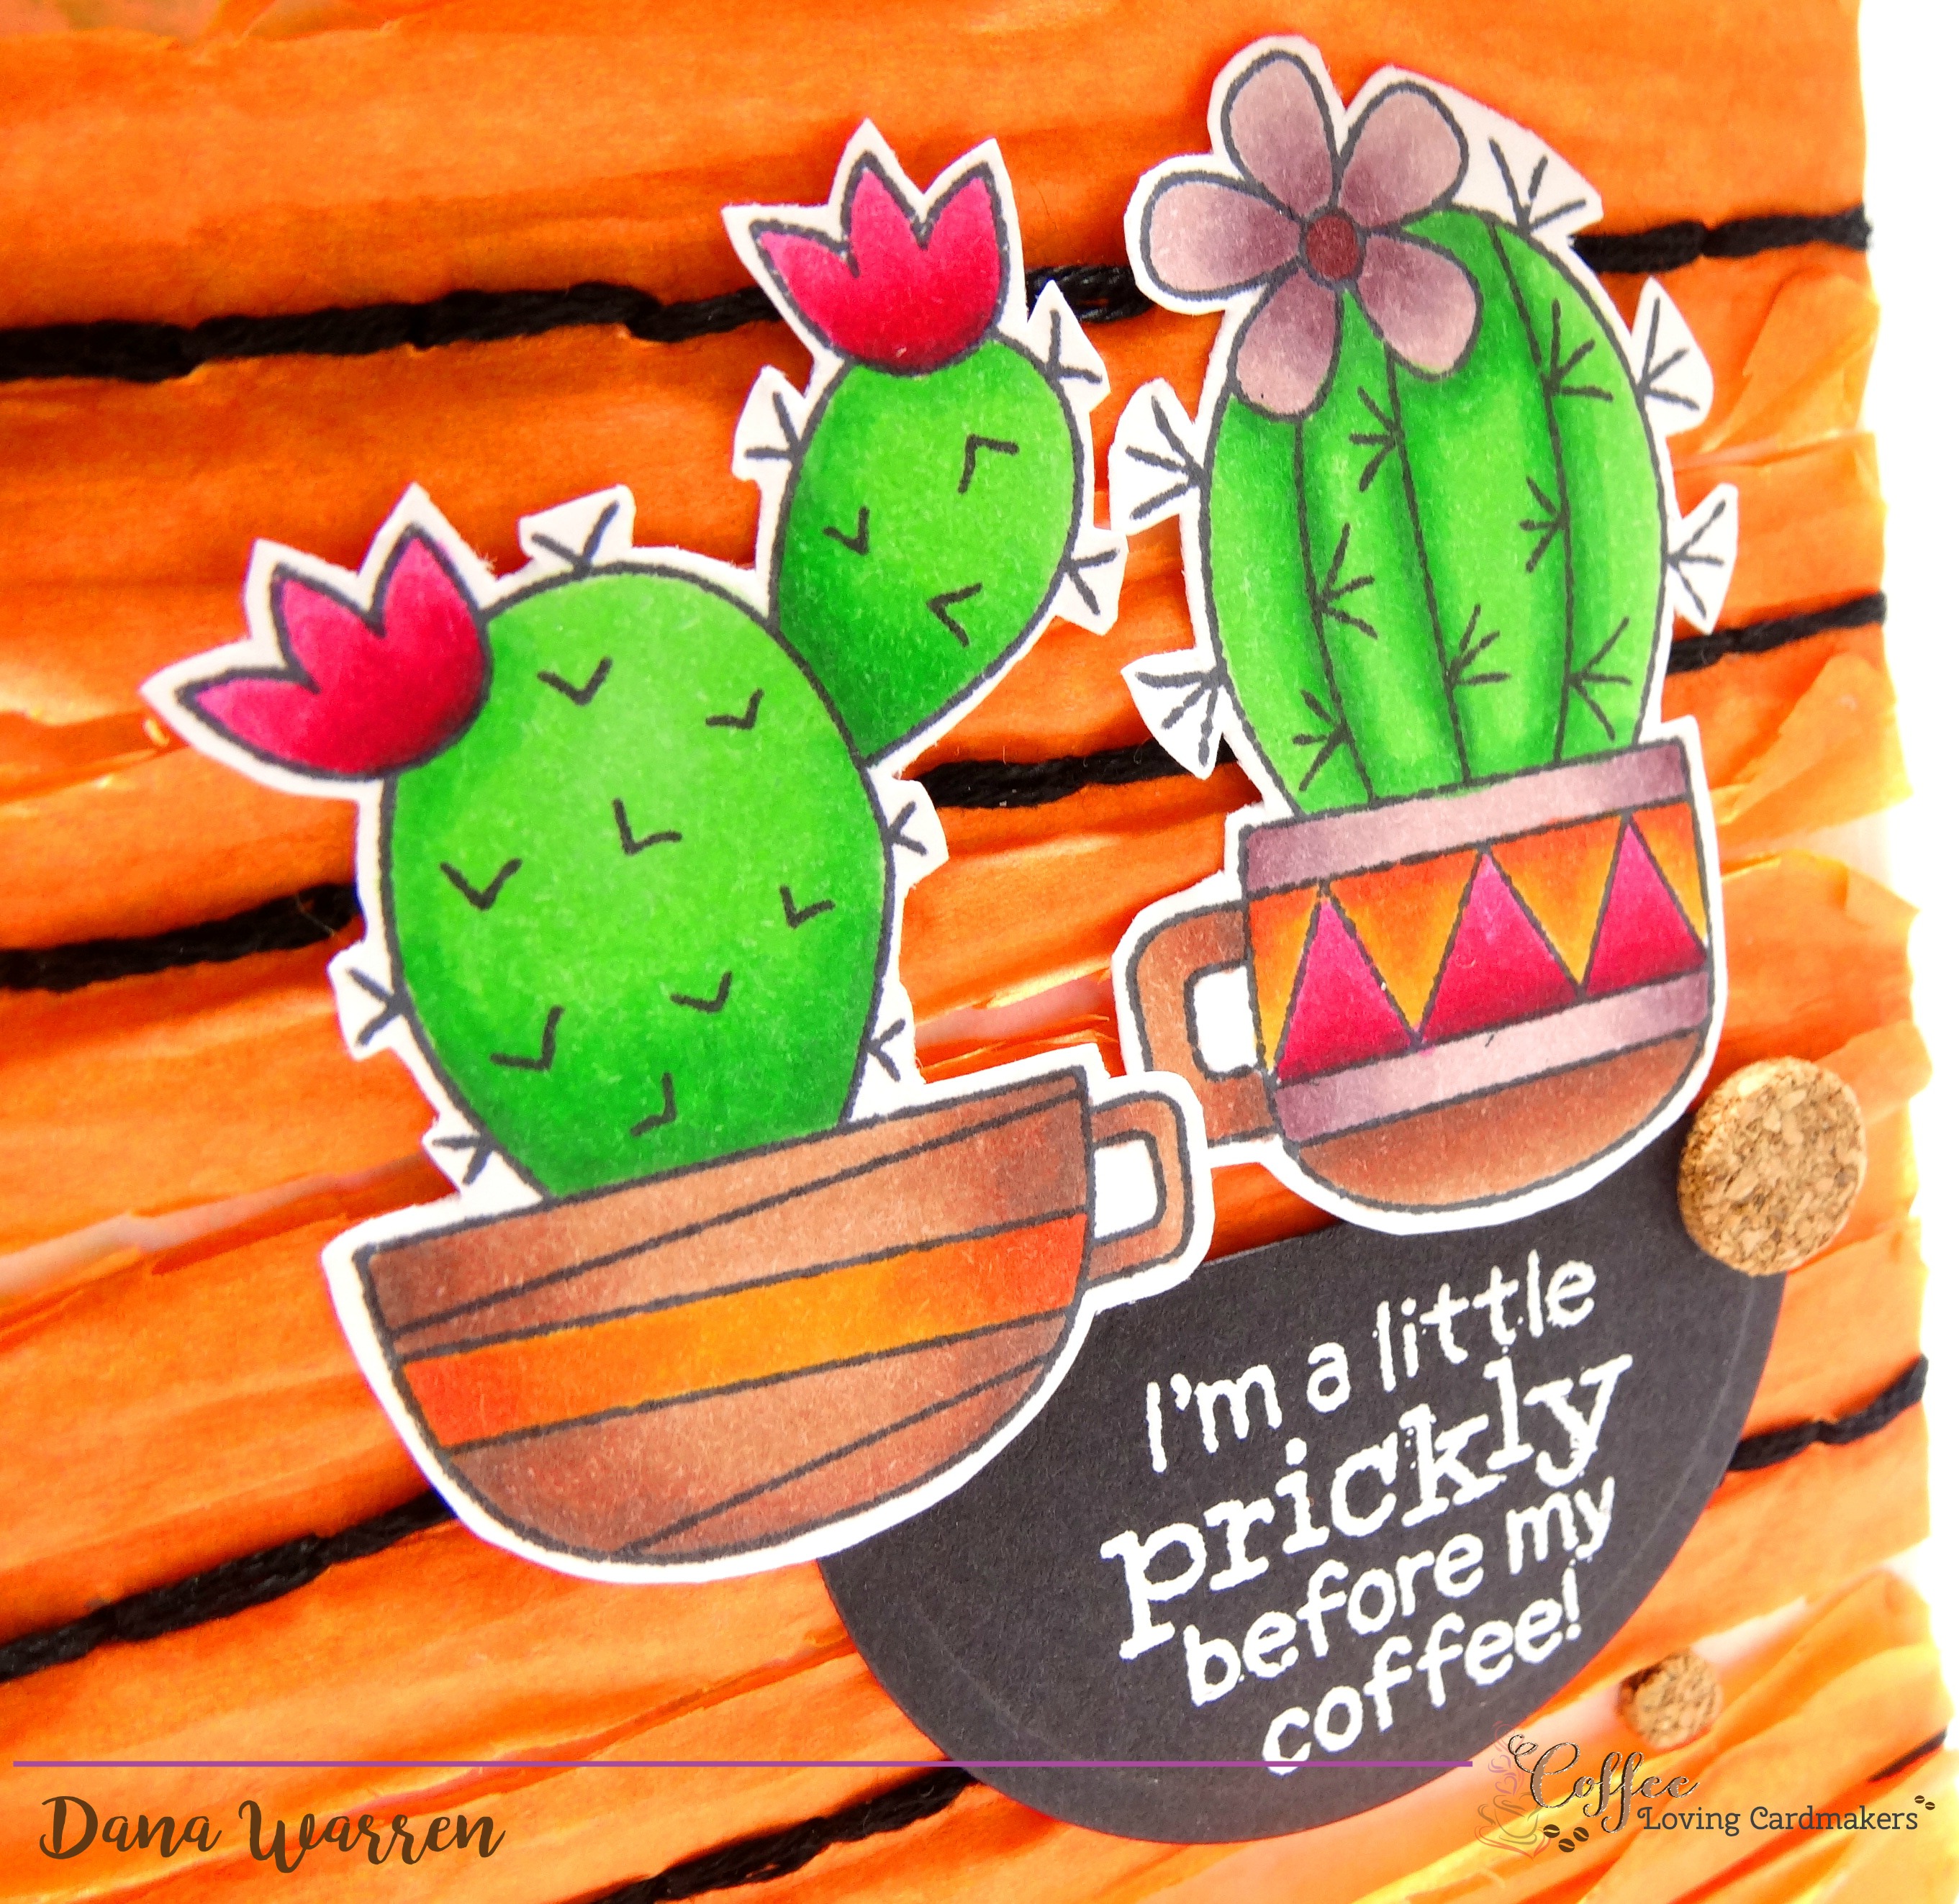
Now that my background is done I pulled out Newton’s Nook Cuppa Cactus and stamped the two images. I colored them with my Spectrum Noir Markers: AG1, AG3, AG5, BO2, BO3, BO4, CG2, DG2, DG3, DP1, DP3, DP4, DR7, MG3, MG5, MG6, PV4, RB1, RB2, RB4. Then I fussy cut out the two images.
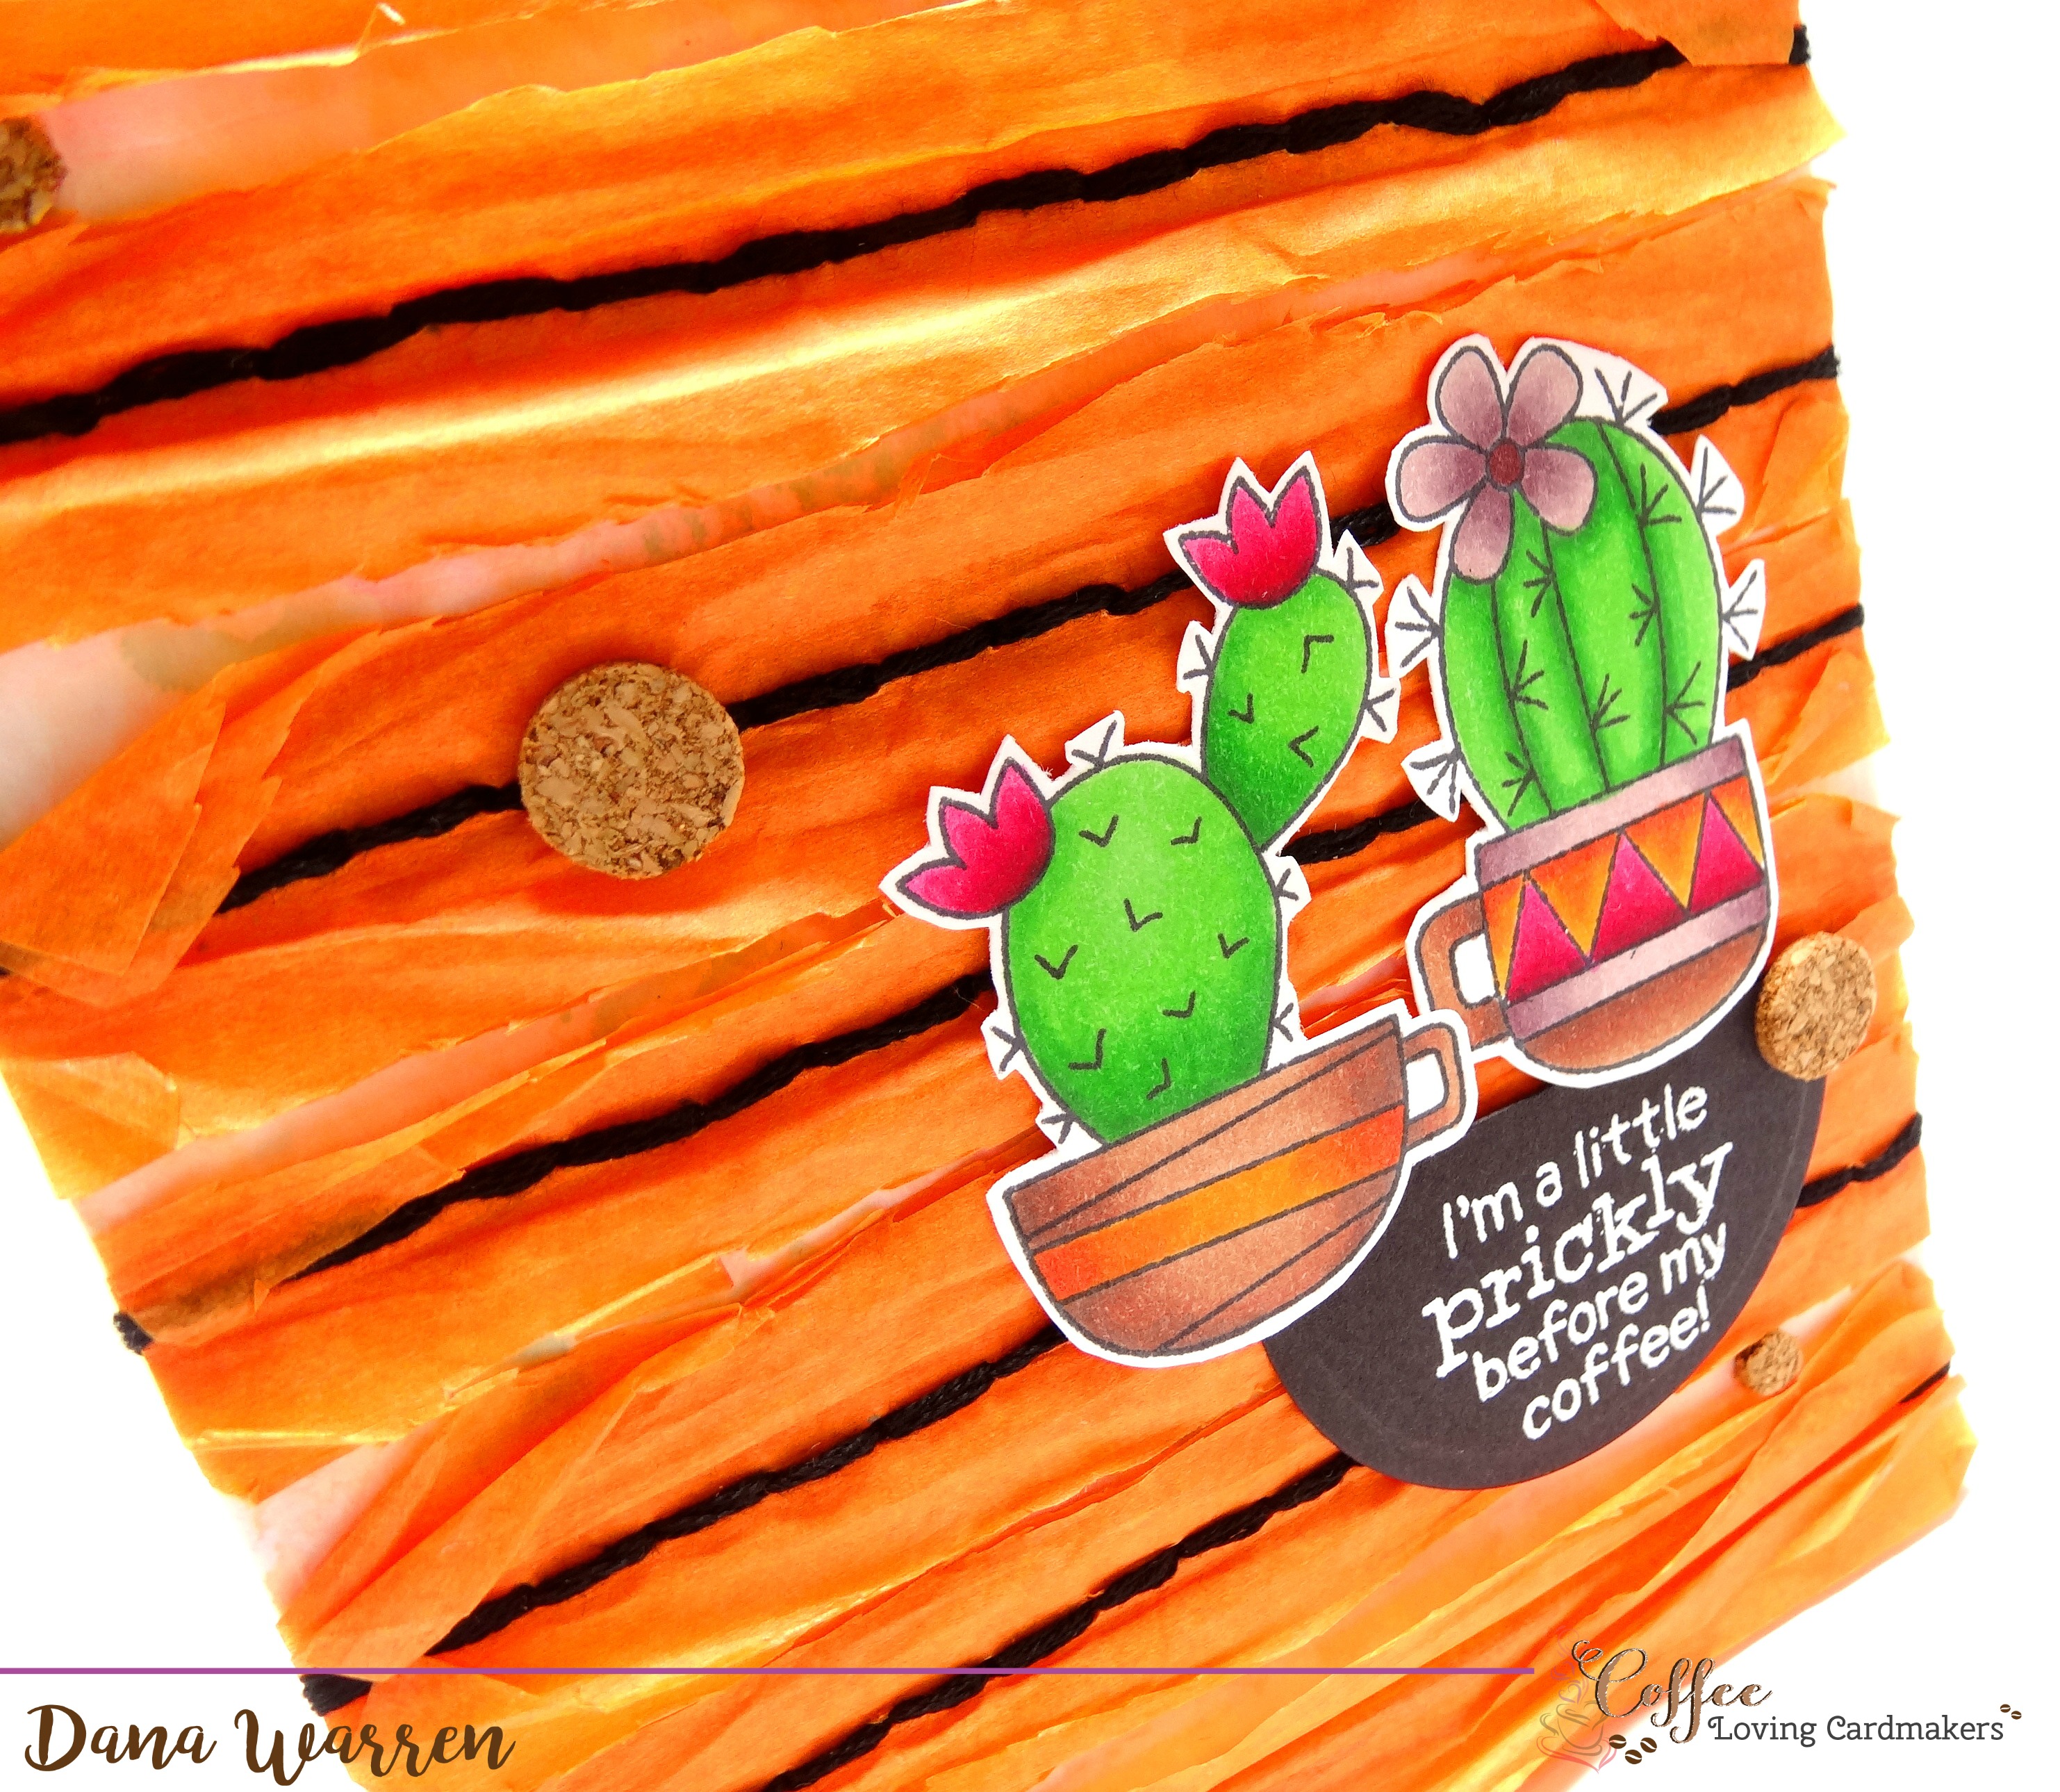
I cut a black circle and then heat and embossed the sentiment on the circle, then trimmed off the top of the circle. I added the circle and cactus cups to the card with adhesive, to make sure they adhered to the tissue paper good I placed a clear block on top of them. The last touch was to add a few cork dots, just a little bit more texture!!!
And there you have it! I hope this encourages you to not only look for texture in interesting areas (like fabric and fashion) but to also use what you have in your stash!!
Thanks for stopping by!!
Dana
Supplies:
Stamps: Newton’s Nook – Cuppa Cactus
Spectrum Noir Markers
Orange tissue paper
Black DMC thread (310)
Cork dots: Reflections
White embossing powder: Hero Arts
Circle Die: Spellbinders
Distress Markers: Picked Raspberry, Carved Pumpkin, Cracked Pistachio


Leave a reply to Renee Drew Cancel reply