Hiya, Coffee & Tea Lovers!!
Dana here with a new installment of Brew & Craft Your Stash!! Grab your coffee or tea and read on for some awesome Heat Embossing ideas!! If this is the first time you are seeing my feature or need a refresher, click here for my first post, it gives a little background explanation on my feature!!

The next section in 2012 Paper Crafting Tips & Tricks magazine is Stamping Techniques and today we are covering Heat Embossing! A staple when it comes to paper crafting, there are a lot of different ways to heat emboss and Sarah J. Moerman has a few ideas!
- Use multiple colors of powders for a tie-dyed look
- Tone-on-tone with clear powder on cardstock
- Stamp your own background and emboss in a contrast color
- Use a mask and watermark ink to get an image, remove mask and heat emboss
- Heat emboss chipboard shapes
- Create multiple layers of heated powder, heat one last tie, and press stamp into it to get a faux wax seal
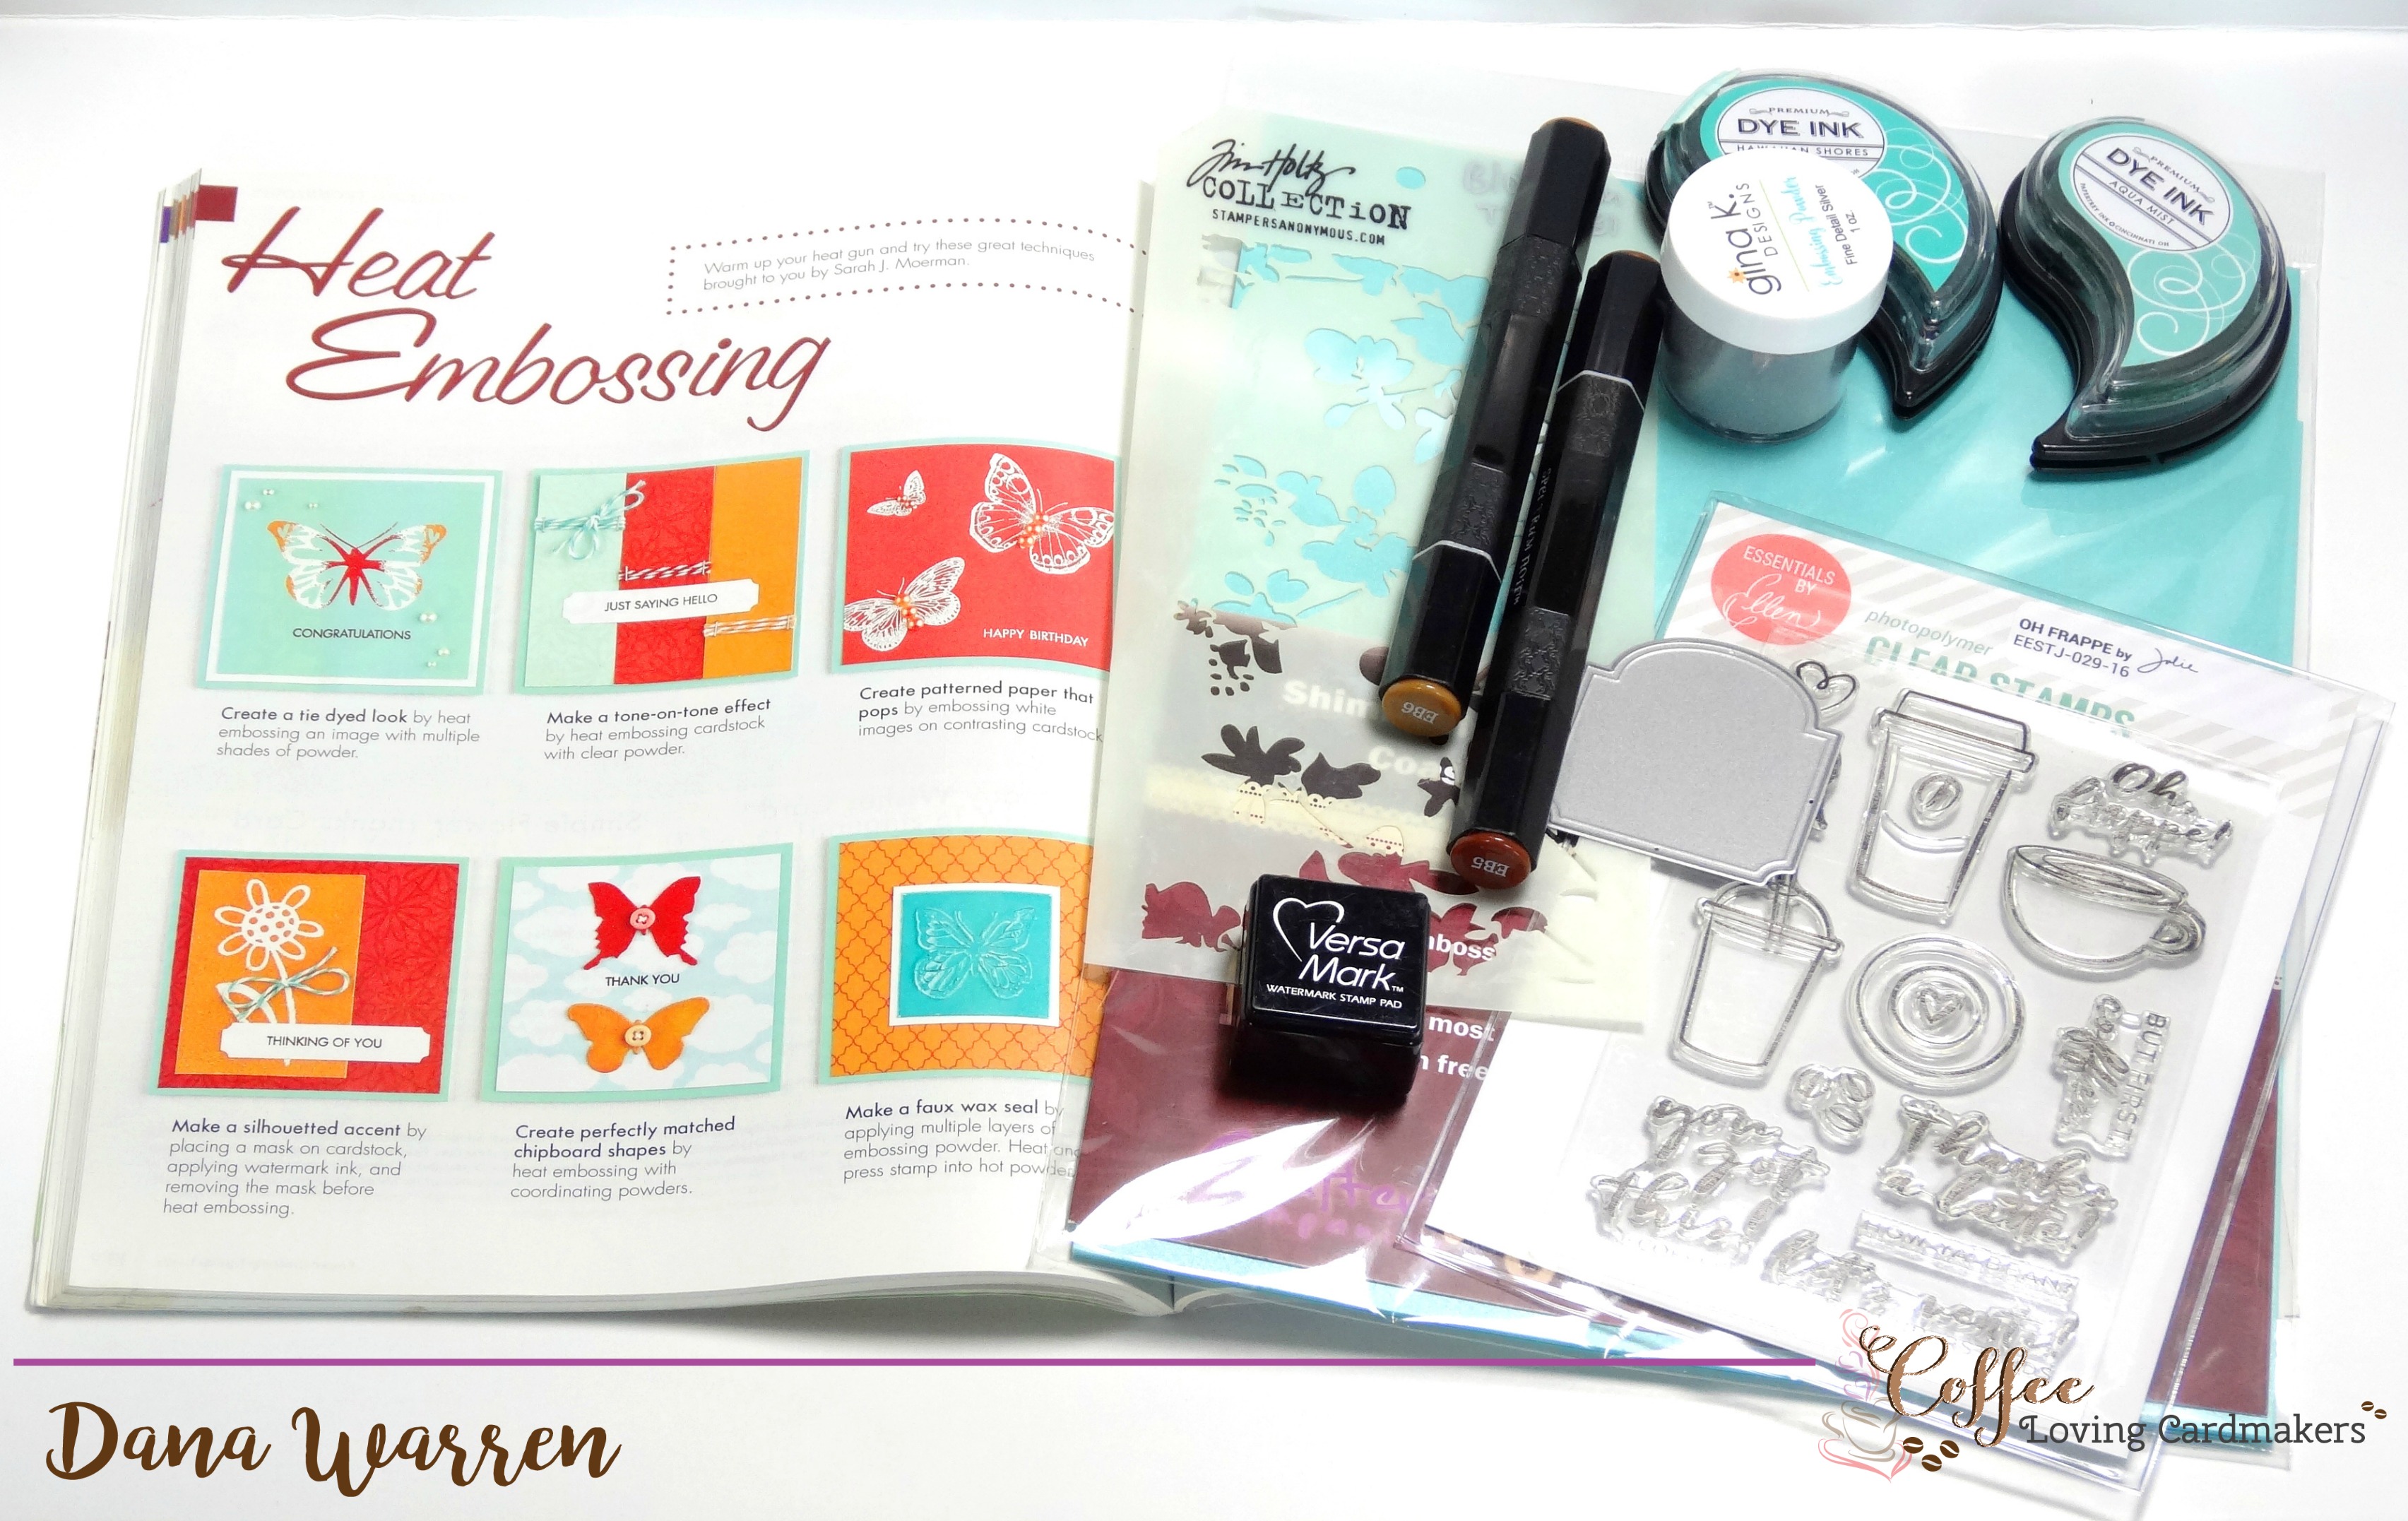
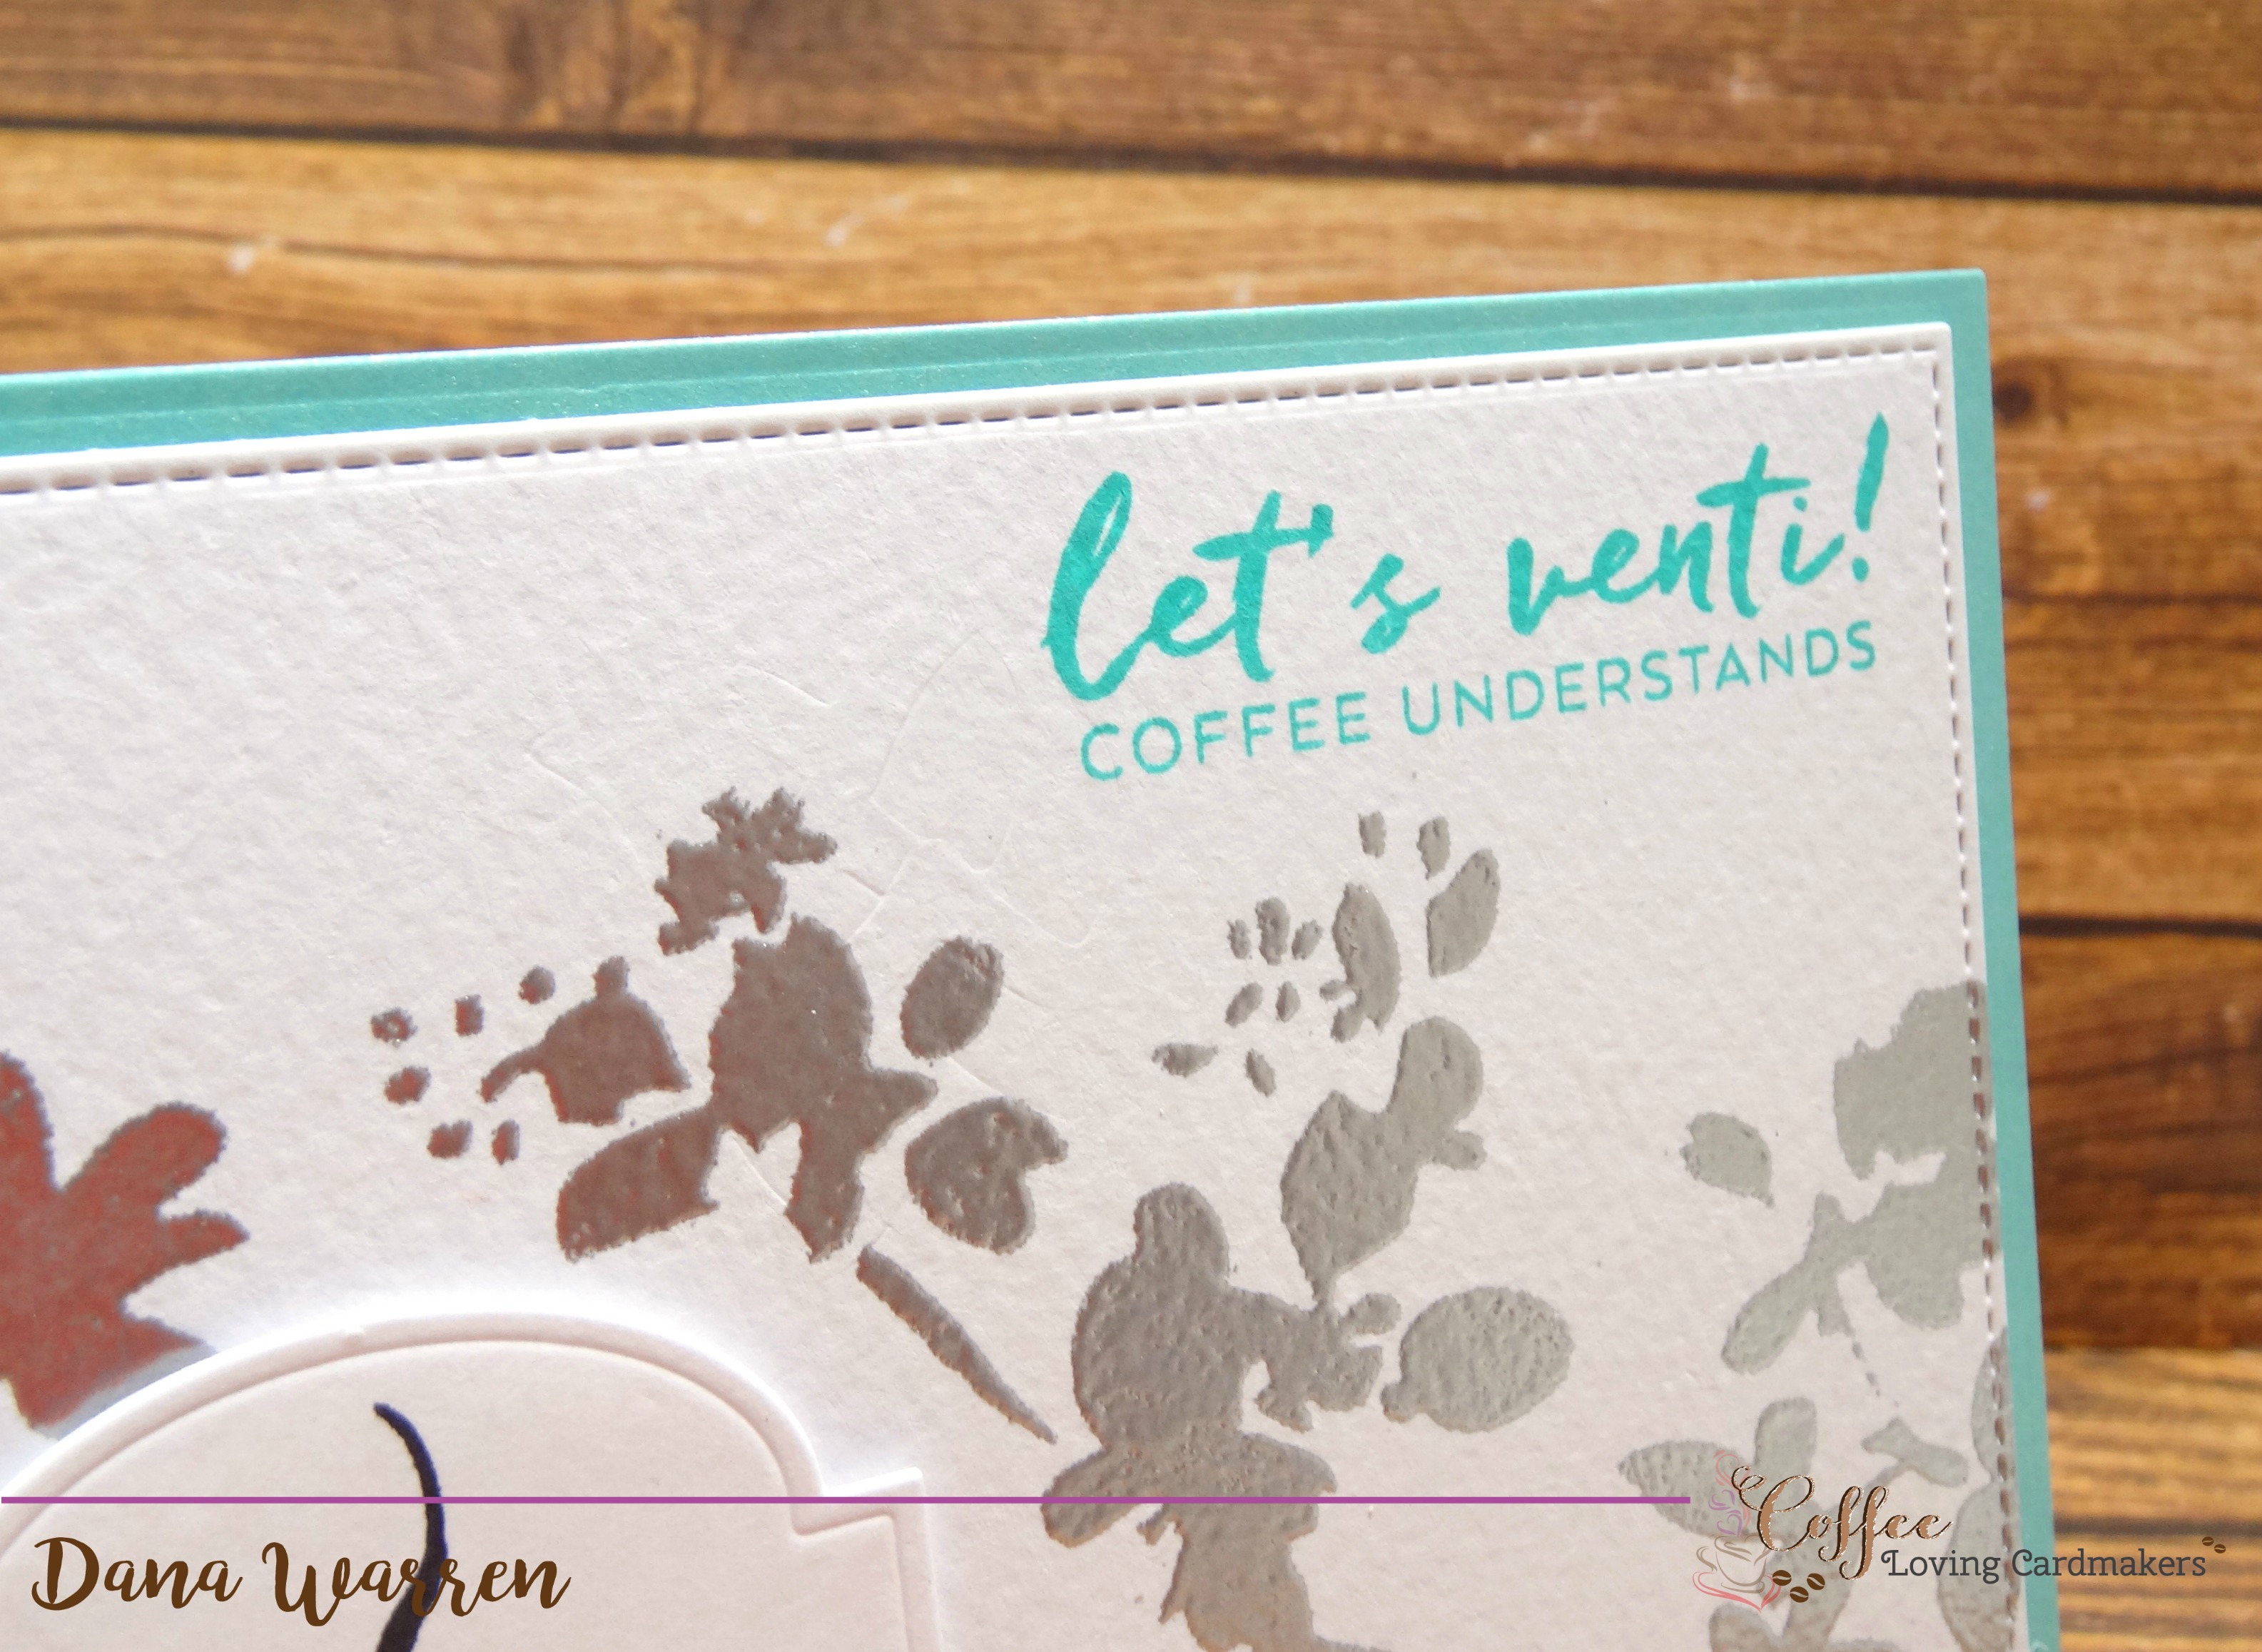
I liked the idea of heat embossing with a mask, so I got to thinking, I have a bunch of stencils which are basically masks…right?!?! LOL!! I started by cutting some white cardstock with a stitched rectangle. With washi tape, I secured a Tim Holtz (Blossom) stencil over the panel. I used a watermark ink cube and really pressed hard to make sure the ink gets in the stencil open areas.
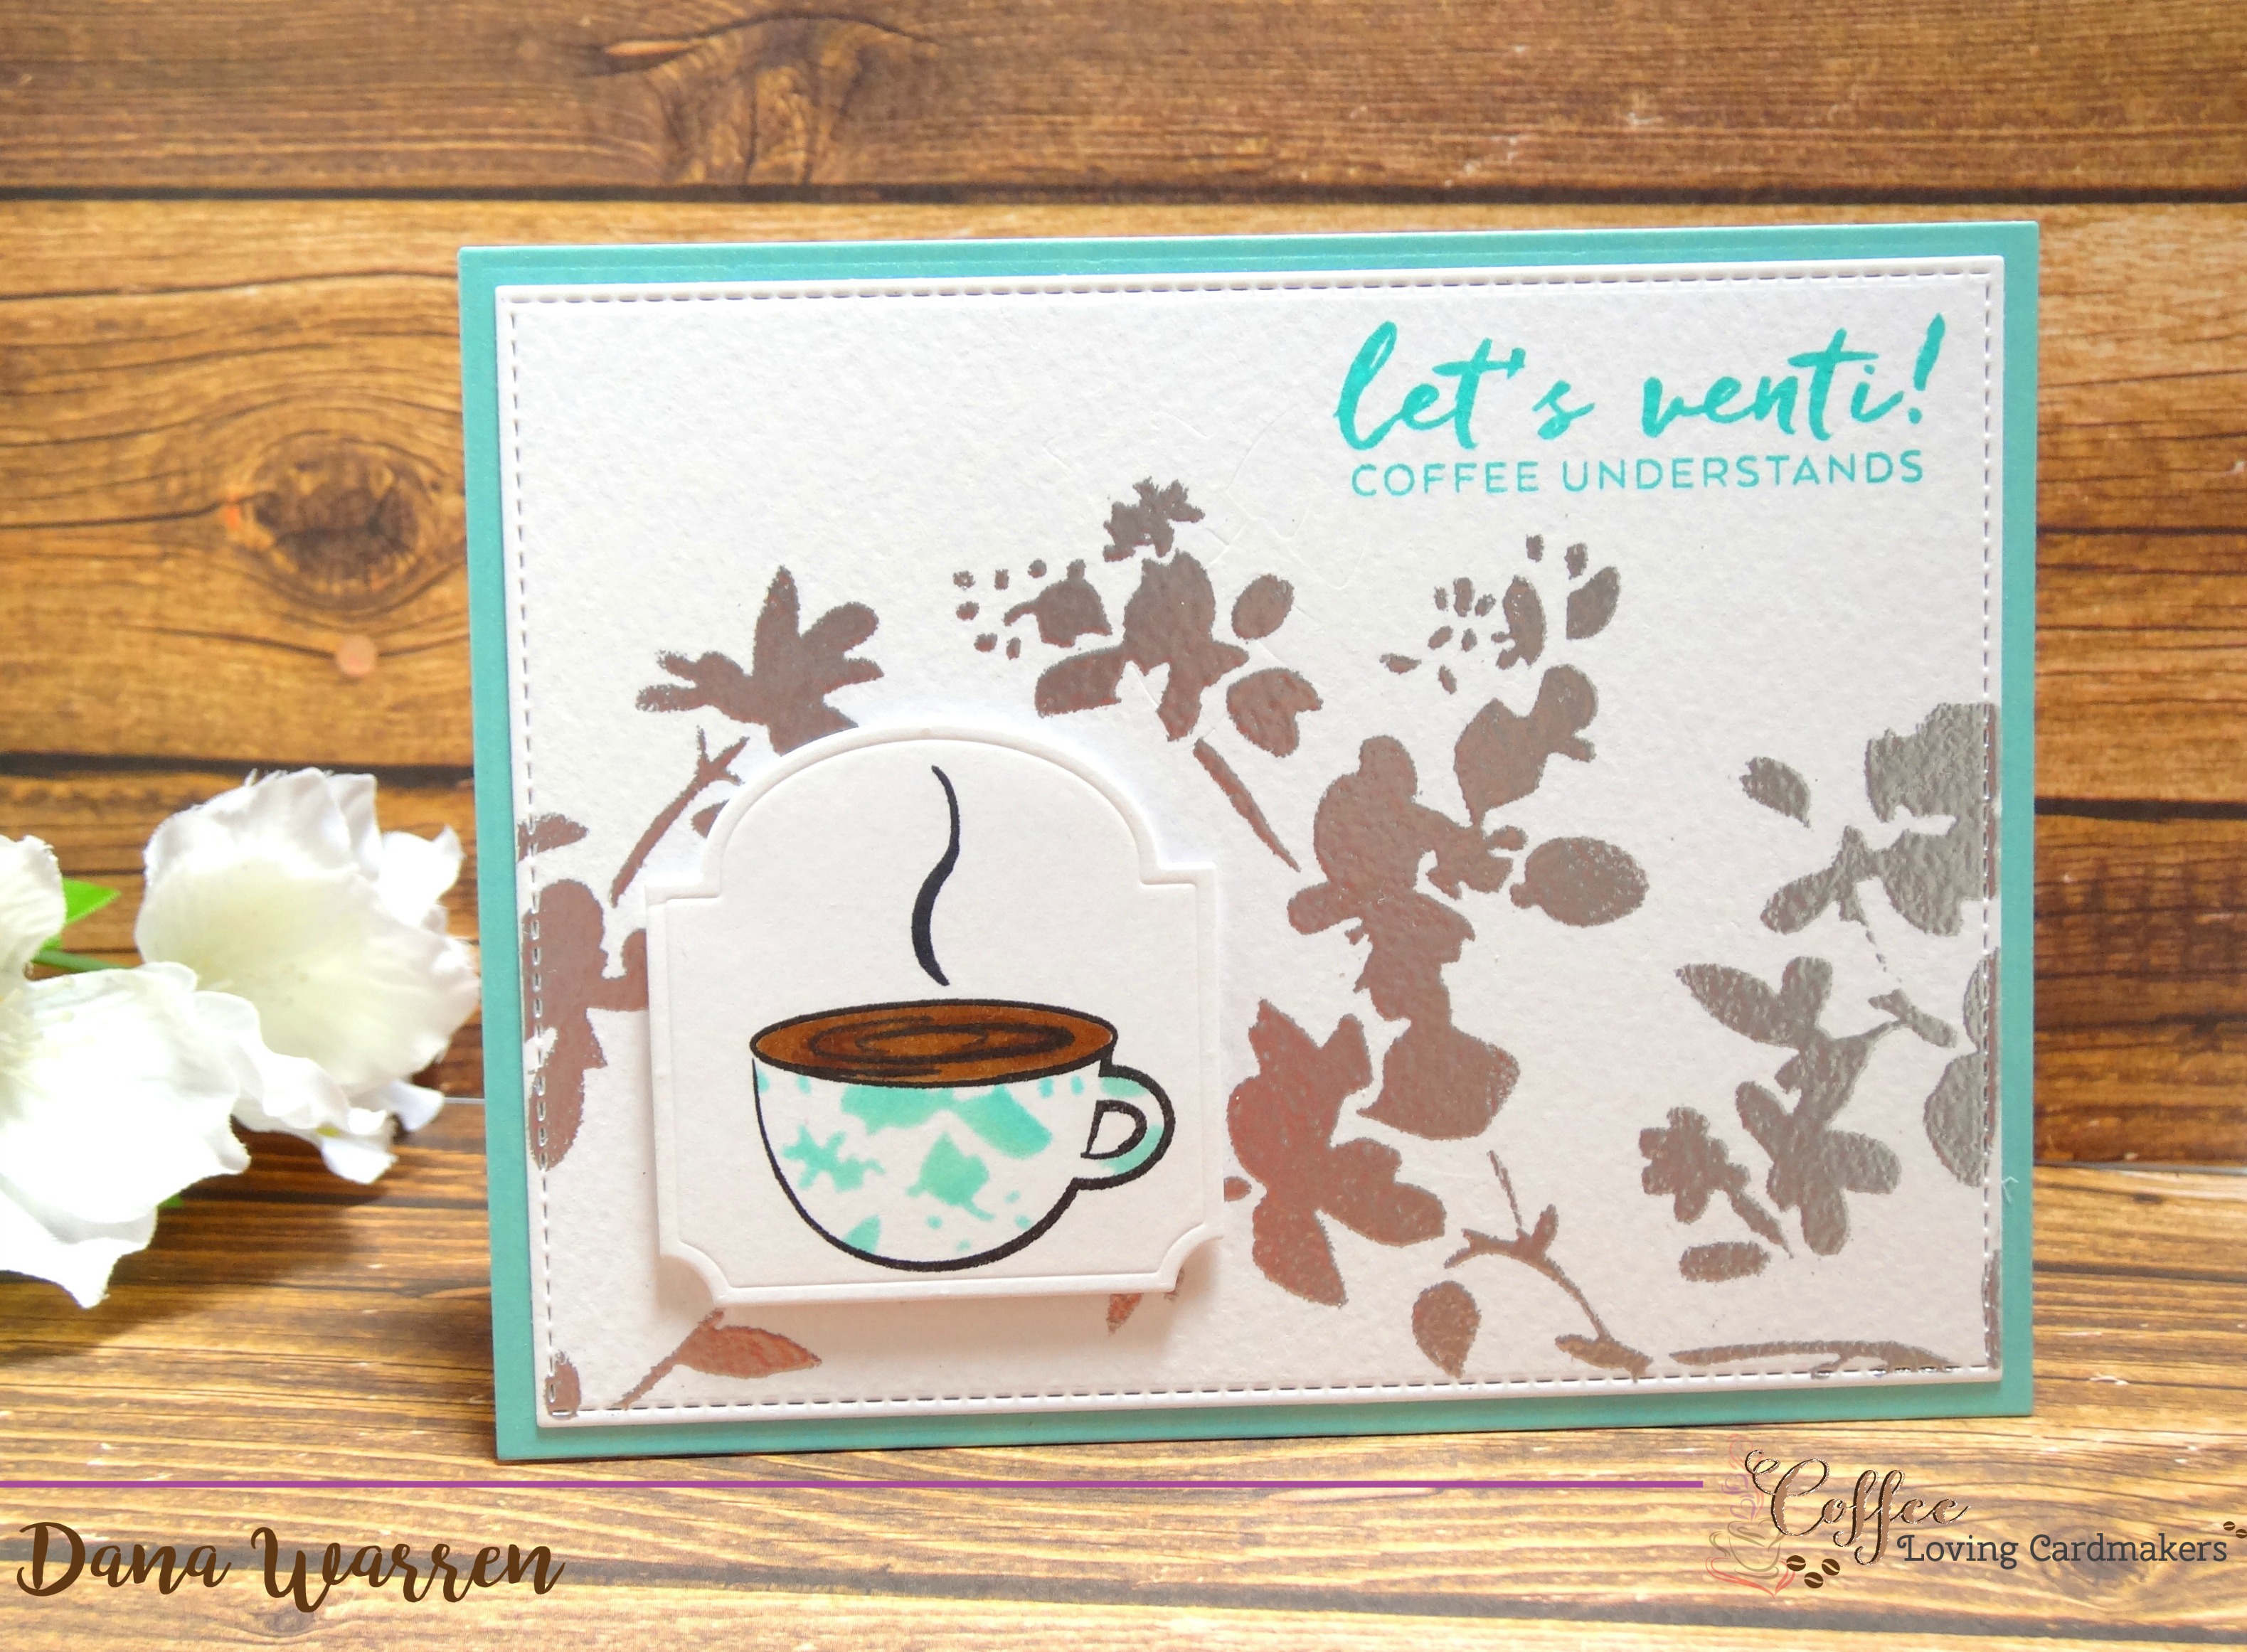
I used Gina K. Designs embossing powder for the first time and I have to say I’m impressed!! Usually, I have to do some touch ups with a watermark marker and emboss again, but the Gina K. embossing powder covered so well that I didn’t need to!!
Next, die cut a label shape with Simon Says Stamp Apothecary Labels. Then pulled out Essentials by Ellen Oh, Frappe stamp set and stamped it on the label. I also stamped it on some SSS masking paper and then fussy cut the inside part of the image.
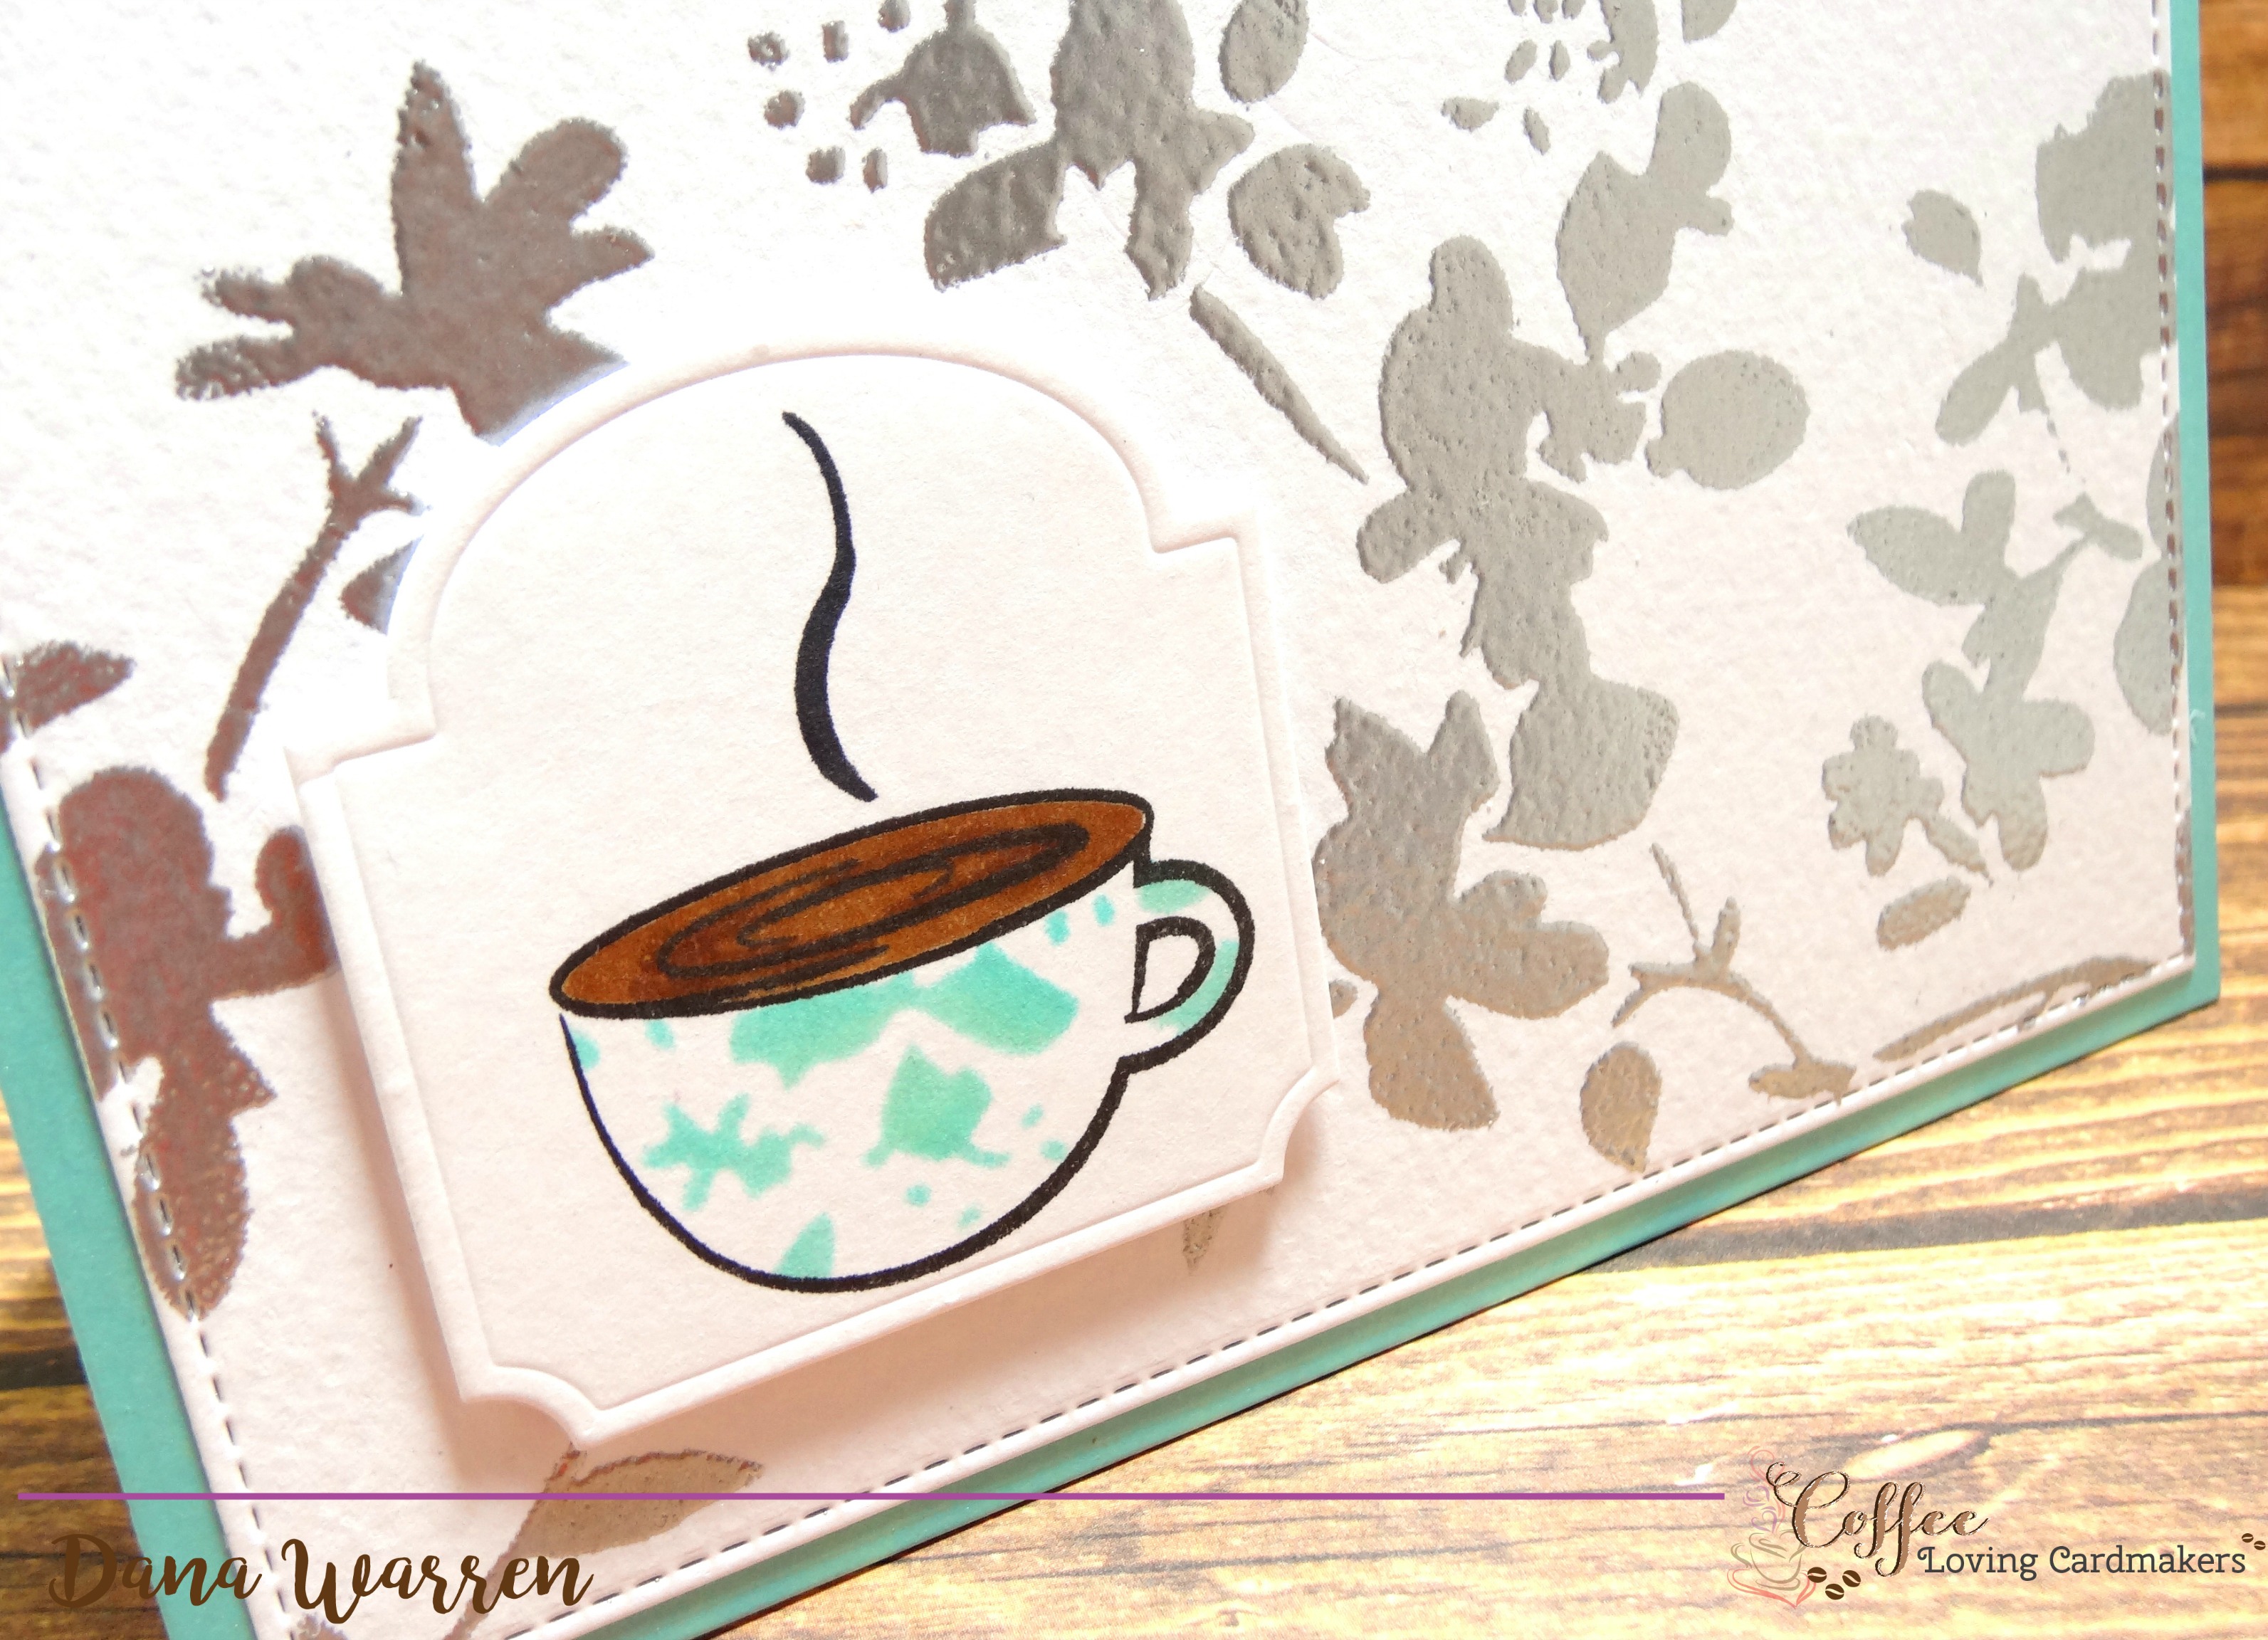
I placed the mask over the stamped cup and then used the same stencil and Papertrey Ink’s Hawaiian Shores and Aqua Mist ink to ink up some flower. Peel off the mask and now my cup has some blue … splats!! Thought it would look a little more like flowers of the stencil, but the coffee cup is too small! But I liked it anyway!!
From the stamp set, I stamped one little steam above the coffee, then used my Spectrum Noir Markers to color in the liquid area of the cup. I added the label to my embossed panel with foam tape.

I stamped the Let’s Venti! Coffee Understands in Hawaiian Shores ink, using my Misti to stamp it a couple times to get it nice and dark. I added the embossed panel to some Coastal Pearl Shimmering Cardstock from Crafter’s Companion and then adhered that to a white card base.
Thanks for stopping by!! I hope this inspires you to break out your embossing powders and maybe a stencil or two!!
Dana
Supplies:
Stamps: Essentials by Ellen – Oh, Frappe
Embossing Powder: Gina K. Designs – Fine Detail Silver
Spectrum Noir Markers: EB5, EB6
Ink: Papertrey Ink – Hawaiian Shores, Aqua Mist
Die: Simon Says Stamp – Apothecary Labels
Shimmery Cardstock: Crafter’s Companion – Coastal Pearl


Leave a reply to Terri Burson Cancel reply