![]()
Good morning, coffee loving crafty friends! It is Thursday again and it is time to take a little break with me 🙂
Today I am sharing a quick and simple way how to create a chalkboard look on your card with White Pigment Ink and White Embossing Powder.

Today I also use Latte Love Stamp Set from Papertrey Ink, Fancy Frame Dies from Craftin In The Dessert and Embossing Folder On the Go Die by Tim Holtz.
First, I cut the Black Cardstock in 4.25″ x 5.5″. I put it in my MISTI and added some embossing buddy powder before I stamped the image. Using MISTI, I stamped the stacked cups image with VersaMark watermark ink and added Ranger Super Fine White Embossing Powder, then I heated it up with my Craft Heater.
I die-cut the black cardstock with one of the stitched rectangle die with my Evolution Advanced diecutting machine. And then I stamped and heat embossed the word “Coffee.” I colored the cups using Prismacolors pencils. These pencils are AMAZING on black!
The next step is adding the faux chalk on the cardstock. I picked up white pigment ink with make sponge (you also can use any craft sponge). Then with circular motion I added the ink on the black cardstock. Add as you desire how much white you like on the card.
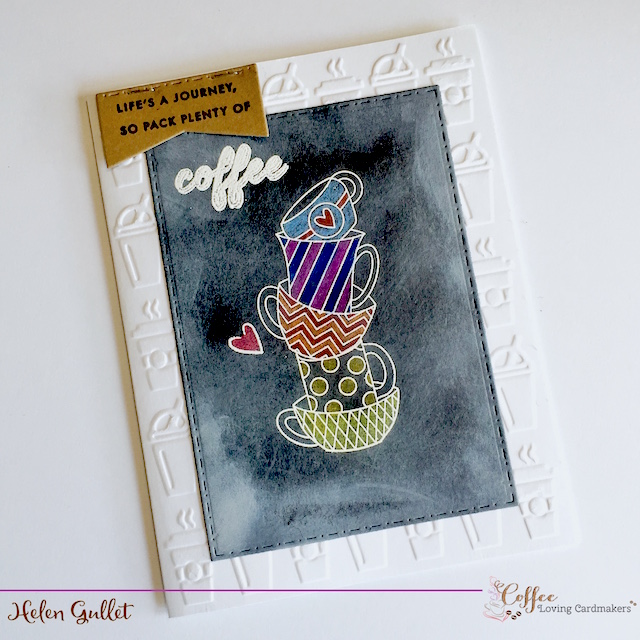
I put the panel aside while I embossed the card base with the coffee embossing folder. Then I added the panel on the card with Tombow adhesive. I stamped one more sentiment on the kraft stitched banner die-cut and added it on the top corner with mini stapler.
My card is done. I hope you are inspired today and have a fabulous Thursday!


Leave a Reply – please note that comments are moderated