We’re on Week Two with Terri Burson as our Guest Designer! Take it away Terri!
Hello lovelies. I’m happy to be back on the blog today, with a little departure from my usual stuff. I’ve been wanting to do a canvas for quite some time. I’ll admit, intimidation kept me from it. I went so far as to purchase a 4 pack of 6″x 6″ canvases from Hobby Lobby. Last year. So, yes, they’ve been quietly sitting in my craft domain for a bit.
Last week, I spotted an artsy technique that I wanted to try, from a craft magazine site; paint on canvas, add some glue then add kosher salt and you get this amazing psychedelic design. Well, seeing as how I’m not one to follow the typical rules, I used Rock Salt, because, I didn’t have kosher salt. But, I do have an ice cream maker, so….. I ended up with a fun design but I’m sure, had I followed the rules, it would have totally rocked!
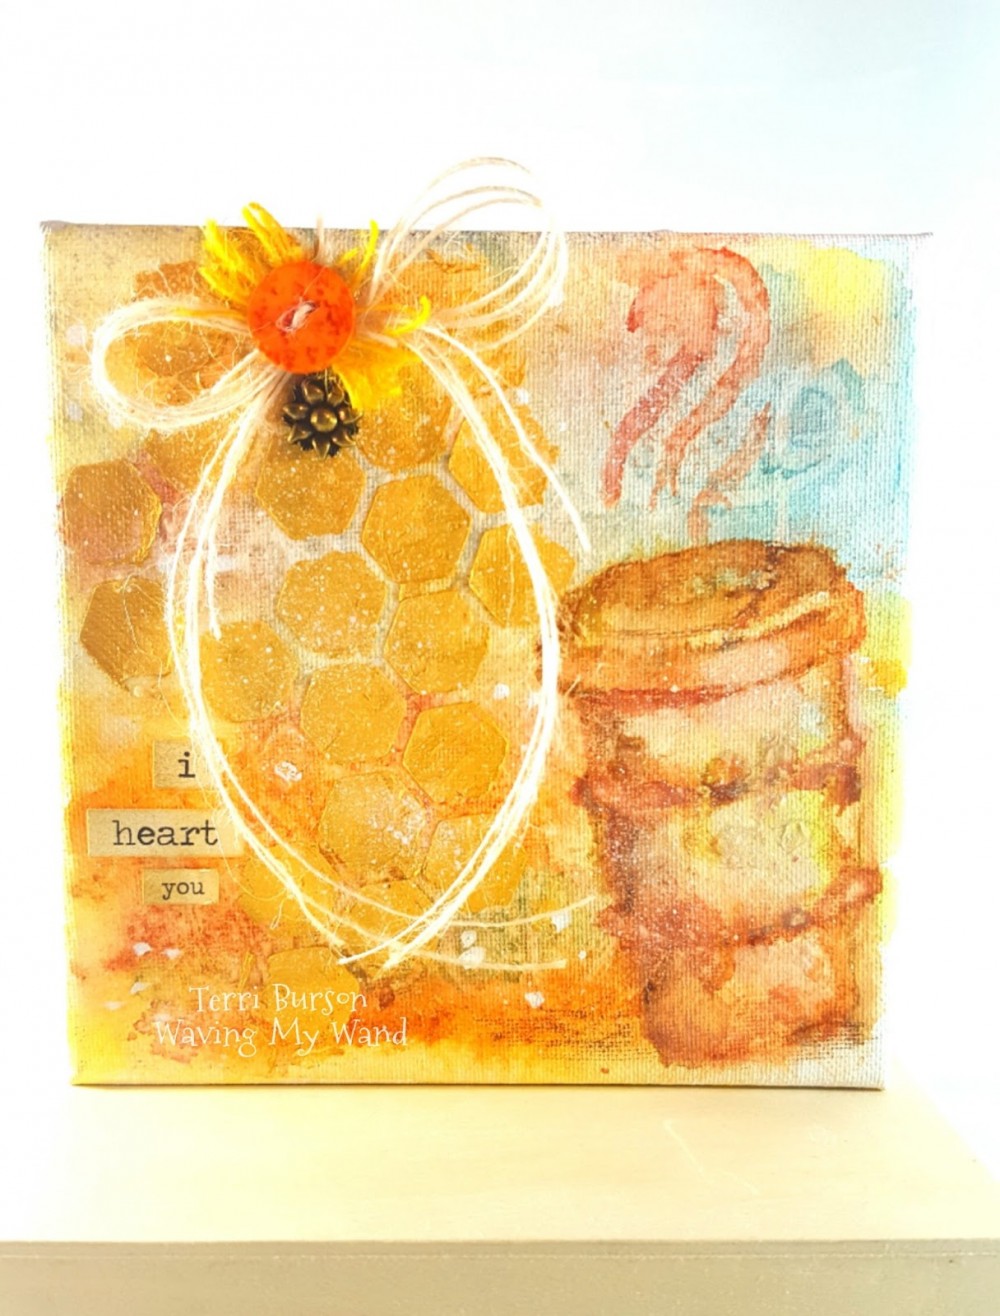
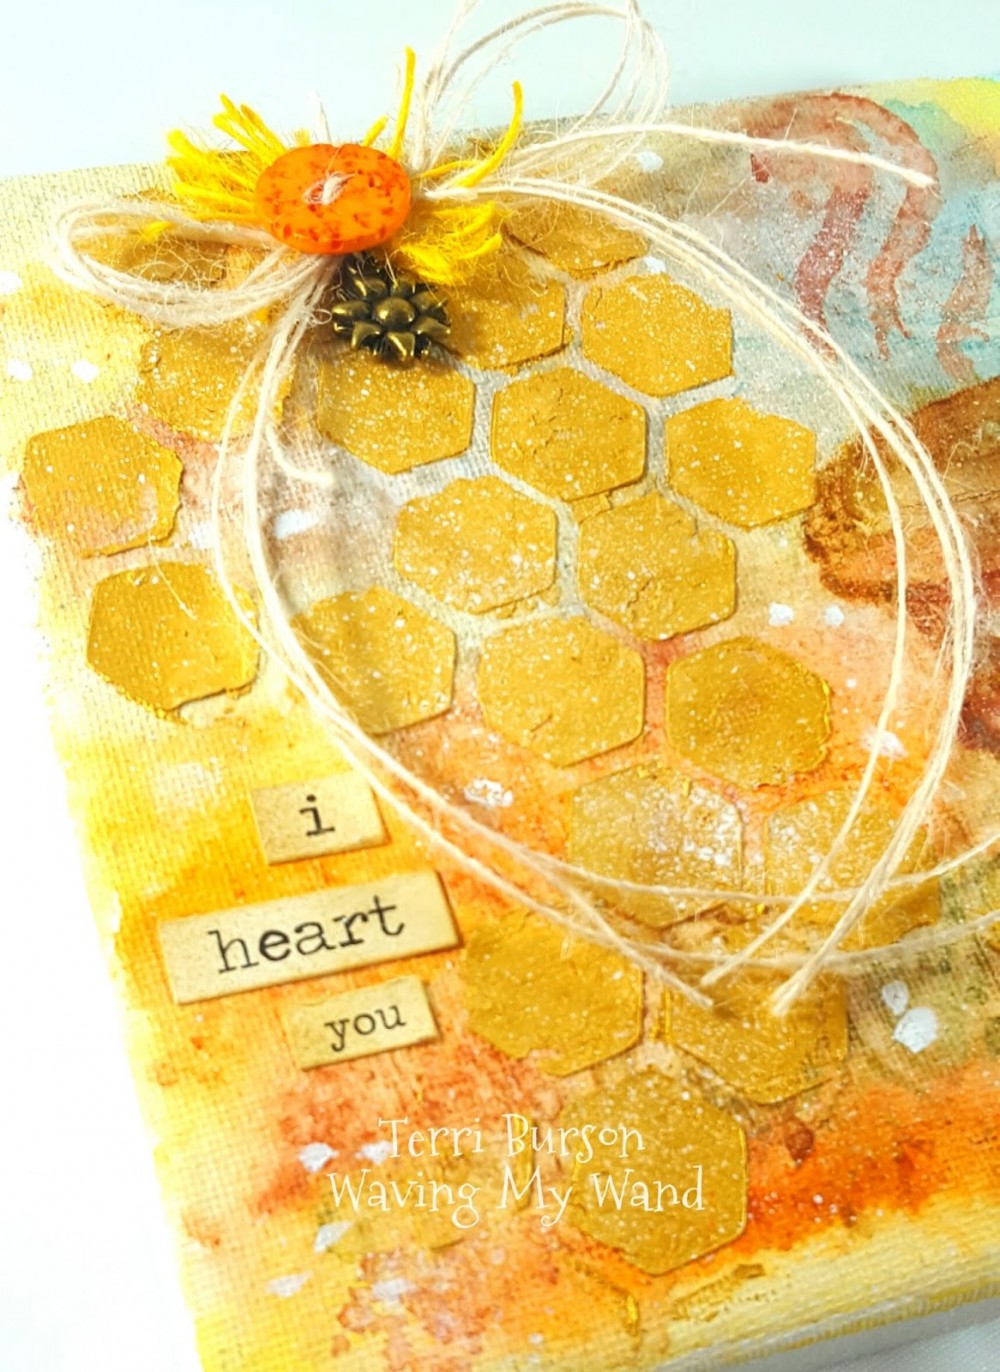
To begin, I chose earthy tones that went with the image in my head. Of course, I wanted a coffee image to be the star of the show, but first, I used several colors on the canvas, varying the depth of shade, and speeding up the drying time with my heat emboss tool. No fancy paints, just some basic watercolor paints that I picked up at Hobby Lobby, because I wanted the large palette that was included. Once I achieved my desired coverage and colors, I stenciled in some Inka Gold. If you’ve never tried it, it’s amazing! It’s very thick and gives great dimension to your projects. My stencil and coffee cup stamp are both from Stamplorations, lovely sponsors of the CLCM blog hops. In fact, one of my most pinned images on Pinterest is a shaker card that I made using this same coffee cup stamp for the Summer CLCM blog hop in 2015.
(Go here, if you want to see it)
Here’s another view of the stenciling. Isn’t it awesome? I love it so much. The wording that you see is from Tim Holtz’s Chat stickers. I glued those on so they would stay put. I also sponged distress ink onto the wording, to blend in with my paint.
Next, I took some paint and a brush, and painted my Stamplorations Coffee Cup stamp. Once I stamped my image, it left a nice wet, fuzzy outline. Then I stamped on top of that, one more time, with my Tim Holtz Brushed Corduroy distress ink, just to give it a little bit more definition. Then, I “went to town”. If you’re not familiar with that American expression, it means, I got super creative. I started mixing various shades of the orange/brown paints, adding in a little white, painting this amazing cup. When I drizzled glue earlier, it left some bubbles which really gave this cup some character, I think.
Look closely and you’ll also see white paint splatters everywhere. This can be achieved easily by dipping a wet toothbrush into some slightly diluted white paint ( I used Decoart Multi-surface Satin in Cotton Ball) then “spray” your paint by rubbing your thumb across the wet, paint saturated toothbrush. Make sure you’ve got a big box to do this in, so you don’t spray your entire craft area.
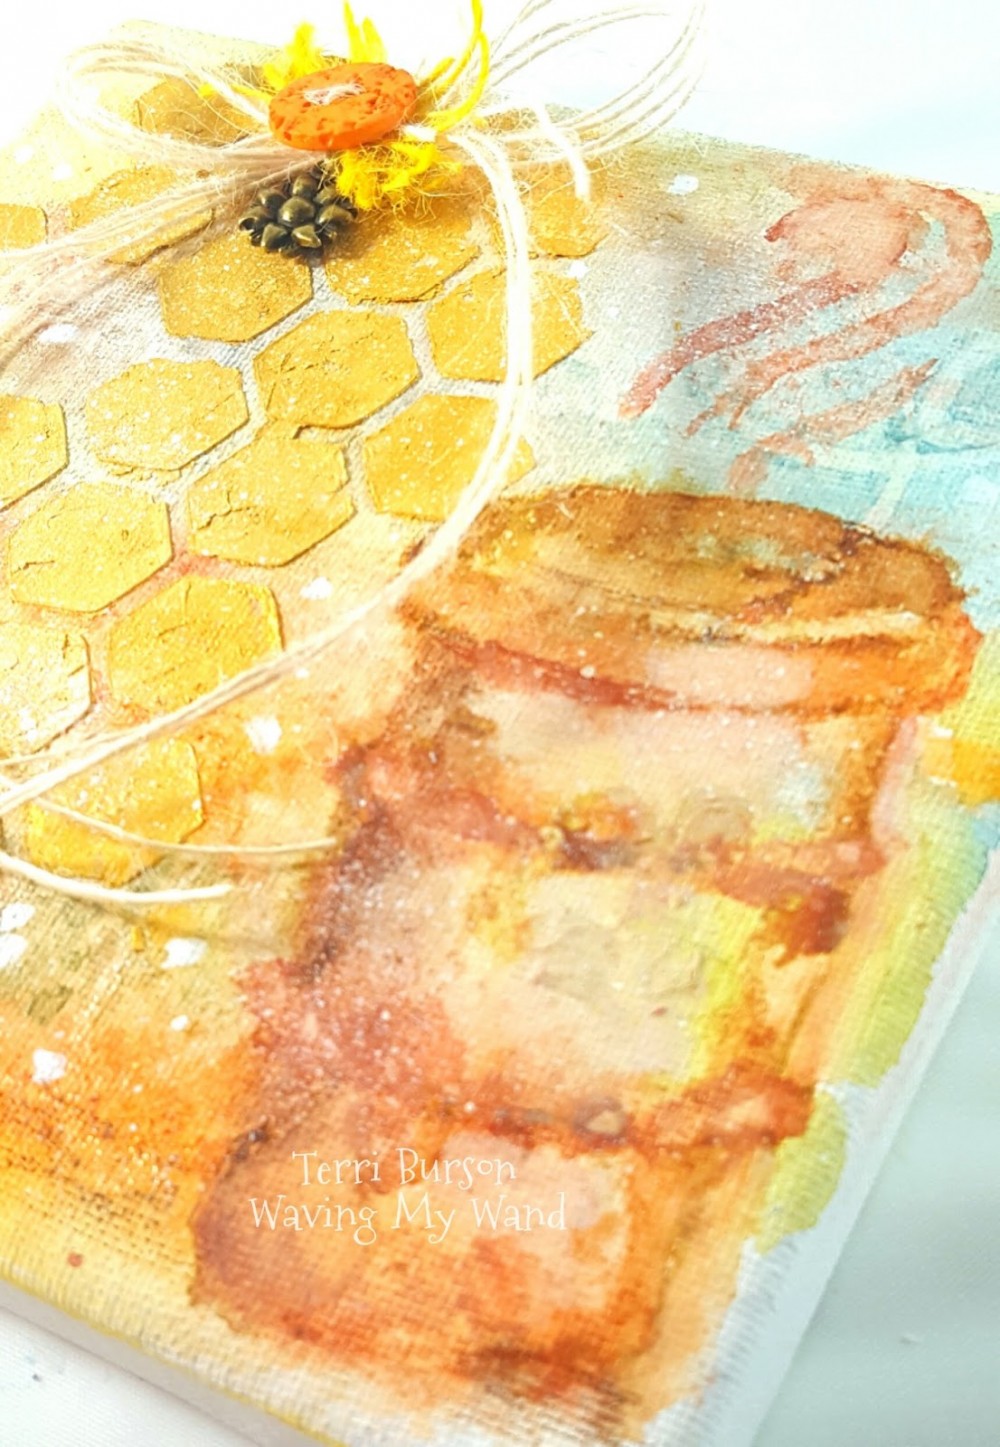
Finally, the steam coming out of the coffee cup is from another Stamplorations stencil. I also hot glued some burlap string, as well as embellishments from 28 Lilac Lane. Thank you for indulging me today. I wasn’t sure if it would be permissible to share a canvas project ( I mean, it IS a card making blog…) but Amy was her usual, sweet and enthusiastic self. Thanks Amy!
Oh My Word….don’t you absolutely LOVE Terri’s canvas project?! She has thoroughly inspired me!
Inspiration can be found on Terri’s blog and you can keep connected via Facebook, Twitter,Instagram & Pinterest.


Leave a reply to Bad Kitty Cancel reply