
Hello, Coffee Lovers!! Dana here with another Brew & Craft Your Stash!! Today we are taking a look at Vellum! If this is the first time you are seeing my feature or need a refresher, click here for my very first post, it gives a little background explanation of my feature!
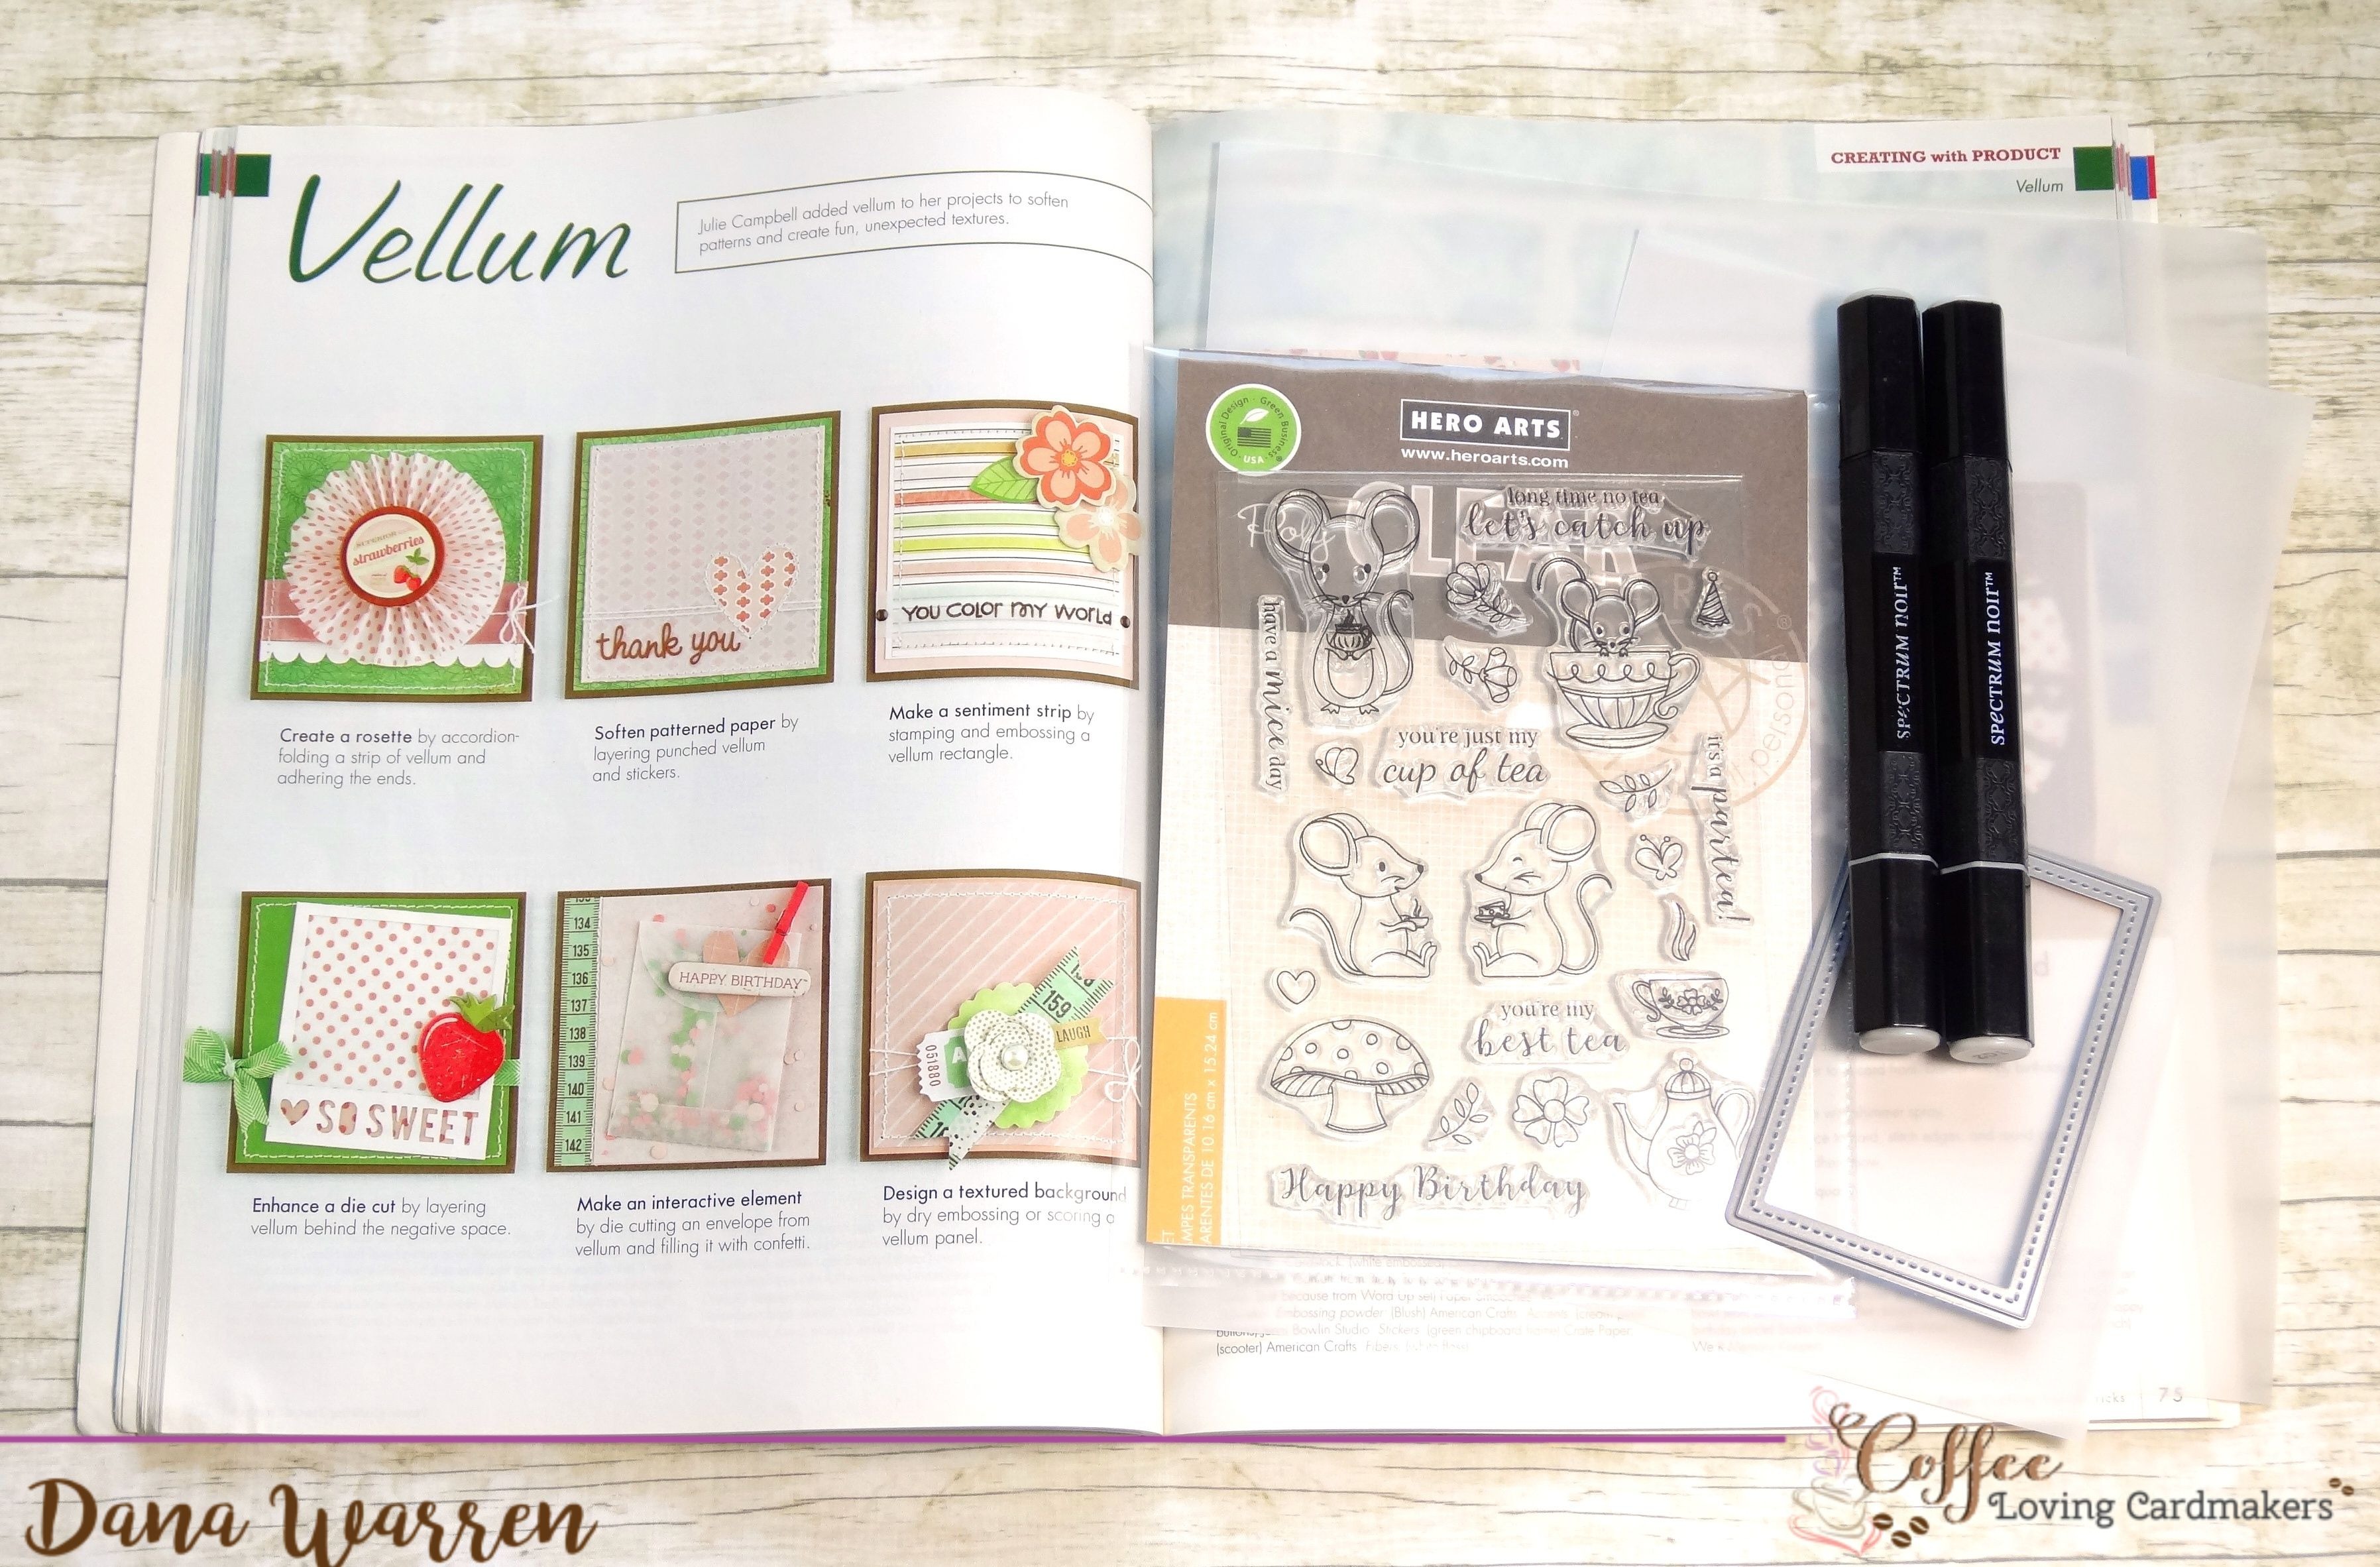
Vellum is the next product in Papercrafts Tips & Tricks 2012 magazine. Julie Campbell has some fabulous ideas for using vellum!
- Score some vellum to create a rosette
- Layer over pattern paper to soften the color and pattern
- Make a sentiment strip by stamping and then heat embossing
- Layer pattern vellum behind the negative space in a die cut
- Make an envelope from vellum and add confetti or sequins
- Dry emboss or score a pattern for a unique background
So watercolor is big right now, well has anyone tried watercoloring on vellum?? I’m sure someone has, but I haven’t and I wanted to see if I could do some watercolor smooshing on vellum. And it actually turned out pretty nice!

I started with a panel of vellum and some water reactive ink! This ink is NEW Spectrum Noir has a new range of inkpads, available on HSN July 11th!! You can check out some information on all the different inks on their site! I pressed the ink onto a flat palette and spritzed it with water. Then smooshed the vellum in the ink. I used a heat gun to dry the ink, then did some more smooshing! The heat made the vellum curl and go wavy. After I smooshed purple, orange and pink ink and it was all dry, I placed it in a textbook to try to flatten it. But I needed to get this card done, so I couldn’t wait long enough for it to really flatten.
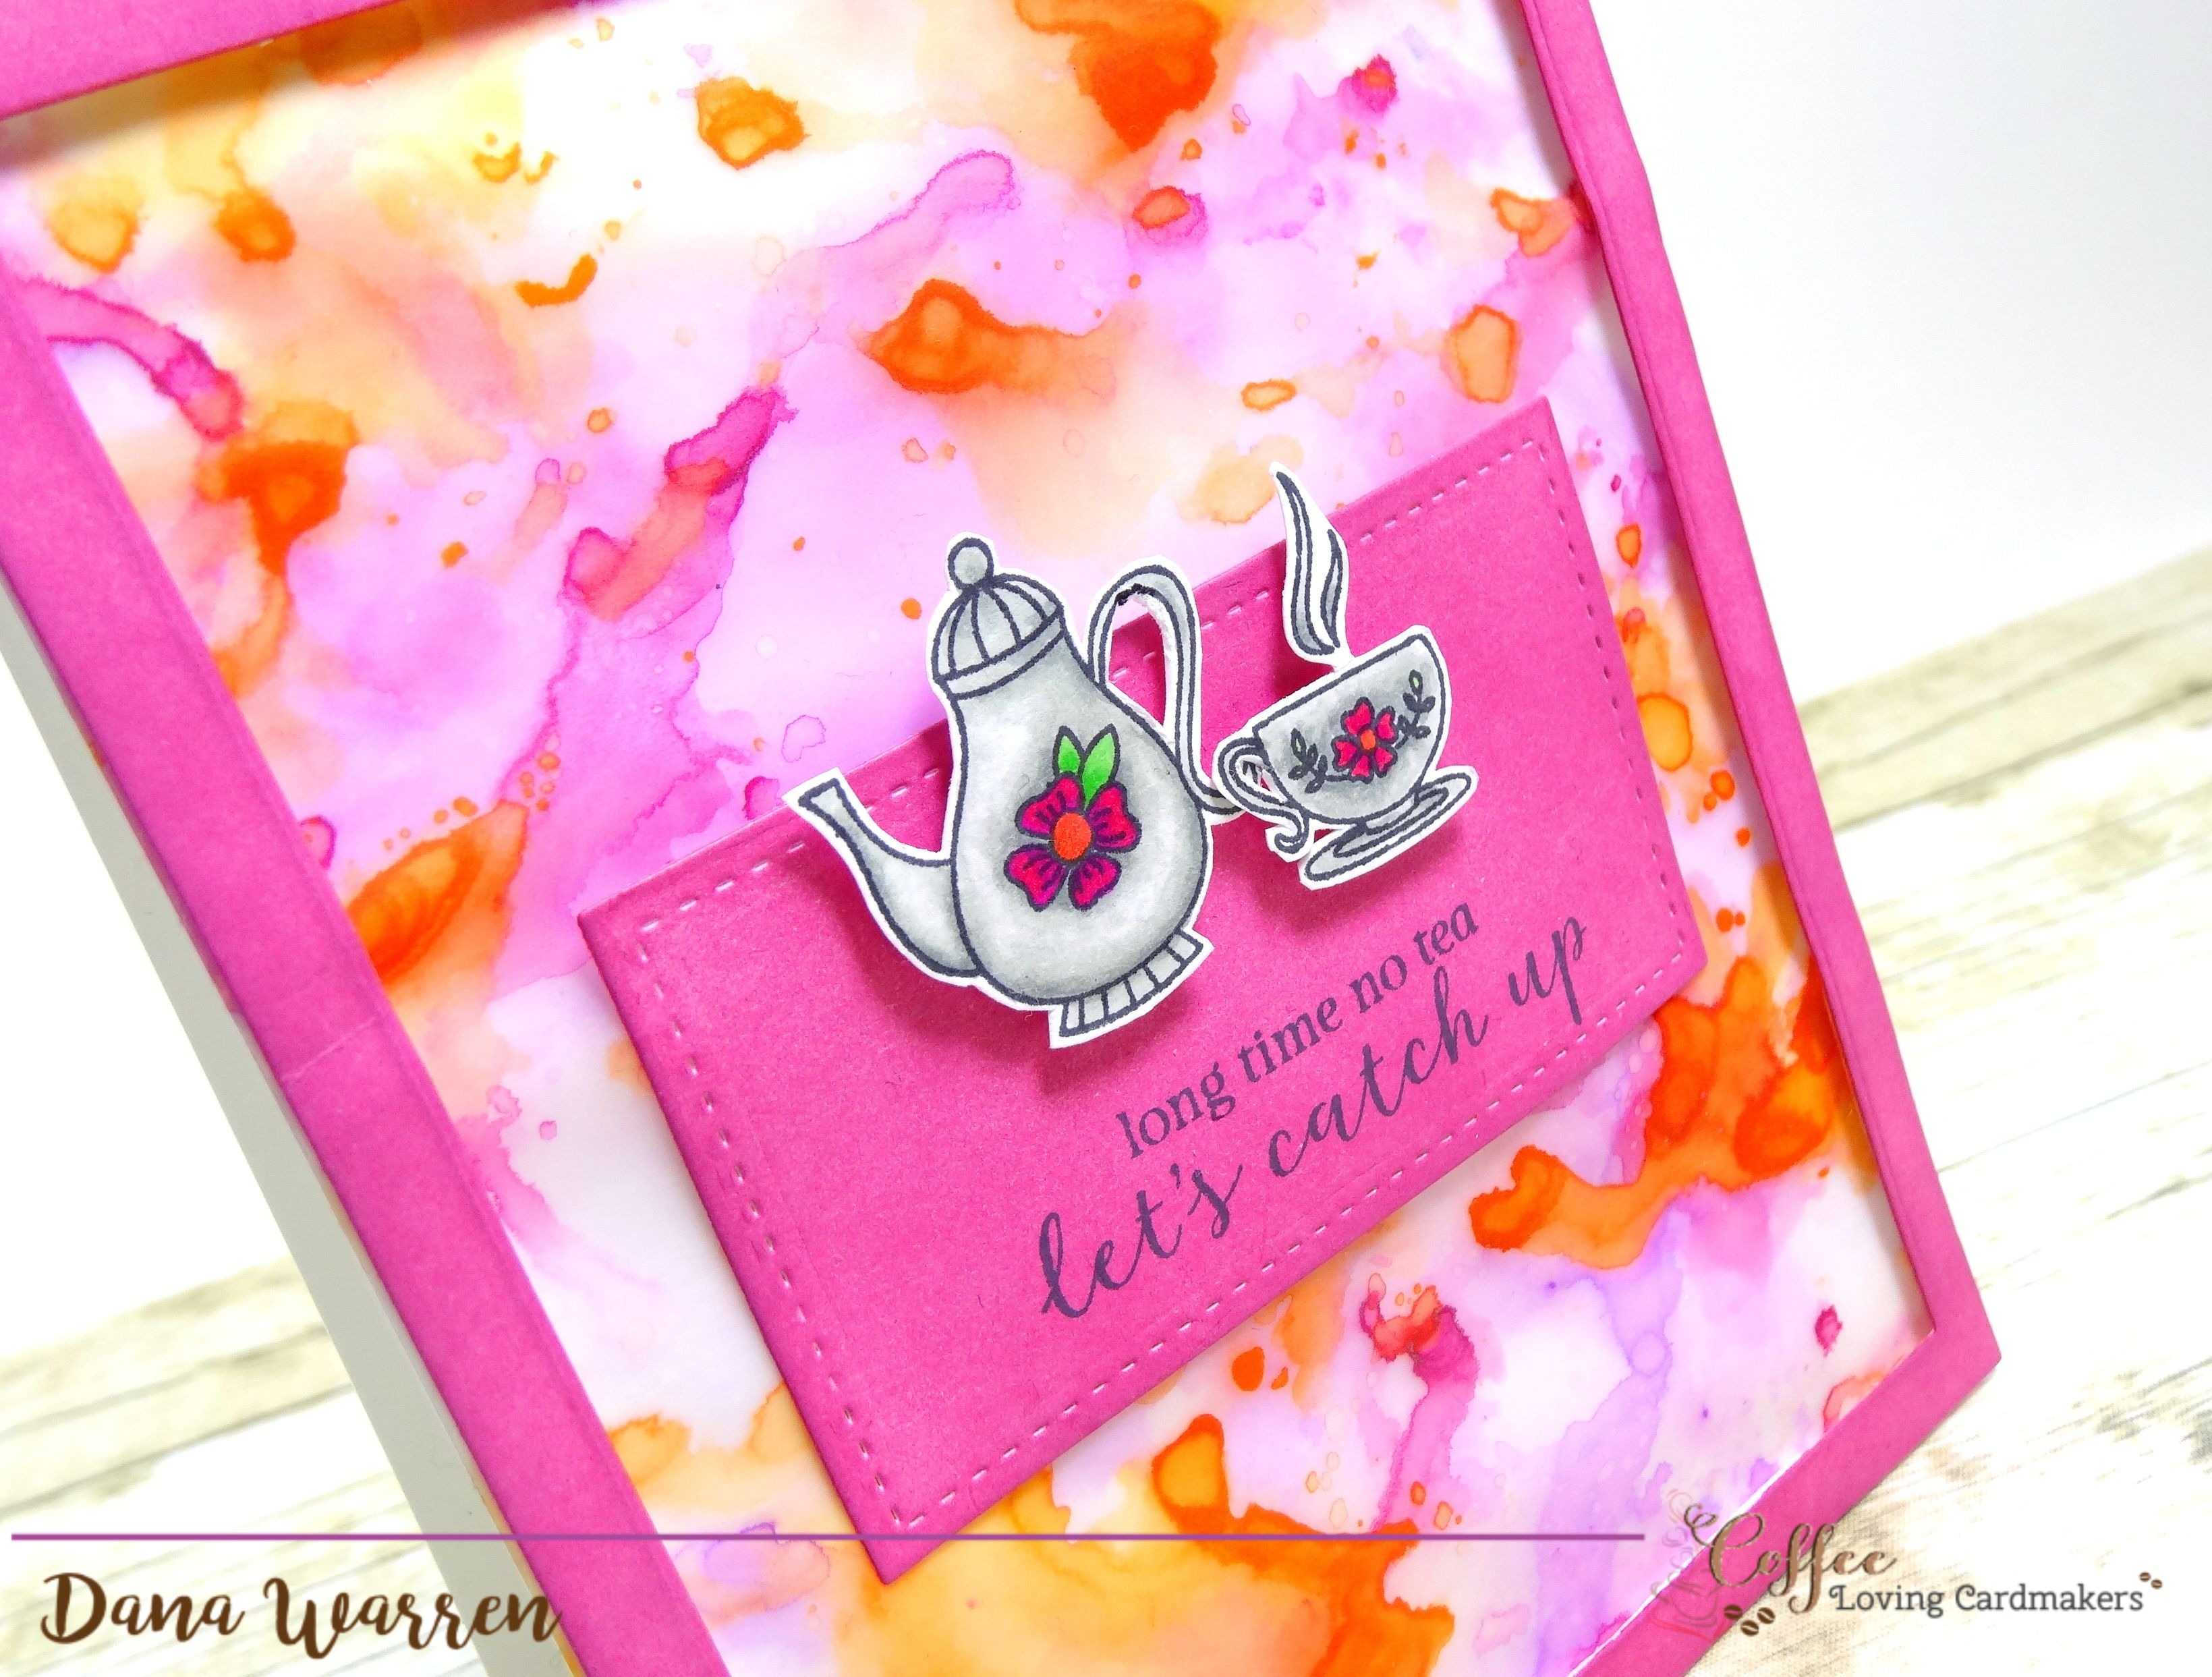
The thing about vellum is it’s really hard to adhere and not see the adhesive. For my card I used double sided tape around the edge and then die cut a rectangle frame to cover it. I’m definitely going to try this again, but I’m going to see if an adhesive sheet will help the vellum stay flat!
Next, I used Hero Art Mouse Tea Party set to stamp the small teapot and cup. Then I used my Spectrum Noir Markers to color them. I fussy cut them out with sharp scissors.
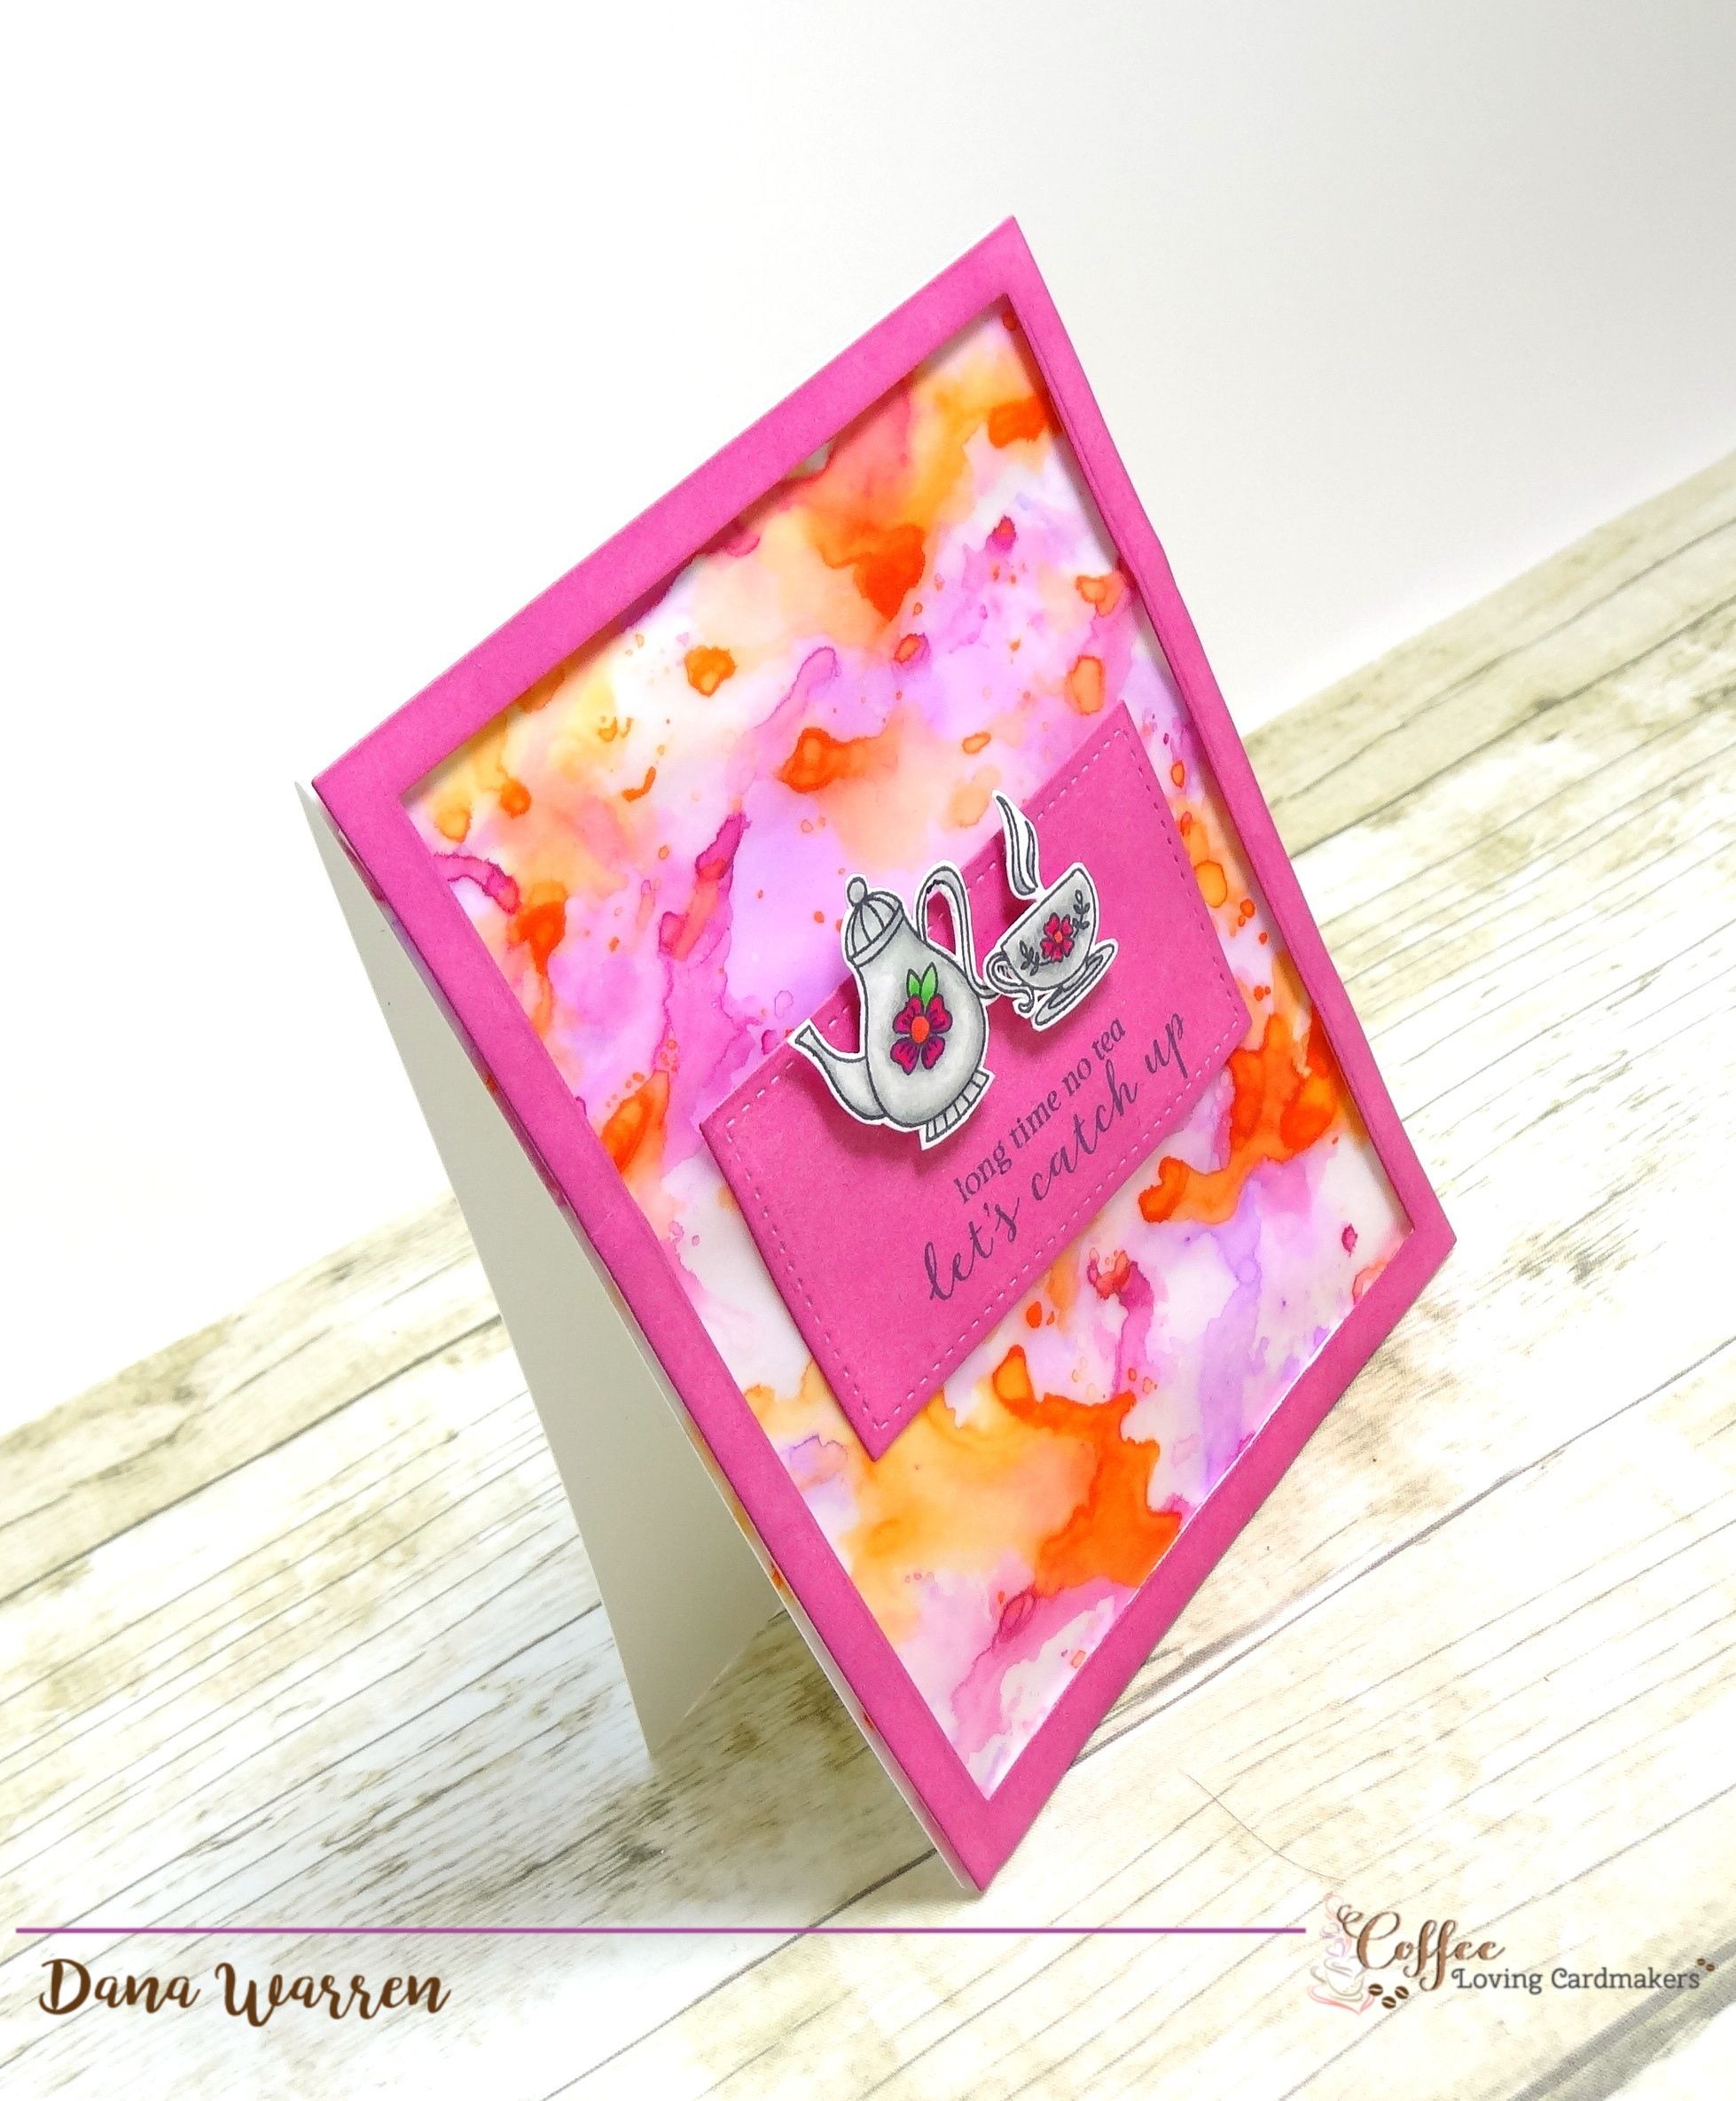
I cut a stitched rectangle from white cardstock and then used the pink ink to color it and the frame that went over the vellum. I stamped the Long Time No Tea Let’s Catch Up sentiment on the rectangle. Then I added it to the card base and finally the images with foam tape.
Thanks for stopping by! I hope this gives you some ideas for using vellum!!
Dana
Supplies
Stamps: Hero Arts- Mouse Tea Party
Spectrum Noir Markers
Rectangle Dies: Lawn Fawn


Leave a Reply – please note that comments are moderated